DC Brick


Note
The DC Brick is discontinued and is no longer sold. The DC Bricklet 2.0 or the Performance DC Bricklet can be used as a replacement.
Features
Controls one brushed DC motor with max. 28V and 5A (peak) over USB
API for many programming languages available
Direction, velocity and acceleration controllable
Extendable via two Bricklets ports
Configurable overtemperature and overcurrent callbacks
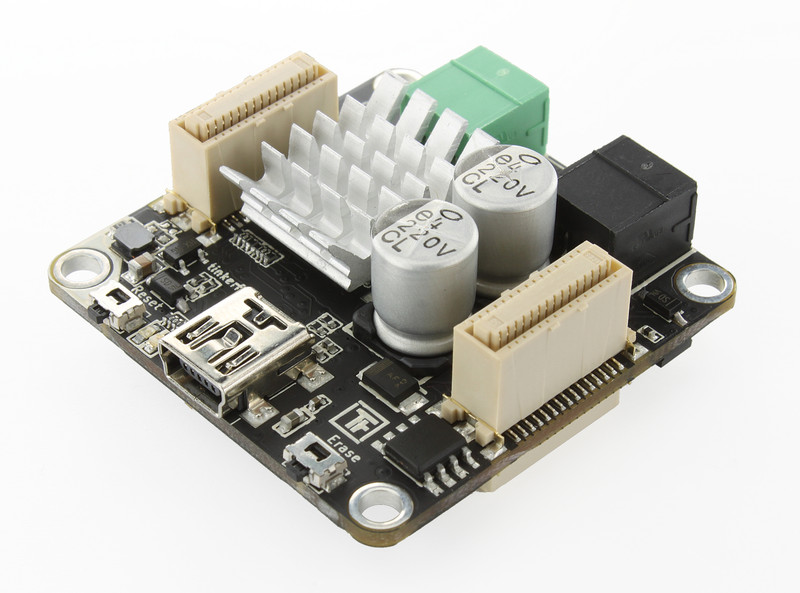
Description
With the DC Brick you are able to control one DC brushed motor (max. 28V and 5A (peak)) over USB. With the provided API for many programming languages you can control the direction, velocity and acceleration of the connected motor.
Two Bricklet ports can be used to extend the features of this Brick. It can also be used together with other Bricks in a stack. For example an additional Master Brick with Master Extension allows to replace the USB connection by other cable based (RS485, Ethernet) or wireless (WIFI) connections.
Besides methods to control the connected motor the API provide the possibility to measure current consumption or the voltage of the power supply. In case of overtemperature and overcurrent callbacks can be triggered. These can be used to react properly in your own program to these events. For battery driven applications an undervoltage callback is user configurable to prevent damaging batteries caused by depth discharge. Additionally, the drive mode can be switched between Drive/Brake and Drive/Coast (see Drive Modes).
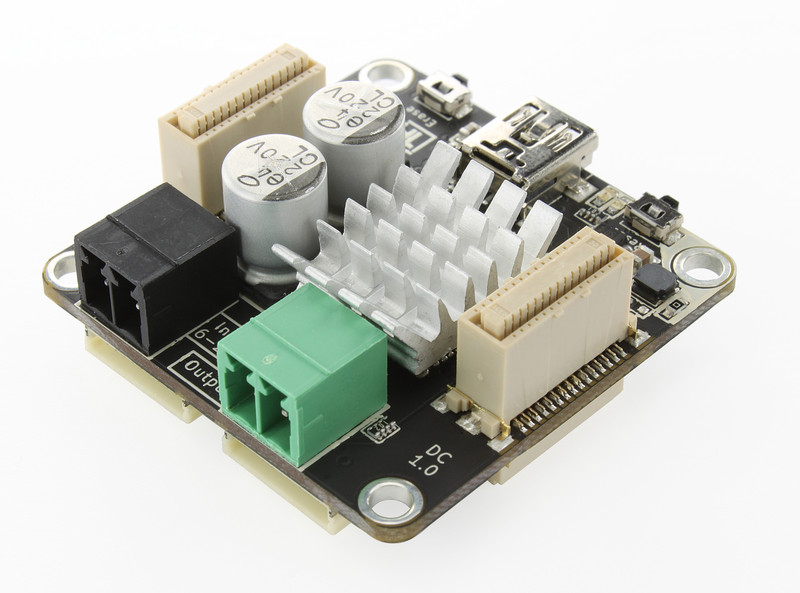
With the power supply connector jack (black) motors can be powered directly. If a stack is used, the connected motors can also be powered through the stack. The Brick switches automatically to the external power supply if connected.
Technical Specifications
Property |
Value |
|---|---|
Maximum Motor Current |
Peak: 5A
Continous: > 3A (depends on cooling)
|
Minimum/Maximum Input Voltage |
6V/28V |
PWM Frequency |
Configurable, 1-20kHz, default 15kHz |
Velocity |
-32767 to 32767, full reverse to full forward, 0=stop |
Acceleration |
0 to 65535, velocity/s, increment for velocity/s |
Bricklet Ports |
2 |
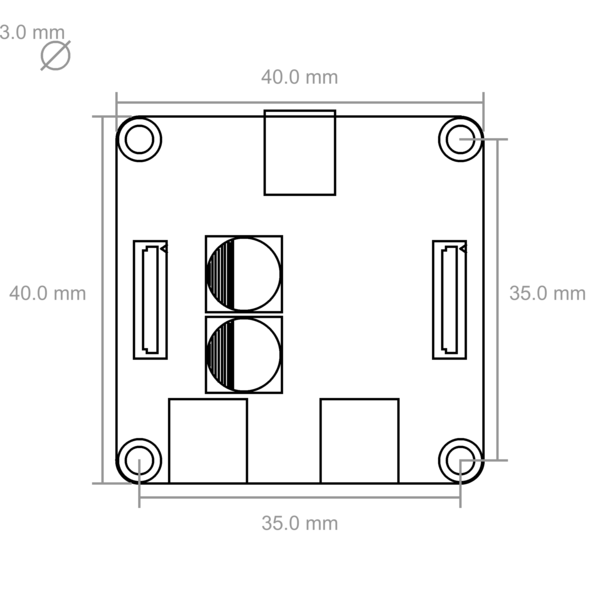
Dimensions (W x D x H) |
40 x 40 x 17mm (1.57 x 1.57 x 0.67") |
Weight |
18g |
Current Consumption |
53mA |
Resources
Connectivity
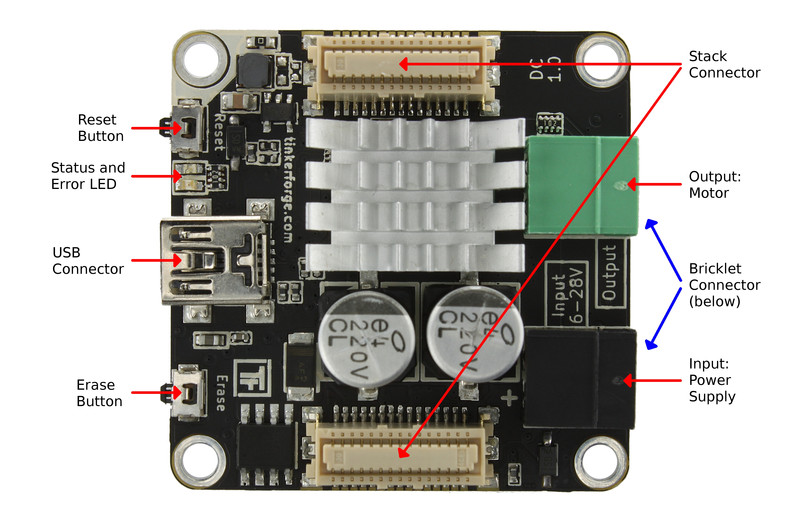
The following picture depicts the different connection possibilities of the DC Brick.
Test your DC Brick
To test a DC Brick you need to have Brick Daemon and Brick Viewer installed. Brick Daemon acts as a proxy between the USB interface of the Bricks and the API bindings. Brick Viewer connects to Brick Daemon. It helps to figure out basic information about the connected Bricks and Bricklets and allows to test them.
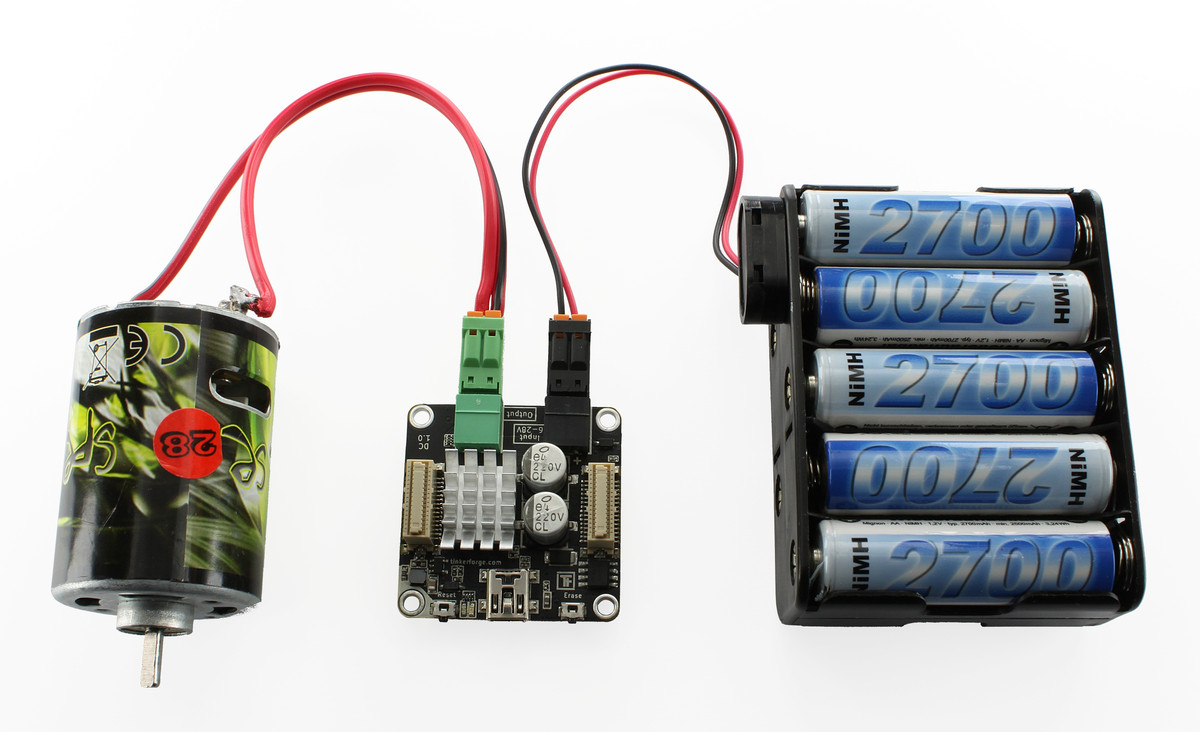
Connect a DC brushed motor to the Brick and a suitable power supply. Your setup should look as shown below.
Now connect the Brick to the PC over USB, you should see a new tab named "DC Brick" in the Brick Viewer after a moment. Select this tab.
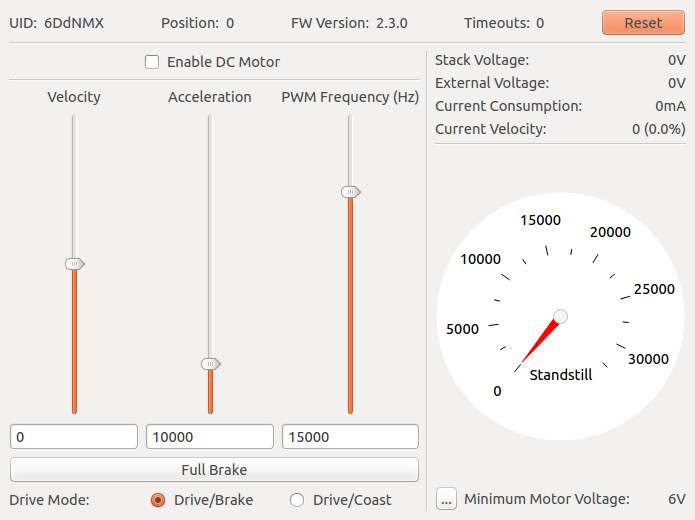
Before you can test your Brick you need to enable the driver chip by ticking the "Enable" checkbox. You have three sliders to control the velocity (forward and backward), the acceleration and the PWM frequency which is used by the driver chip to control the connected motor.
On the right you see the voltages of the two power sources and the current consumption. Below you find a graphical representation of the velocity of the motor. At the bottom you can configure the minimum motor voltage, which allows for undervoltage callbacks if the voltage is too low.
Below the sliders you can test the "Full Brake" and change the driving modes (see here for more information).
After this test you can go on with writing your own application. See the Programming Interface section for the API of the DC Brick and examples in different programming languages.
Power Supply
The connected motor can be powered through the black on-board power-connector or through a Power Supply in a stack. The Brick switches automatically to the on-board power-connector when a voltage above 1V is measured there.
Warning
Keep in mind that the Brick switches automatically. So e.g. if you have a stack and remove your external battery connected to the Brick it will use the stack power supply. If you then enable the motor it is driver with the voltage supplied by the stack which might be higher then your battery voltage
Drive Modes
There are two possible modes of motor controls:
Drive/Brake
In this mode the motor is always either driving or braking, there is no freewheeling possible. A more linear correlation between PWM and velocity is an advantage of this mode. Therefore it is possible to accelerate more precise. Typically motors can be driven with slower velocities in this mode. Disadvantageous is a higher current consumption and a resulting faster heat-up of the driver chip.
Drive/Coast
In this mode the motor is either driving or freewheeling. Advantageous is a lower current consumption and a resulting slower heat-up. The control of the velocity and acceleration is less precise, it can "lag behind".
Error LED
The red LED is enabled if the supply voltage is below the minimum voltage (configurable) or the driver chip is in emergency shutdown state.
An emergency shutdown is triggered if either the current consumption is too high (above 5A) or the temperature of the driver chip is too high (above 175°C). These two possibilities are essentially the same, since the temperature will reach this threshold immediately if the motor consumes too much current.
To get the Brick operational again you have to increase the voltage or in the latter case you have to let the driver chip cool down and enable it again.
Programming Interface
See Programming Interface for a detailed description.
Language |
API |
Examples |
Installation |
|---|---|---|---|
C/C++ |
|||
C# |
|||
Delphi/Lazarus |
|||
Go |
|||
Java |
|||
JavaScript |
|||
LabVIEW |
|||
Mathematica |
|||
MATLAB/Octave |
|||
MQTT |
|||
openHAB |
|||
Perl |
|||
PHP |
|||
Python |
|||
Ruby |
|||
Rust |
|||
Shell |
|||
Visual Basic .NET |
|||
TCP/IP |
|||
Modbus |