- Getting Started
- Hardware
- Software
- Kits
- Embedded Boards
- Specifications
Starter Kit: Blinkenlights


Note
The Starter Kit: Blinkenlights is discontinued and is no longer sold.
Features
- Giant 90x50cm 200 Pixel RGB Display with update rate up to 100Hz
- Develop Party Games, Exhibition Presentations and Customer Specific Displays of any kind
- Freely programmable, configurable and expandable
- Pixels: 12mm diameter, waterproof (IP65), full-color RGB with 1600mcd per pixel
Description
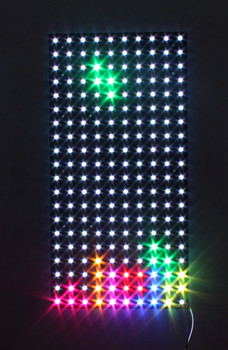
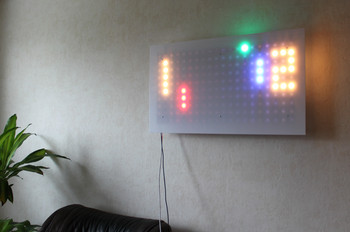
The Starter Kit: Blinkenlights is a huge, freely programmable display. It consist of 200 independently controllable full-color RGB LED pixels that can be changed up to 100 times per second. Possible applications are vast. The kit can be used to create party games, exhibition presentations, fancy mood lighting and custom displays of any kind.
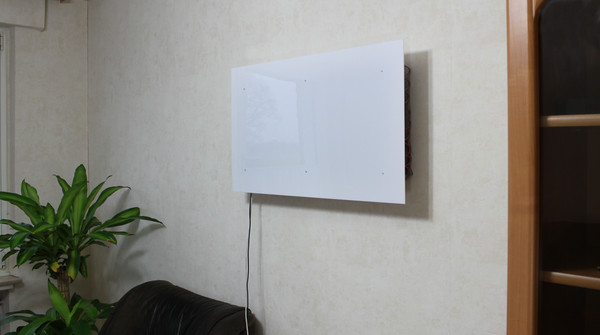
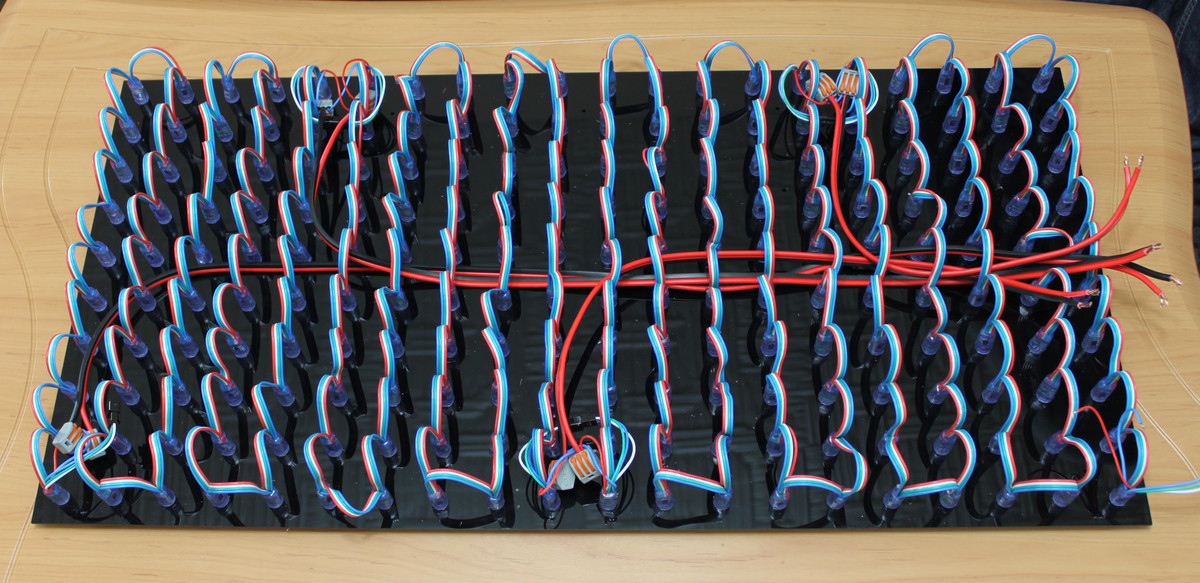
The basic kit comes with one Master Brick, one LED Strip Bricklet, four 50 LED Pixel sets, one LED power supply, four wall mounting plates, one perforated board, one front panel and all necessary cables and mounting materials. The basic kit can be controlled over USB by any (Embedded-) PC (e.g. Raspberry Pi), laptop, server or tablet.
The kit can be extended by other Tinkerforge products. In game applications the Giant Game Pad can be used for controls. The Piezo Speaker Bricklet can provide background music and the Segment Display 4x7 can show a score. It is possible to play pong with two Dual Button Bricklets.
With the Ethernet Extension the USB interface can be changed to Ethernet, to allow smart phone or tablet controlled applications. A larger display can be created by attaching more LED Pixels to the kit.
A demo application implements clones of Tetris and Pong and includes different non-game applications. For example, it can show customizable scrolling text in different colors on the display, it shows rainbows, customizable image sets with configurable durations and can warm your heart with a virtual fire. The games can be controlled by a PC keyboard but can be also be controlled by customizable touch pads when using the Multi Touch Bricklet (Giant Game Pad) or by Dual Button Bricklet.
The kit name "Blinkenlights" is used in hacker jargon to describe blinking lights of network equipment. It is also known from the Project Blinkenlights.
The following video shows the demo application and the construction in time lapse:
Technical Specifications
| Property | Value |
|---|---|
| Maximum Update Rate (LED Strip Bricklet) | 100Hz (per Pixel) |
| RGB resolution (LED Strip Bricklet) | 3 x 8bit |
| Luminous Intensity | 1600mcd per pixel |
| Number of RGB Pixels | 10 x 20 |
| Dimensions (W x D x H) | 40 x 80 x 7cm (without front panel)
50 x 90 x > 7cm* (with front panel)
|
| Weight | 4kg (assembled kit) |
* depends on configured the distance between front and back panel
Resources
- Example Source Code for Tetris (Download: Python, C#)
- Example Source Code for Pong (Download: Python, C#)
- Example Source Code for Fire (Download: Python, Delphi)
- Example Source Code for Scrolling Text (Download: Python, PHP)
- Example Source Code for Display Images (Download: Python, Java)
- Demo Application (Download: Windows, Linux, macOS, Source Code)
Firmware updating and first tests
As a very first step you should try out and update your Bricks and Bricklets.
For that you need to install the Brick Daemon and the Brick Viewer. Connect the LED Strip Bricklet to the Master Brick and connect it via USB to your PC. Afterwards use Brick Viewer to check if all of the firmwares are up to date (Updates / Flashing button). If not, you can update the Bricks and update the Bricklets with the Brick Viewer too:
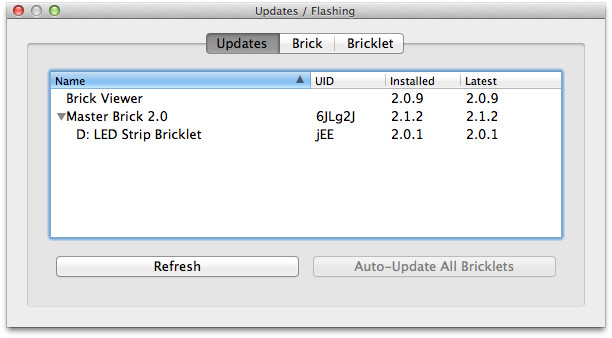
As the next step test the LED Strip Bricklet and the pixels as described here. After that you can start to assemble the kit.
Demo Application and Example Projects
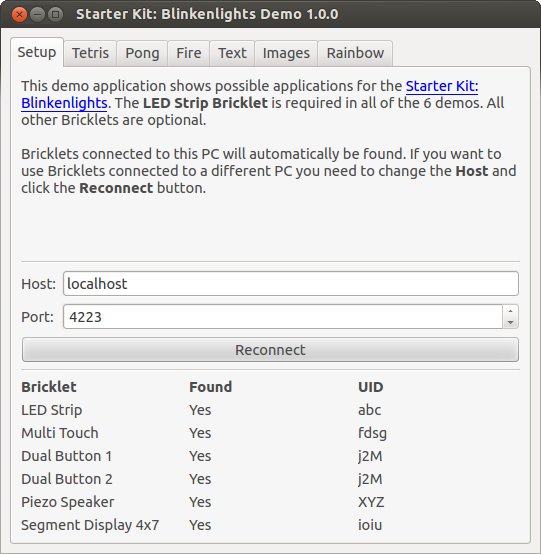
The demo application shows possible use cases for this kit. It consists of 6 individual applications each also provided as individual project (see below). Each project is represented by its own tab and will be started by selecting the corresponding tab. The application supports the additional usage of two Dual Button Bricklets or one Multi Touch Bricklet to control the games. If a Piezo Speaker Bricklet and/or Segment Display 4x7 Bricklet is connected, these Bricklets will also be used by the games to give acoustic feedback or to display the score.
Before starting you have to configure the host and port. If you use the standard kit and have connected it directly to your PC via USB "localhost" and "4223" is fine. If you extended the kit by Extensions or want to control the kit from another PC you have to enter the IP address or hostname of the Extension or the PC where the kit is connected to. Below the input boxes is a table which shows you the connected Bricks and Bricklets.
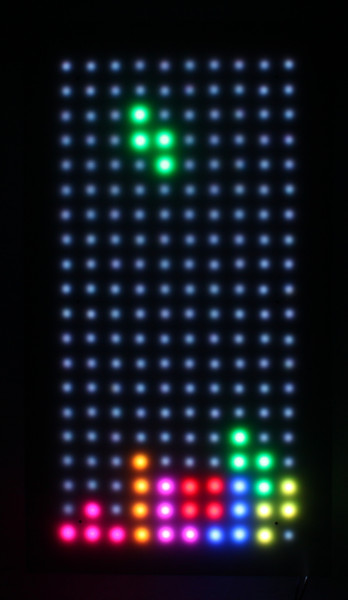
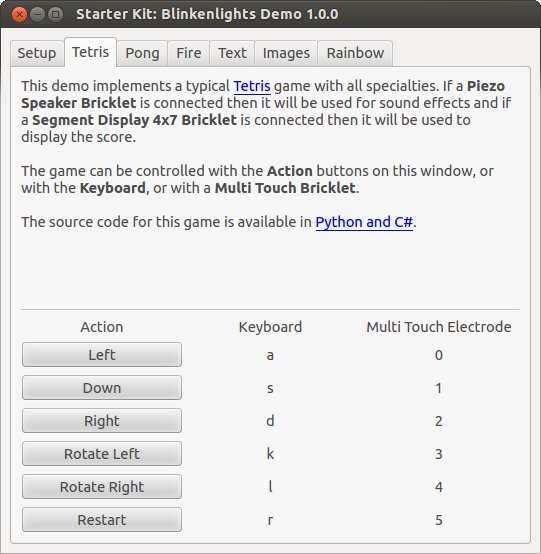
Tetris
The demo application implements a typical Tetris game with all specialties. It can be played with:

or without front panel:
This Tetris clone can be controlled by three possible ways. Firstly, there are buttons in the tab which can be used to control the game. Next you can use your keyboard. The keys are defined in the tab. Finally a connected Multi Touch Bricklet with a Giant Game Pad or self-made electrodes can be used.
The standalone Python project can be downloaded from
GitHub.
This also incorporates the
Pong project and consists of mainly
two files: tetris.py implements the game and config.py defines the
configuration (host, port, UIDs, LED matrix layout and keymaps).
Modify config.py according to your needs and run the application:
python tetris.py
There is also a C# implementation that can be downloaded from GitHub.
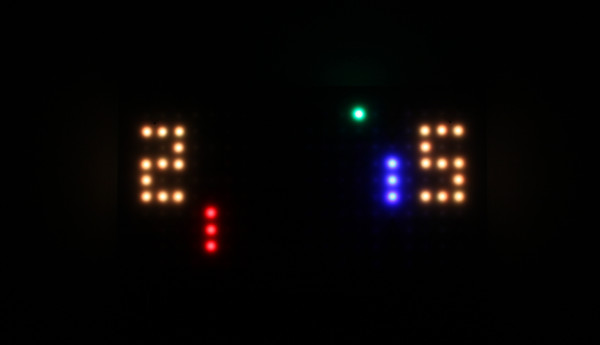
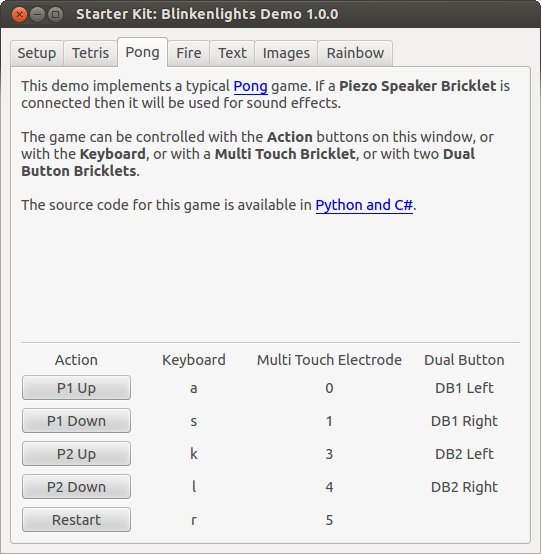
Pong
Like Tetris the Pong can be used with or without front panel.
The following images show pong with darkness and daylight.

The game can be controlled by buttons, keyboard or a Multi Touch Bricklet. Additionally it can be controlled by two Dual Button Bricklets.
The standalone Python project can be downloaded from
GitHub.
This also incorporates the
Tetris project and consists of mainly
two files: pong.py implements the game and config.py defines the
configuration (host, port, UIDs, LED matrix layout and keymaps).
Modify the config.py according to your needs and run the application:
python pong.py
There is also a C# implementation that can be downloaded from GitHub.
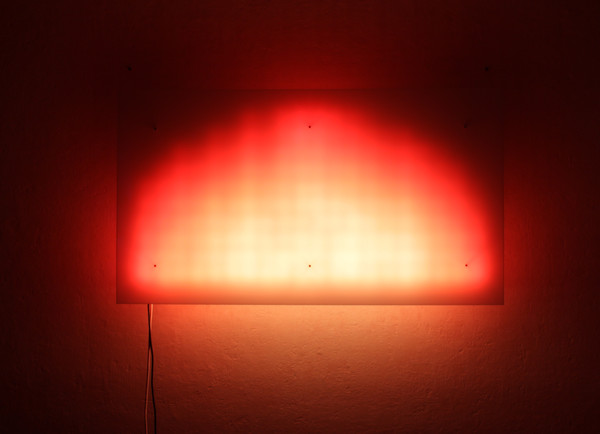
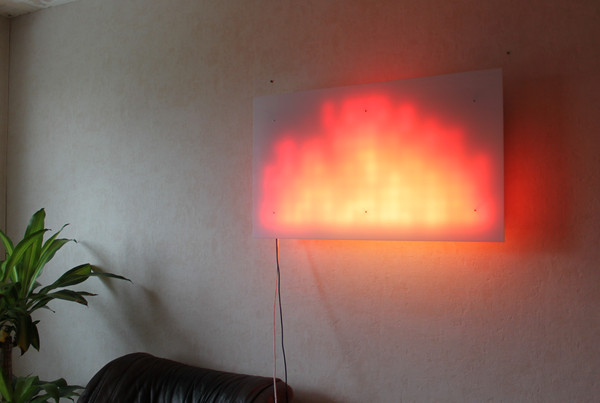
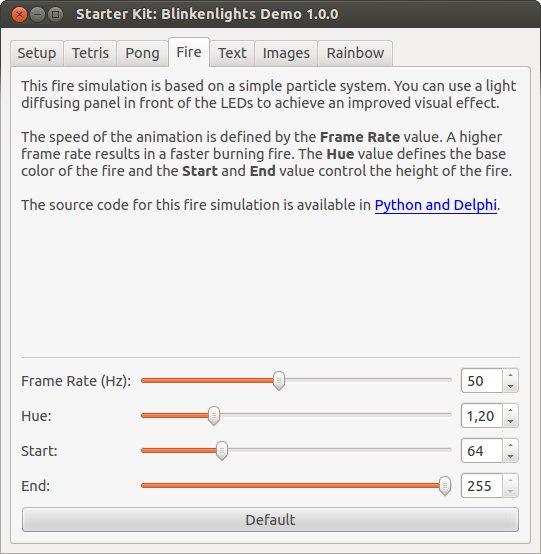
Fire Simulation
When selecting the Fire tab you will see a fire simulation. It looks good if you place the front panel in a distance of 42mm (2x9mm and 2x12mm standoff) to the back panel.
The following images show the fire simulation during darkness and daylight.


The simulation is based on a particle system and can be configured by four sliders:
- Frame Rate: Defines the frame rate in Hz. The simulation is updated for each new frame. If you increase the frame rate you will see a faster burning fire.
- Hue: Defines the color of your fire.
- Start: Defines the starting point where the fire particles will start to rise.
- End: Defines the end point where the fire particles will extinguish.
Play with the sliders to configure your personal fire! With the "Default" button you will set back all sliders to their default values.
The standalone Python project can be downloaded from
GitHub.
It consists of mainly two files: fire.py implements the simulation and
config.py defines the configuration (host, port, UID, LED matrix layout and
simulation parameters).
Modify the config.py according to your needs and run the application:
python fire.py
There is also a Delphi implementation that can be downloaded from GitHub.
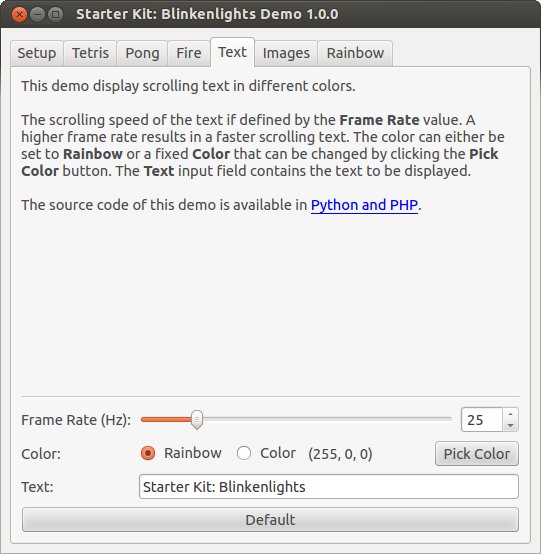
Scrolling Text
The "Text" demo will scroll the entered text with the given frame rate on the display.

The text moves one column per frame. A higher frame rate results in faster moving text. You can set changing colors by selecting "Rainbow" or select "Color" and pick the color you like by pressing the button.
The standalone Python project can be downloaded from
GitHub.
It consists of mainly two files: text.py implements the logic and
config.py defines the configuration (host, port, UID, LED matrix layout and
color parameters).
Modify the config.py according to your needs and run the application with
some text to display:
python text.py Starter Kit: Blinkenlights
There is also a PHP implementation that can be downloaded from GitHub.
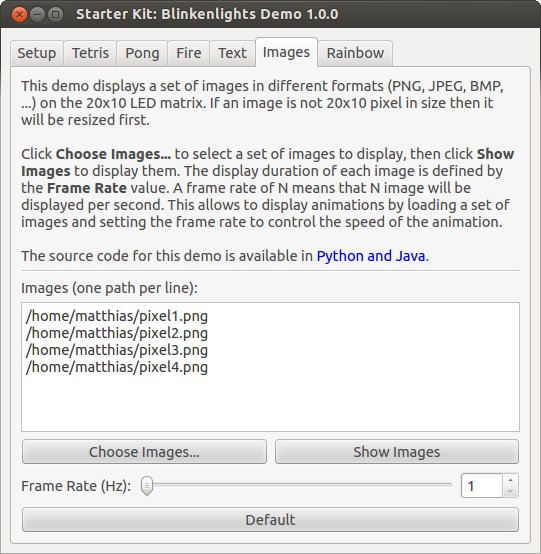
Display Images
The "Images" demo can be used to display user specific images and whole animations.
The following image

generates the following output
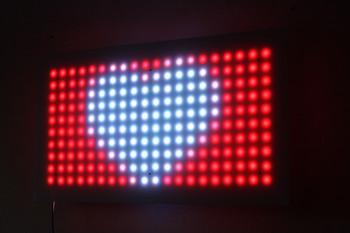
Choose the images you want to display by pressing "Choose Images...". The application will display the images with the given frame rate and switch to the next image in the sequence each frame. This way you can create animations. Each image is resized to 20x10 pixel (size of the display) and stretched if the aspect ration does not fit. Use an image editing tool if you are not satisfied with the results.
The standalone Python project can be downloaded from
GitHub.
It consists of mainly two files: images.py implements the logic and
config.py defines the configuration (host, port, UID, LED matrix layout).
Modify the config.py according to your needs and run the application with
some image files to display:
python text.py image1.jpg image2.jpg
There is also a Java implementation that can be downloaded from GitHub.
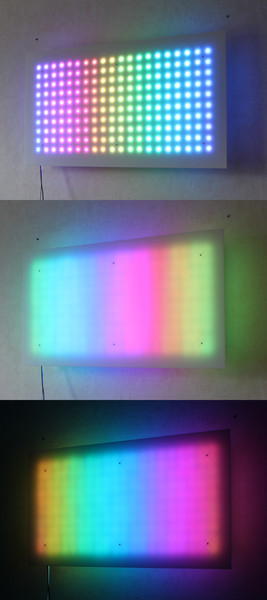
Moving Rainbow
The "Rainbow" demo will display a moving rainbow with the given frame rate and speed. The results depend on the distance to the front panel.
The following image shows the rainbow demo with 12mm distance in daylight, 42mm distance in daylight and with 42mm distance during darkness.

A higher frame rate and speed results in faster moving rainbow.

The standalone Python project can be downloaded from
GitHub.
It consists of mainly two files: rainbow.py implements the logic and
config.py defines the configuration (host, port, UID, LED matrix layout and
speed parameter).
Modify the config.py according to your needs and run the application:
python rainbow.py
There is also a C implementation that can be downloaded from GitHub.