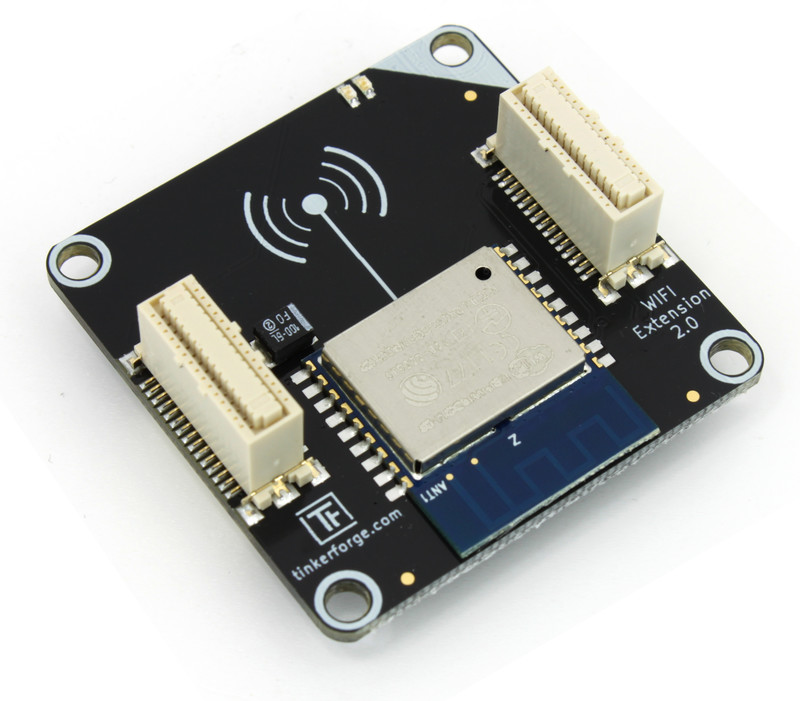
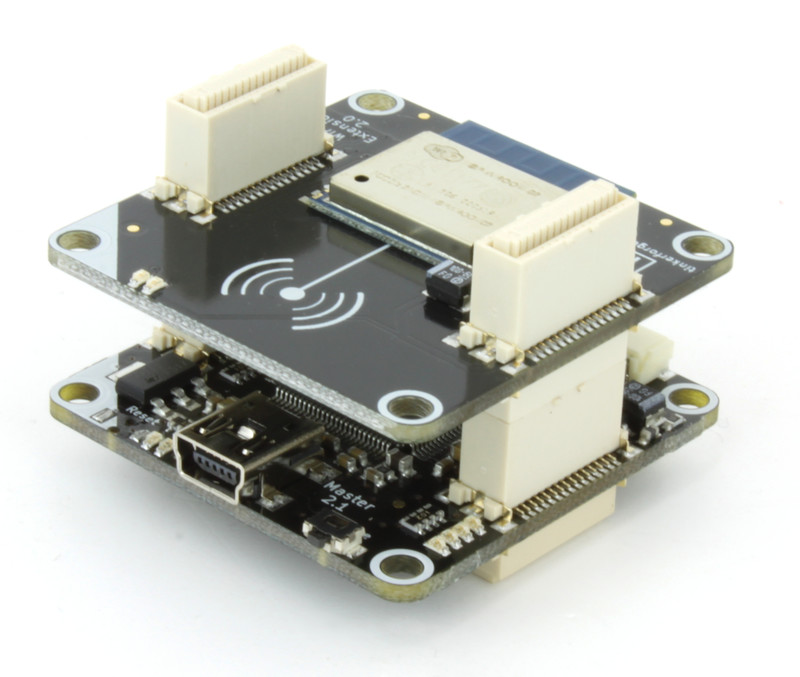
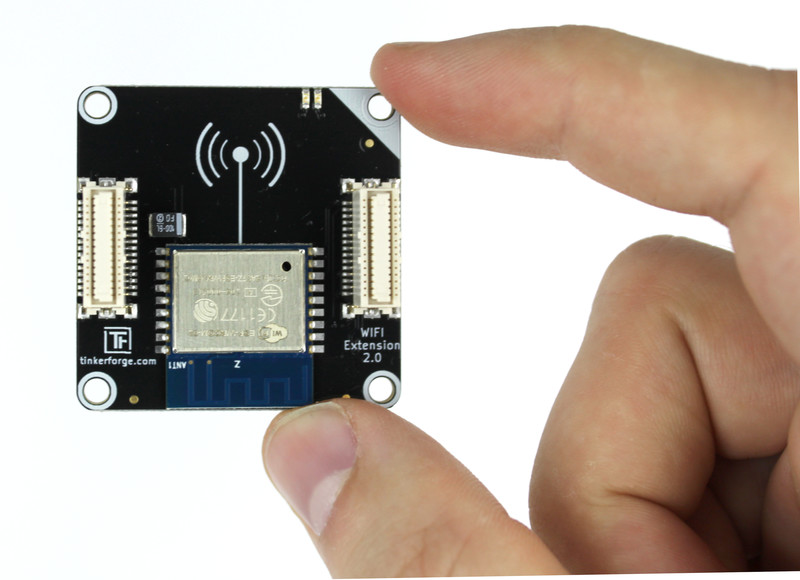
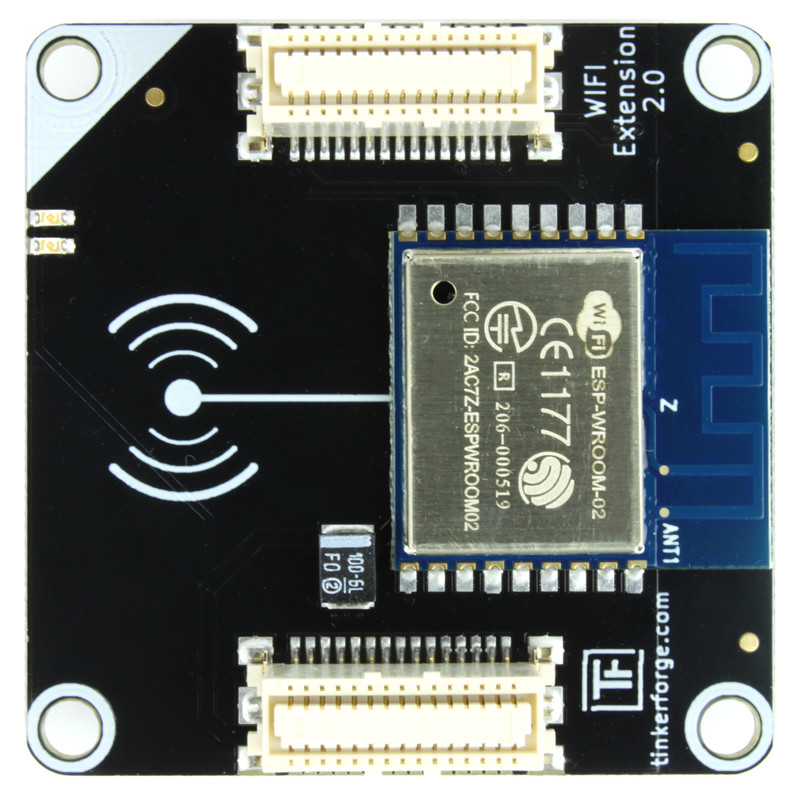
WIFI Master Extension 2.0
Features
- Controls Bricks/Bricklets wirelessly over a WIFI network
- Operates at 802.11b/g/n
- Supports WPA2 encryption as client and access point
- Supports static IP as well as DHCP as client and access point
- Supports client and access point mode at the same time
Description
With the WIFI Extension 2.0 you can control Bricks and Bricklets wirelessly over your mobile phone, tablet or PC. For an explanation of the Master Extension concept please take a look at the general description.
Since the device itself handles TCP/IP packages generated by the API, it is possible to connect directly from your controlling device (mobile phone, tablet, (embedded) PC). A Brick Daemon is not necessary.
To use the WIFI Extension 2.0 a Master Brick is mandatory. The RED Brick is currently not supported. If you want to use other Bricks, you can build a stack and plug them also on top of the Master Brick. If you want to use Bricklets you can attach them to the Master Brick or to other Bricks in the stack. From the programming perspective this is completely transparent, i.e. all Bricks and Bricklets can be used exactly the same way as if they were connected to your controlling device via USB.
You need a Master Brick with firmware version 2.4.0 or newer to use this extension.
The following combinations with other Extensions in a stack are possible (regardless of order):
- WIFI 2.0 / RS485 Master
Technical Specifications
| Property | Value |
|---|---|
| Current Consumption | 80mA (transmit), TBDmA (during sleep) |
| Maximum Concurrent Connections | 10 |
| Modes | Client, Access Point and Client/Access Point concurrently |
| Tinkerforge Protocols | Full support (TCP/IP, authentication and WebSockets) |
| RF Output Power (Typical) | up to 19.5dBm |
| Security Protocols | WPA, WPA2 |
| Supported Standards | IEEE 802.11 b/g/n, with CCK, OFDM and MCS7 modulation |
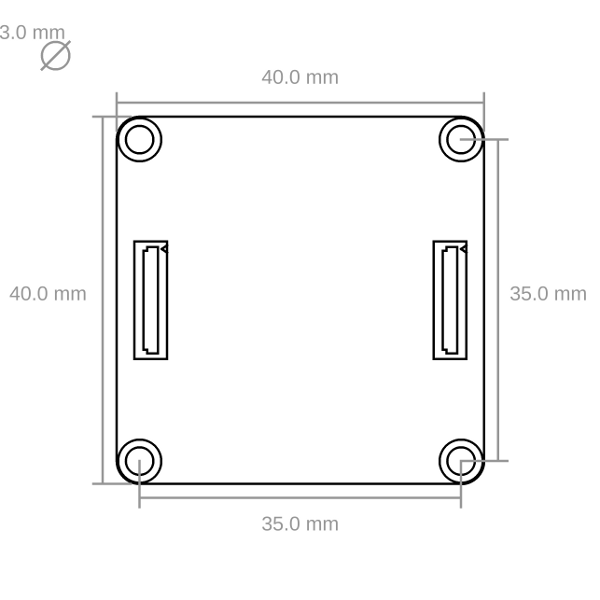
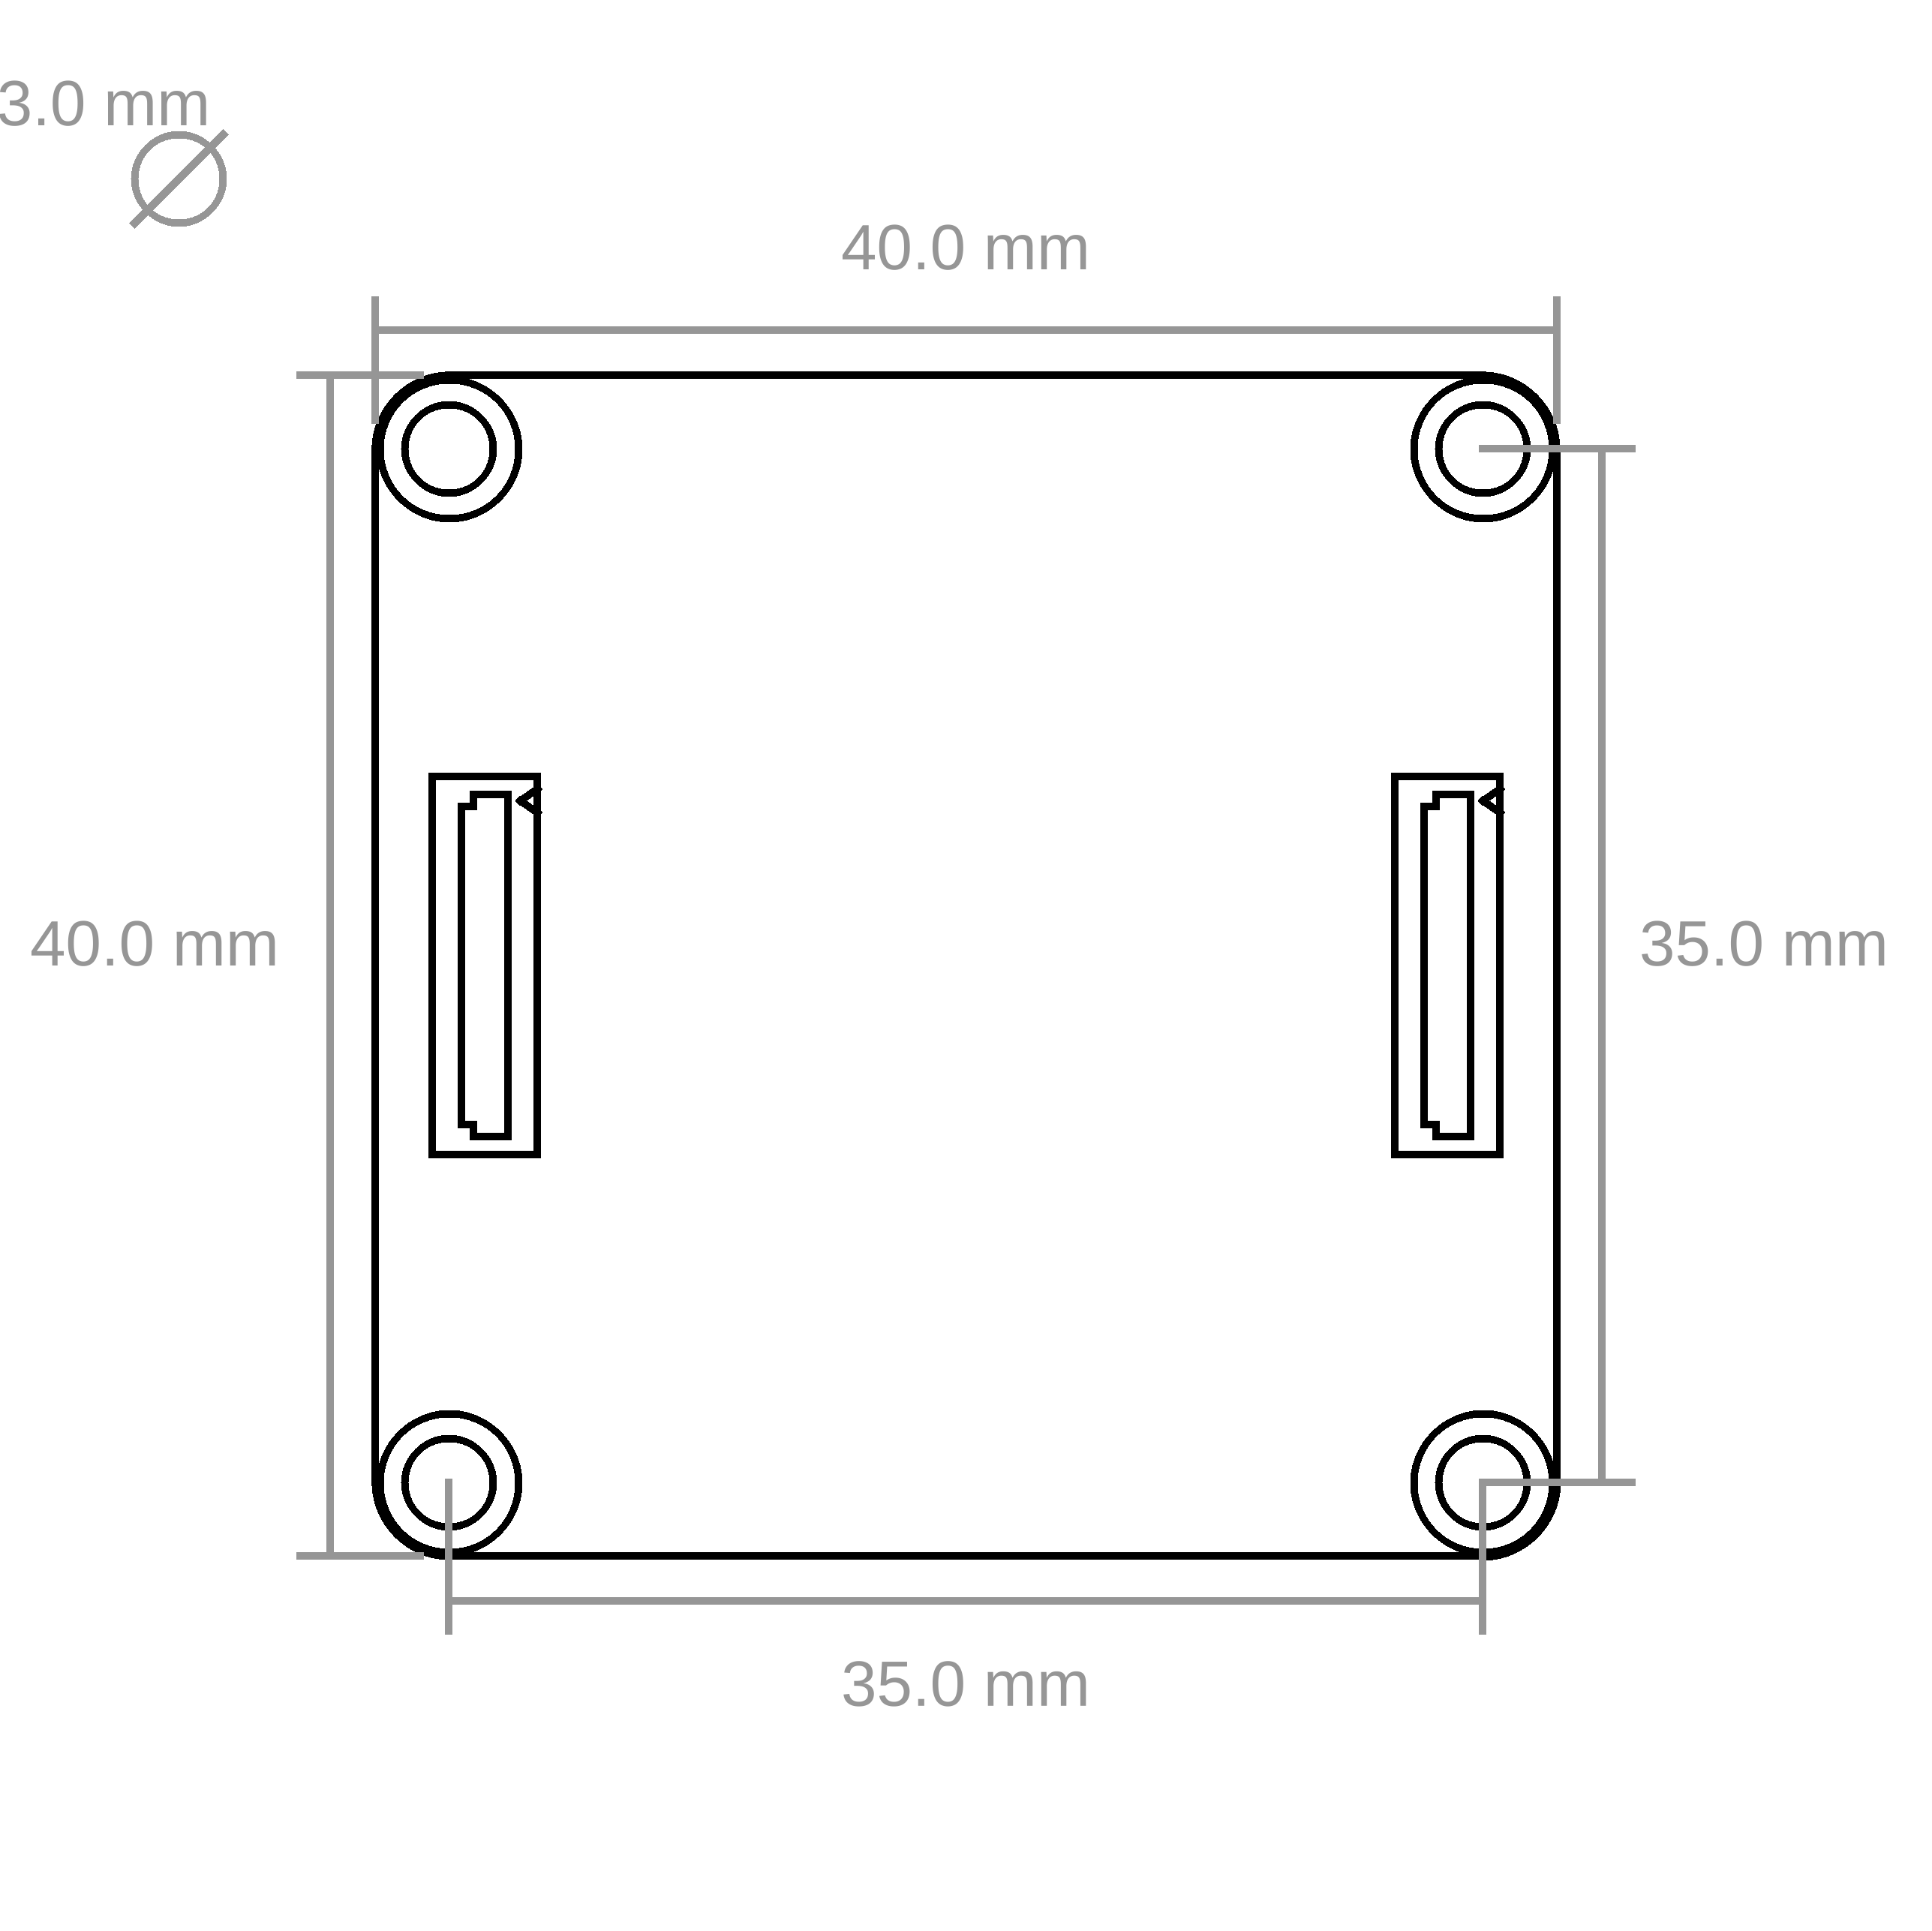
| Dimensions (W x D x H) | 40 x 40 x 16mm (1.57 x 1.57 x 0.63") |
| Weight | 12g |
Resources
WIFI Network
With this Master Extension you will be able to create a wireless connection to a Master Brick and all of its connected Bricks and Bricklets. A Brick Daemon is not required.
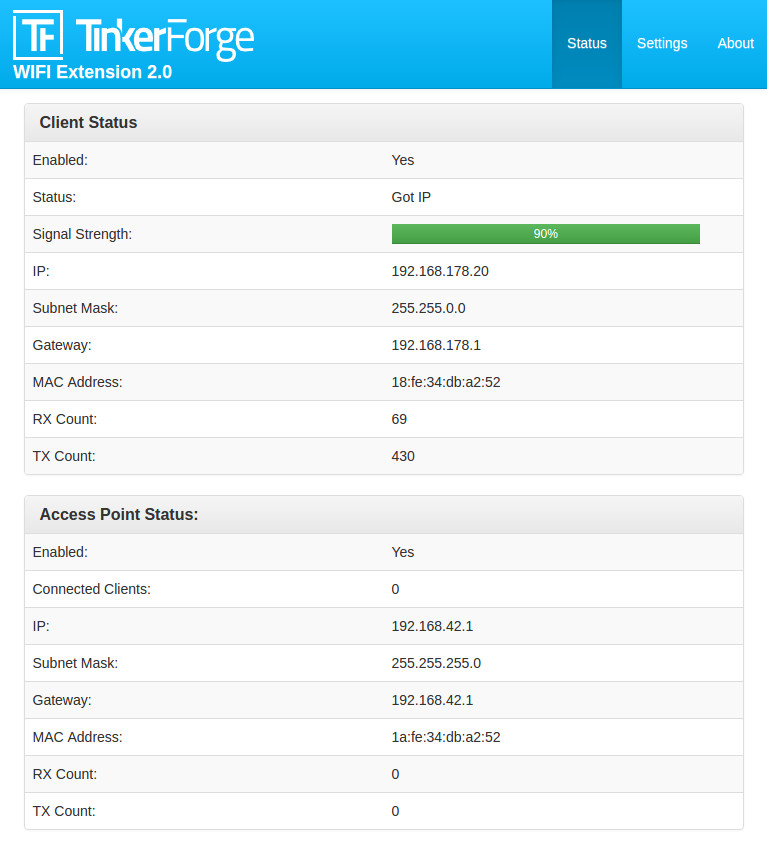
If you want to connect the Brick Viewer with your WIFI setup, you have to enter the IP of the WIFI Extension 2.0 and the configured port in the Setup Tab. After pressing "Connect" you will not connect to your local running Brick Daemon but to your WIFI Extension 2.0.
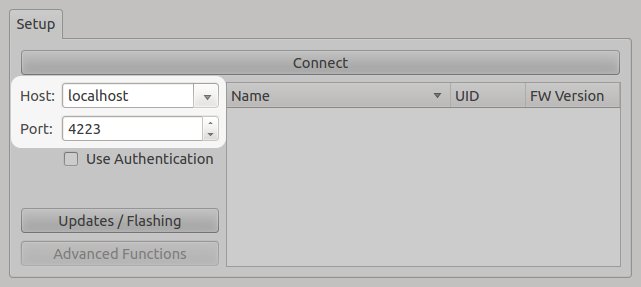
For your own code modify the host and port in your connect call, e.g.:
ipcon.connect("localhost", 4223)
has to be changed to
ipcon.connect("192.168.0.25", 4223)
WIFI Configuration
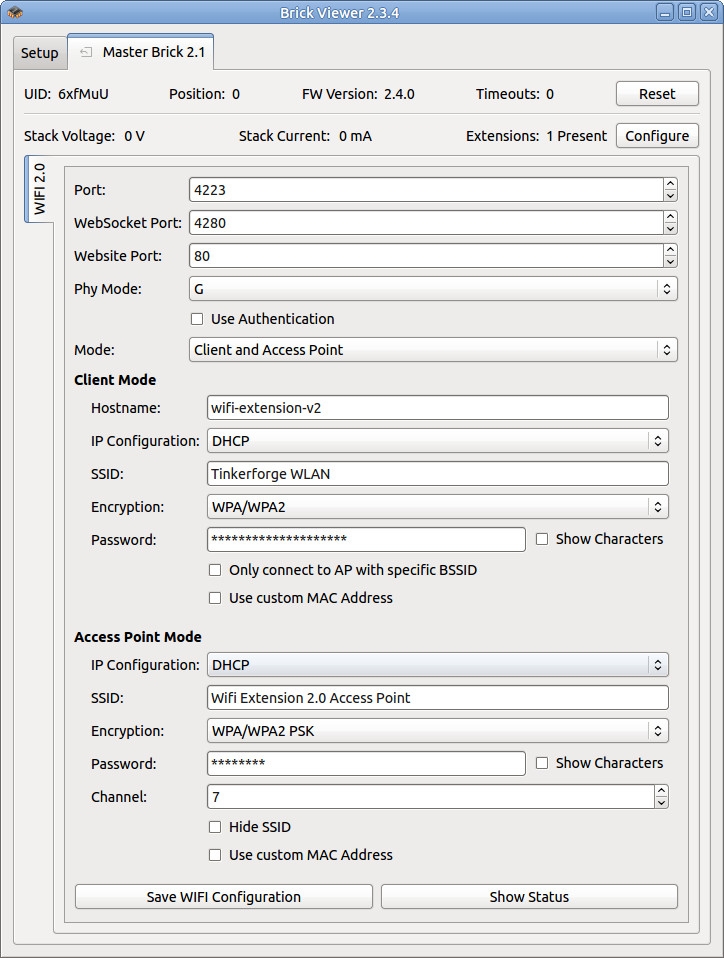
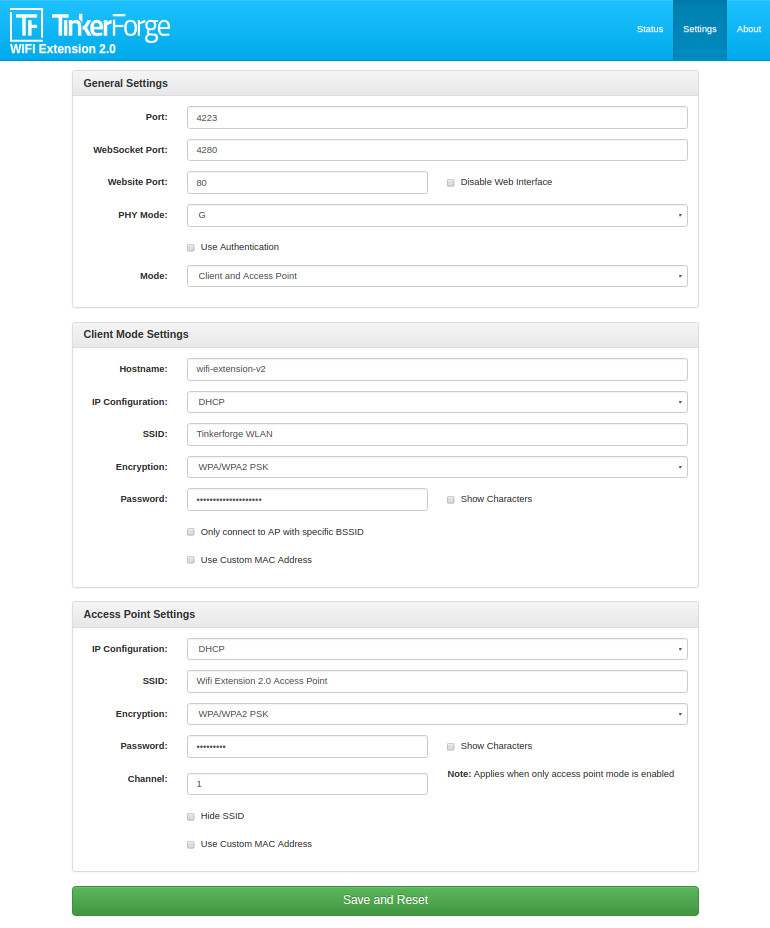
You can configure the WIFI Extension 2.0 through the Master Brick Tab in the Brick Viewer.
Ports
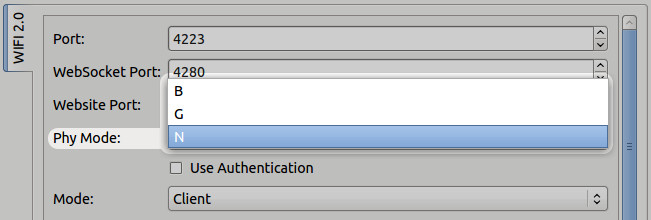
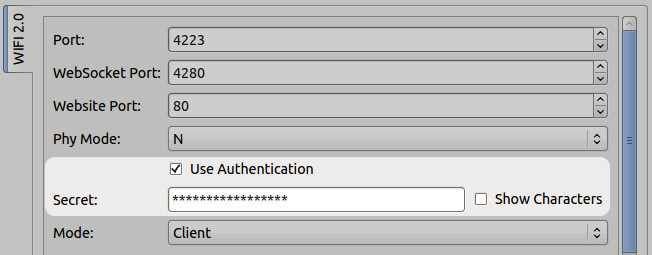
The first configuration options are the port, WebSocket port and website port. You can change them from the defaults 4223, 4280 and 80 if necessary. In most cases they can stay unchanged.
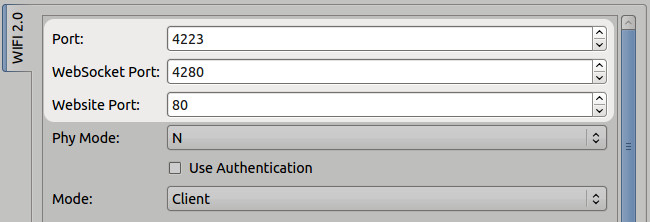
PHY Modes
The PHY modes
- B,
- G and
- N
are available. PHY mode N can't be used if the access point is enabled.
Authentication
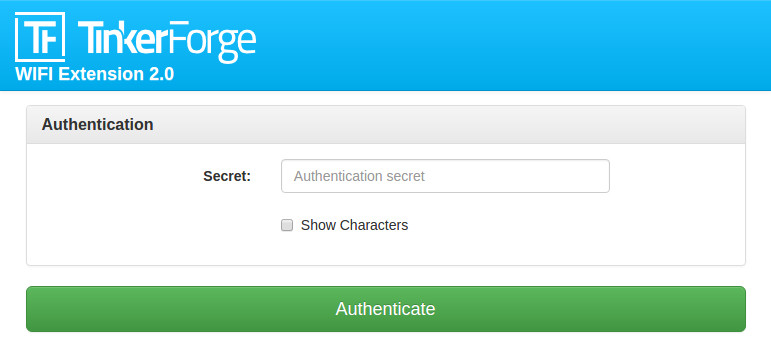
The WIFI Extension 2.0 supports authentication. Authentication is disabled by default. Tick the "Use Authentication" check box and choose an authentication secret to enable it. This secret can be 64 ASCII characters long. After saving the configuration and restarting the Master Brick authentication is enabled.
Now every TCP/IP connection to the WIFI Extension 2.0 has to prove to the Master Brick that it knows the authentication secret before normal communication can occur. See the authentication tutorial for more information.
Operational Modes
The WIFI Extension 2.0 can operate as
- Client,
- Access Point or
- both at the same time.
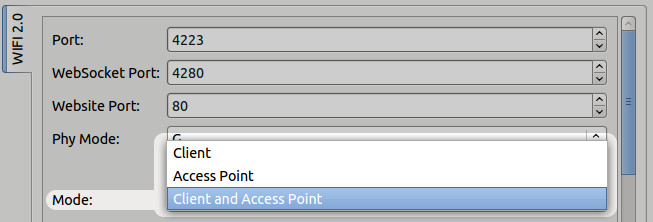
If you choose both, the two resulting networks are completely independent from each other. The Client will have a different MAC as the Access Point and there is no routing between the networks.
The whole configuration (including client and access point configuration) is saved by pressing the "Save WIFI Configuration" button at the bottom.
To see the current status of the WIFI Extension 2.0 press the "Show Status" button.
Client Mode Configuration
In client mode you can set a hostname with up to 32 ASCII characters.

The IP can be obtained using DHCP or you can choose to use a static IP. In the latter case you have to configure a IP, subnet mask and gateway.
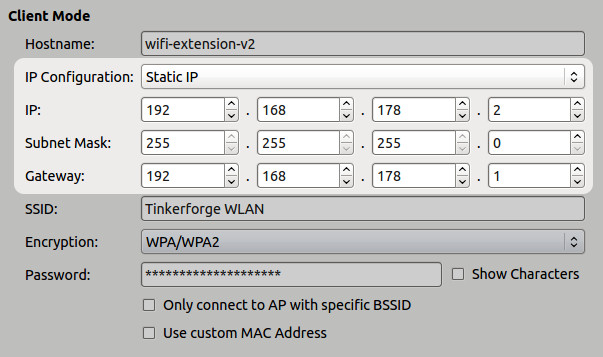
The SSID of the access point can be up to 32 ASCII characters long.
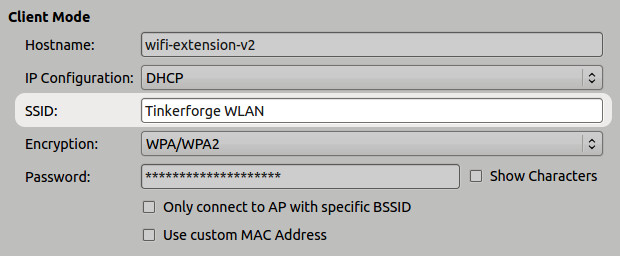
It is possible to connect to open networks as well as networks encrypted by WPA/WPA2.

If your network is encrypted you can set a password with up to 64 ASCII characters.
If necessary you can specify a specific BSSID that you of a Access Point that you want to connect to and you can use a custom MAC address.

Access Point Mode Configuration
In Access Point mode you can either enable DHCP (the WIFI Extension 2.0 will run a DHCP server) or static IP. If you choose static IP, please make sure that the client uses a IP, subnet mask and gateway which is compatible to the static WIFI Extension 2.0 network.
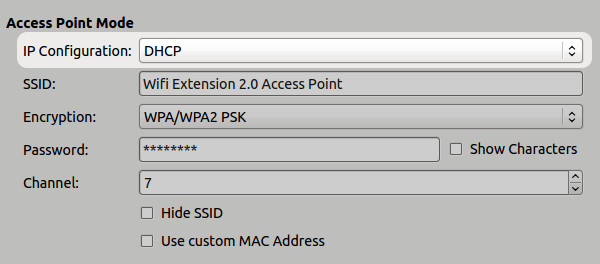
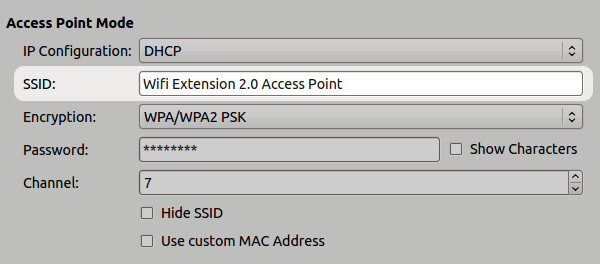
The SSID can be up to 32 ASCII characters long.
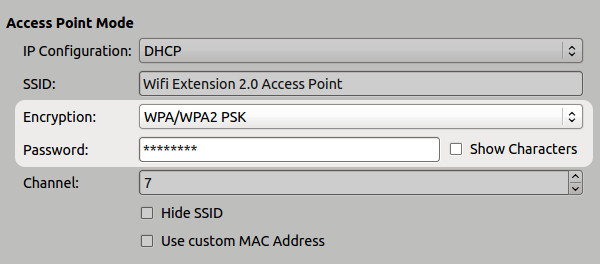
In Access Point mode the WIFI Extension 2.0 supports
- WPA PSK,
- WPA2 PSK and
- WPA/WPA2 PSK
as encryption protocols. You can also open a network without encryption. If you enable encryption you can set a password with at least 8 and up to 64 ASCII characters.
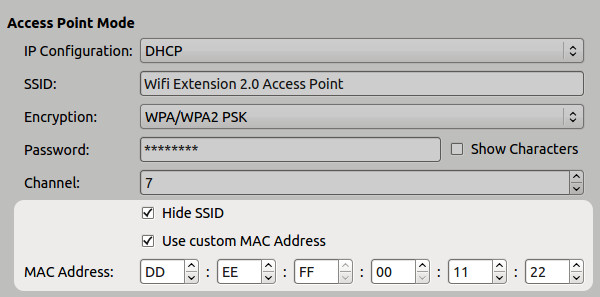
Additionally you can specify a WIFI channel between 1 and 13, hide the SSID and use a custom MAC address.
Web Interface
Starting from the firmware version 2.0.1 a web interface is available for configuring the extension. With this interface the current status of the extension can be viewed and the configuration options as discussed in the previous section can be configured.
The "Disable Web Interface" check box in the settings view can be used to enable or disable the web interface. When the web interface is disabled it can be enabled from Brick Viewer. Note that to disable the web interface in Brick Viewer 2.3.6 the "Website Port" field must be set to 1. Setting this field to a value which is greater than 1 will enable the web interface on the corresponding port. From Brick Viewer version 2.3.7 this is fixed and a check box is available like in the web interface for enabling or disabling the web interface.
If authentication secret is enabled then the web interface will present the following page for user authentication.
Mesh Network
Starting from the firmware version 2.1.0 the WIFI Extension 2.0 supports mesh network between multiple WIFI Extension 2.0. Note that for using the mesh feature properly, Master Brick firmware version 2.4.2 or higher, Brick Daemon version 2.3.0 or higher and Brick Viewer version 2.3.7 or higher is required.
Stacks with WIFI Extension 2.0 which are configured in mesh mode can form a mesh network. All Bricks and Bricklets present in these stacks can be accessed normally via the Mesh Gateway.
Some key concepts of mesh mode are:
Mesh Root Node:
Each mesh network has at least one WIFI Extension 2.0 acting as root node. Root nodes are entry/exit point of the mesh network where data is coming into the the mesh network or going out of the mesh network.
Mesh Router:
The mesh router is a Wi-Fi access point to which the root node connects to reach the mesh gateway.
Mesh Gateway:
The mesh gateway is basically Brick Daemon which can handle and route data coming from the nodes of a mesh network and can also send data into mesh network.
The illustration below represents a simple scenario to understand the system better.
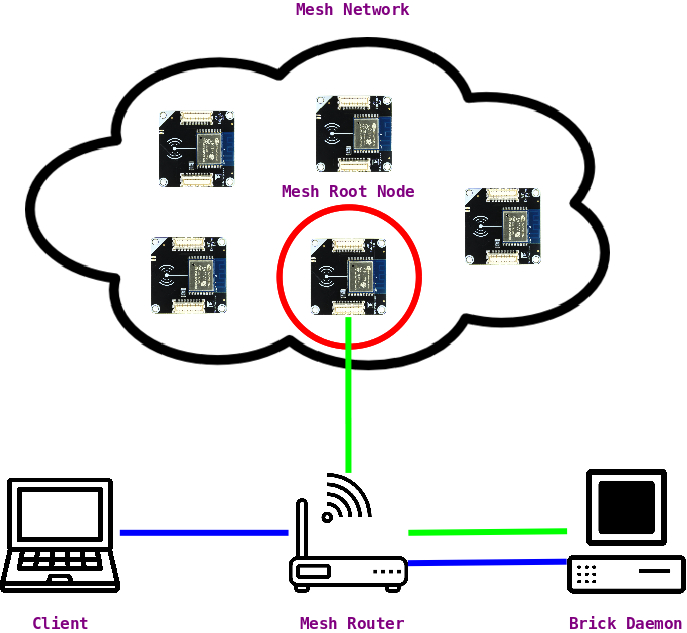
In the illustration above, there is a mesh network with five stacks each with a WIFI Extension 2.0 configured in mesh mode. The root node of this mesh network is marked with a red circle. The mesh root node can connect to the Wi-Fi access point, "Mesh Router". The "Brick Daemon" machine is running a Brick Daemon that supports the mesh feature and is reachable via the network of the "Mesh Router". From the perspective of the mesh network this machine is the mesh gateway.
The mesh root node establishes a connection to the mesh gateway which is marked with the green lines in the illustration. After that, all the stacks which are available in the mesh network are accessible to the "Client" which is connected to the Brick Daemon that is running on the "Brick Daemon" machine. This connection is marked with the blue lines in the illustration.
Configuration
Note
The configuration for all WIFI Extension 2.0 in a particular mesh network has to be identical, otherwise the mesh network will not be able to work properly.
To form a mesh network first the Extension must be configured to be in mesh mode. This can be achieved from Brick Viewer by selecting mesh mode.
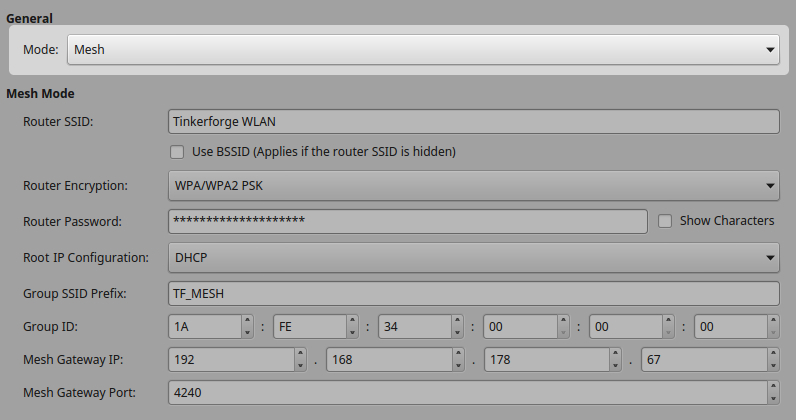
Mesh router configuration must be provided to the node. These are generic configuration parameters that are required to configure and connect to a Wi-Fi access point.
It must be defined to which mesh network a mesh node belongs to. The "Group SSID Prefix" and "Group ID" together defines a mesh network to which the mesh node belongs to.
The "Mesh Gateway IP" and "Mesh Gateway Port" fields define how the mesh gateway can be reached.
Known Bugs
Mesh router SSID maximum length:
The maximum applicable mesh router SSID can be 32 characters long but in mesh mode a mesh router SSID of up to 31 characters is valid. This is due to a bug in the Espressif mesh library.
Dropped packets in non-root mesh node:
This bug is also in the Espressif mesh library. If a mesh node which is not a root node receives a burst of packets all of these packets are dropped. This is rather a serious bug as it involves data loss. This bug can be easily observed by sending a lot of setter requests to a non-root mesh node and they will all be lost. Because of this bug, Servo Brick's test feature which is offered by Brick Viewer will fail if the node where the Servo Brick is present is not a mesh root node.
One work around of this problem is to limit the setter call burst, for example by setting response expected flag of the setter calls or by simply adding a slight delay between the setter calls.
LEDs
The blue power LED will be on permanently as long as the device is powered. The green LED is a status LED.
In client mode it will blink fast while trying to connect to a access point and turn on if connected.
In access point mode it will blink slowly as long as no client is connected.
If both are enabled, it will blink fast until it is connected to an external access point and after that it will blink slowly until a client connects to the access point of the WIFI Extension 2.0.
In mesh mode if the node is trying to establish a connection then the green LED will blink rapidly. Once connection is established and the node is operational, the green LED will blink slowly with an interval of about 6 seconds.