- Getting Started
- Hardware
- Software
- Kits
- Starter Kit: Weather Station
- Starter Kit: Hardware Hacking
- Starter Kit: Server Room Monitoring
- Starter Kit: Server Room Monitoring 2.0
- Starter Kit: Blinkenlights
- Starter Kit: Internet of Things
- Starter Kit: Camera Slider
- Tabletop Weather Station
- Embedded Boards
- Specifications
Construction - Basic Weather Station
The basic Weather Station Kit comes with Ambient Light 2.0, Barometer, Humidity and LCD 20x4 Bricklet, Master Brick, the Weather Station case including a replacement side element for a DC Jack Adapter, Bricklet cables and USB cable as well as lots of screws, spacers, nuts and washers.

There are several ways to mount the Bricks and Bricklets in the case. In this construction tutorial we will show one way to put everything together.
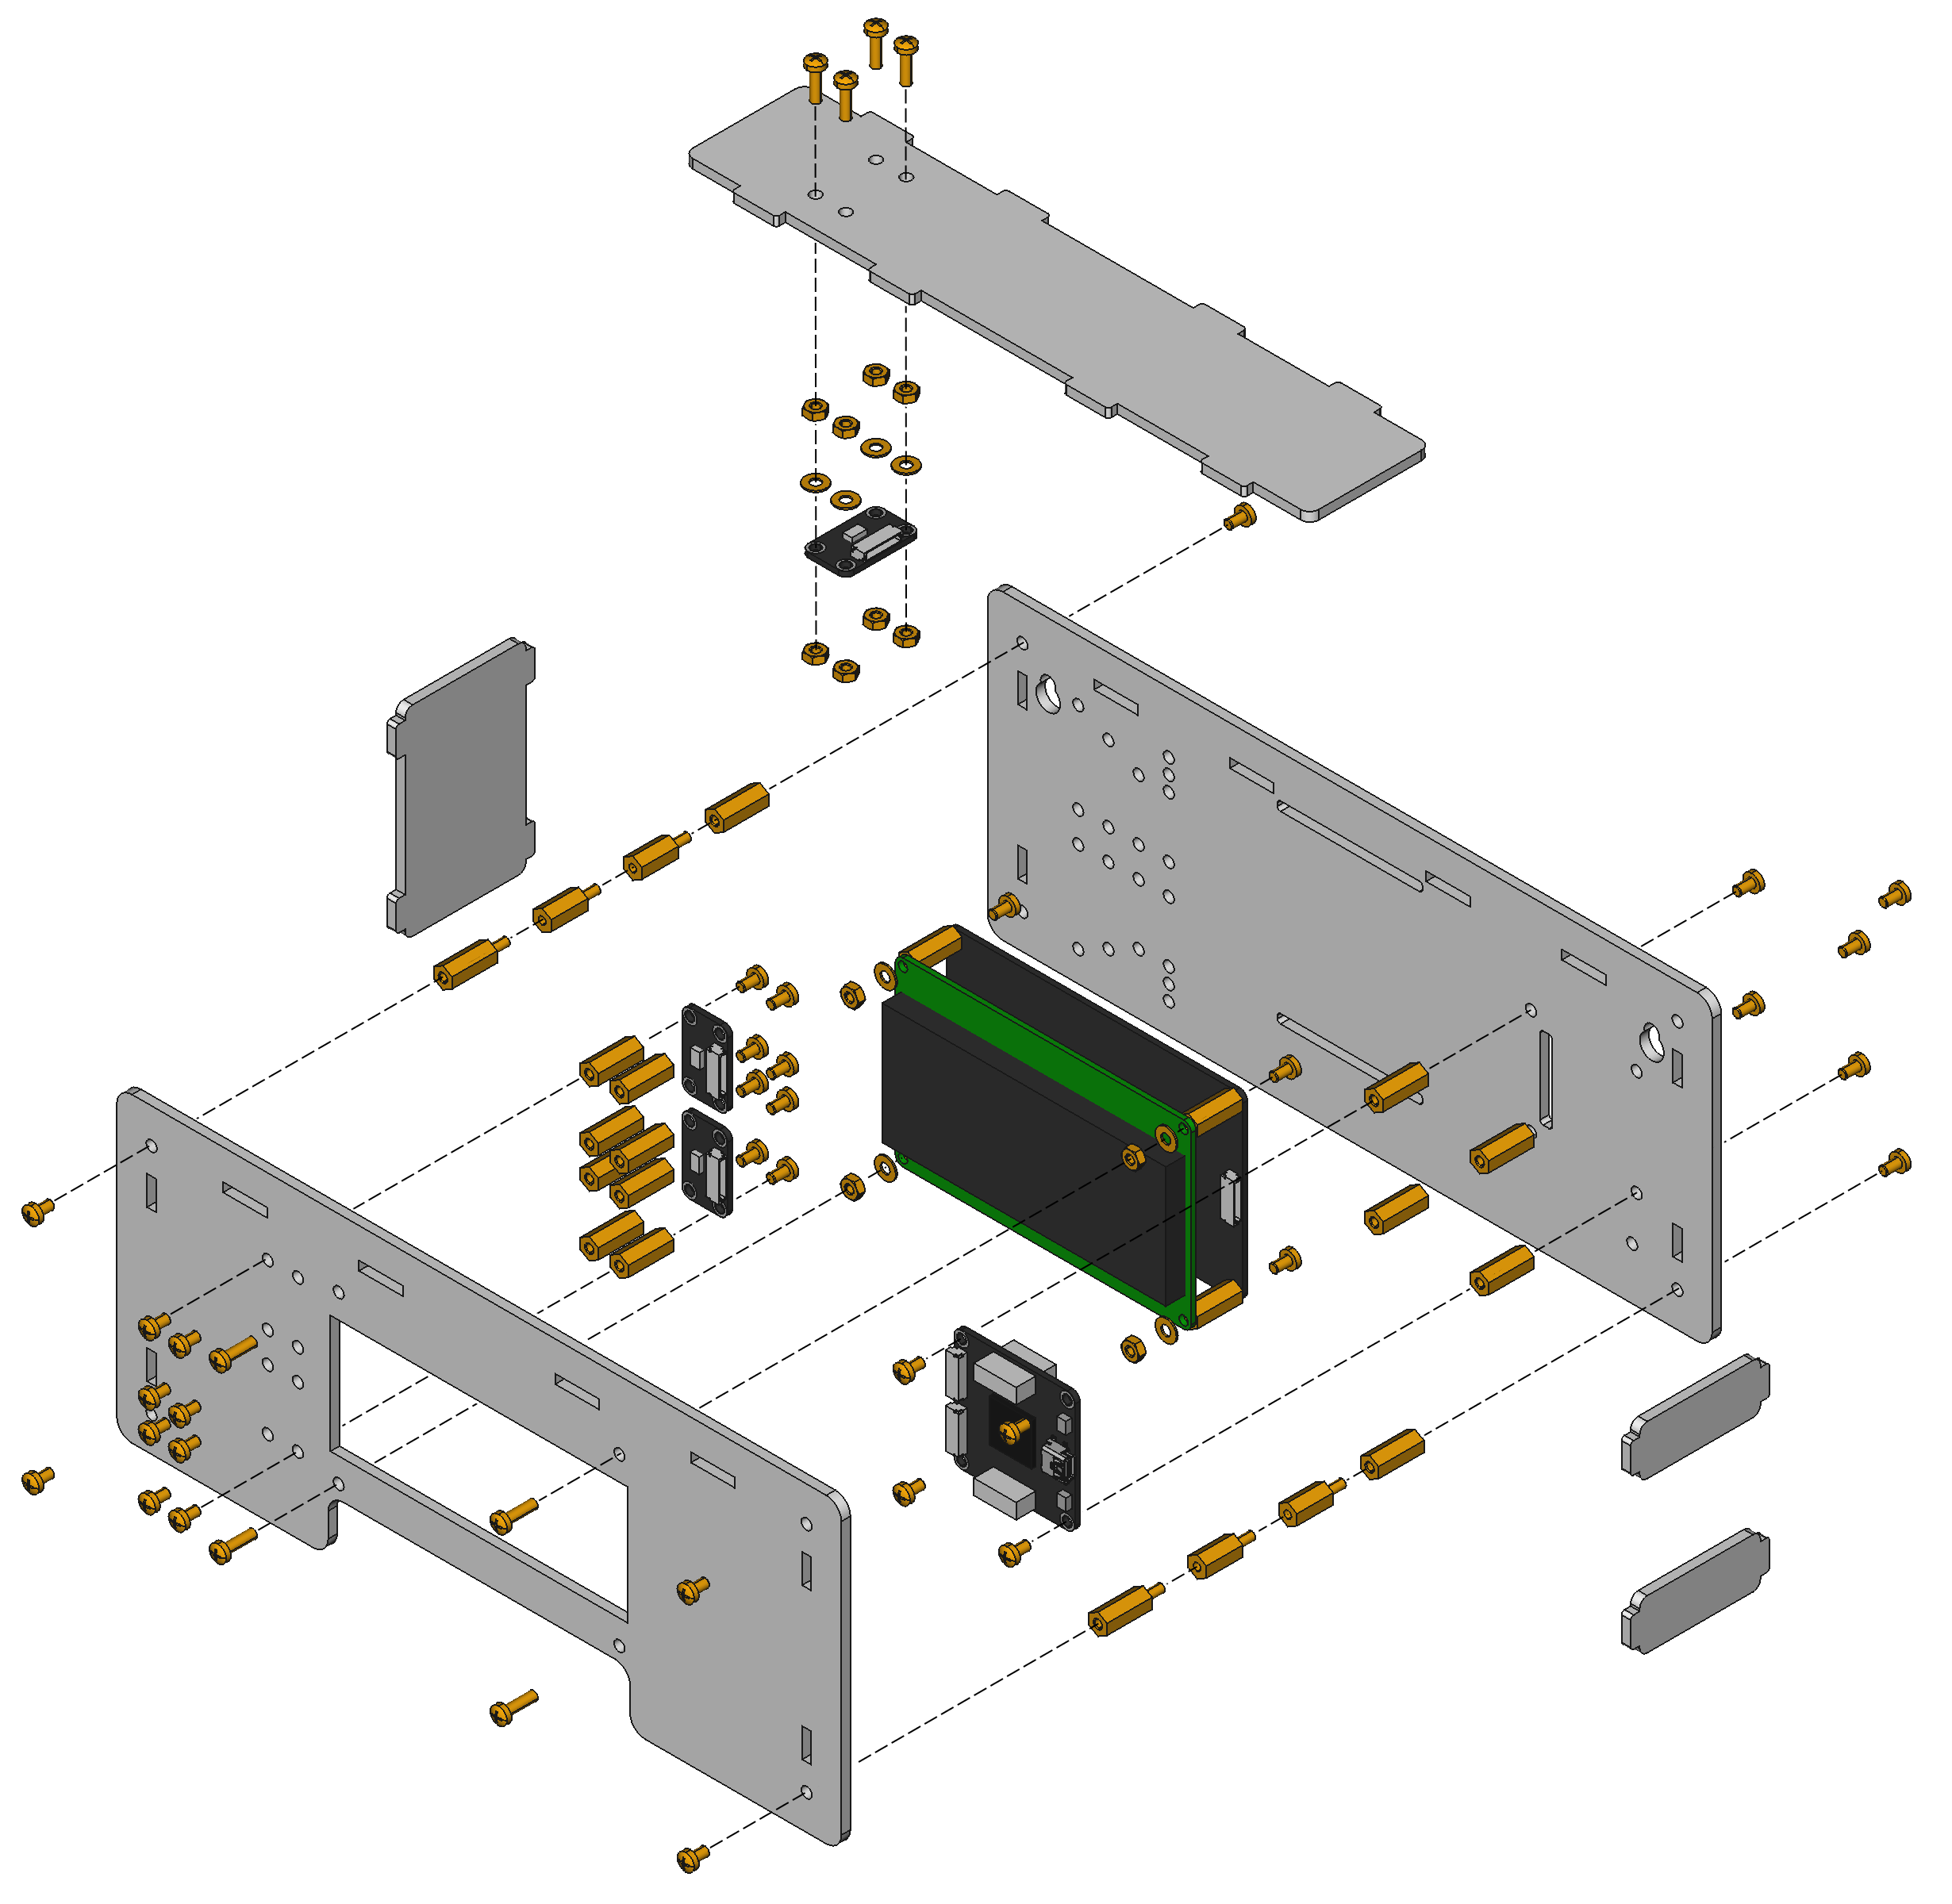
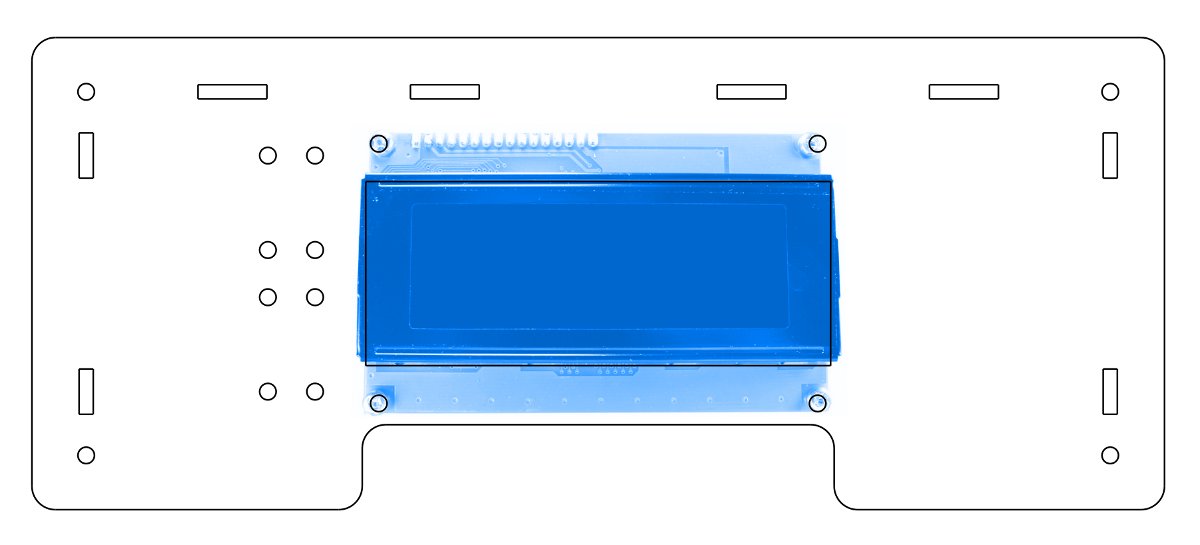
For easy understanding there are some sketches in the following. Bricks and Bricklets could be mounted in two ways:
If a Brick or Bricklet is mounted on the front side of a case part, the Brick or Bricklet is shown in normal colors
If a Brick or Bricklet is mounted on the back side of a case part, the Brick or Bricklet is shown in blue
In the following you can find an exploded view drawing of the weather station. It should give you a rough overview of the weather station assembly.
Remove Protective Foils
At first the protective foils on all case parts have to be removed. There is one foil on the front and back side each. In some cases the protective foils can be hard to remove and it seems that there is no foil at all.
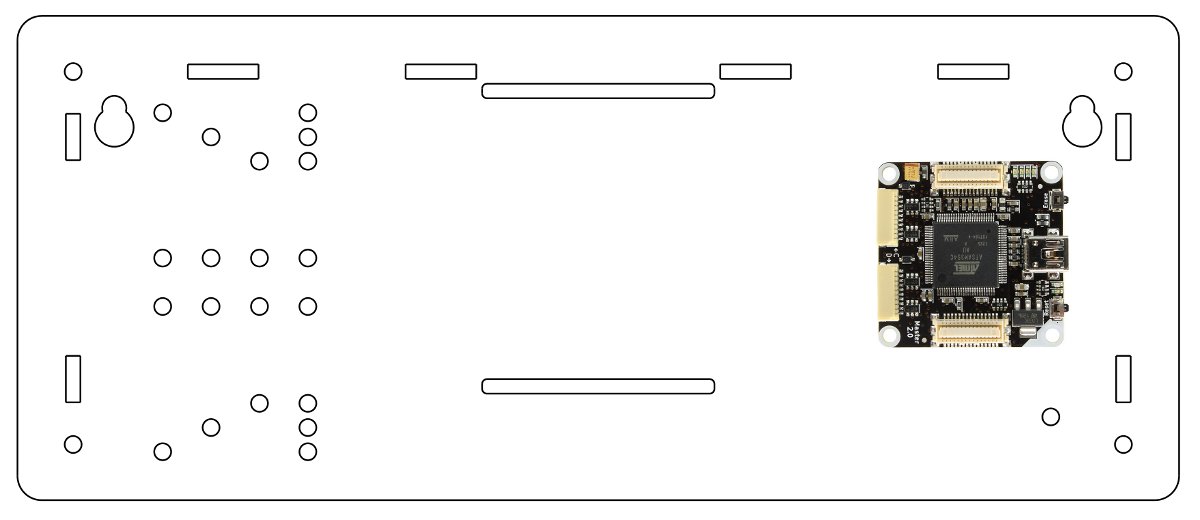
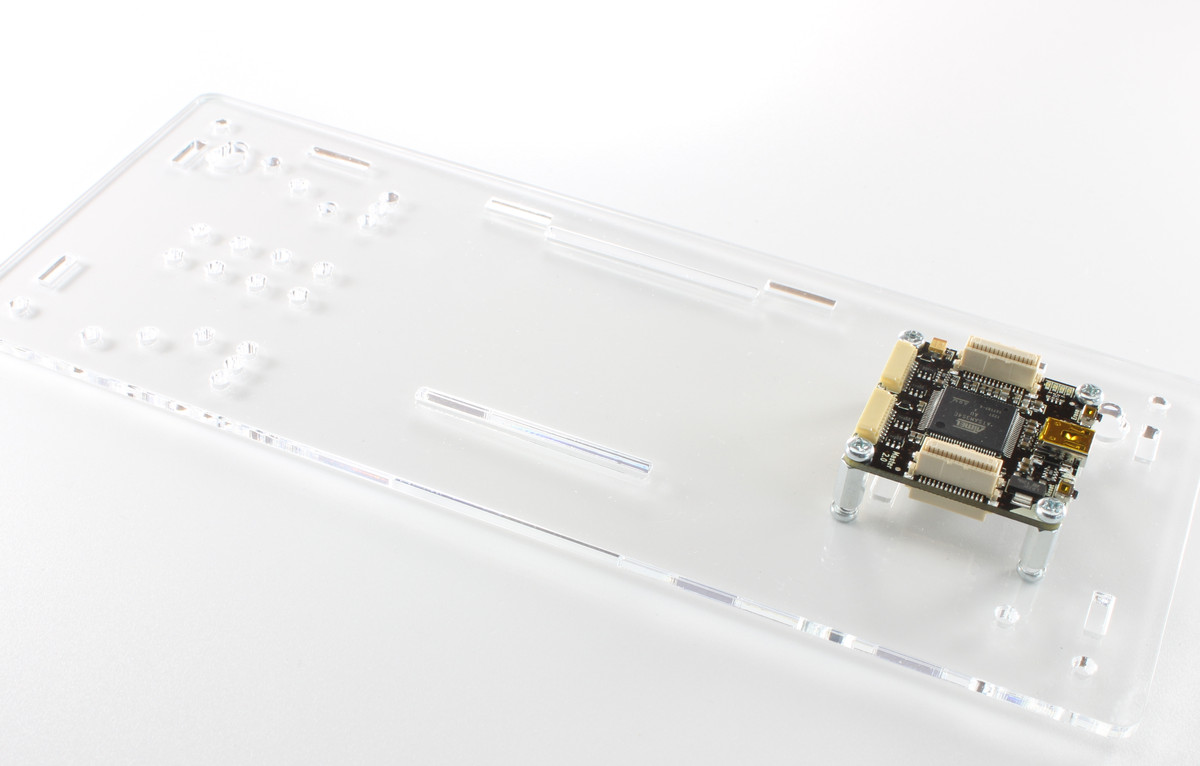
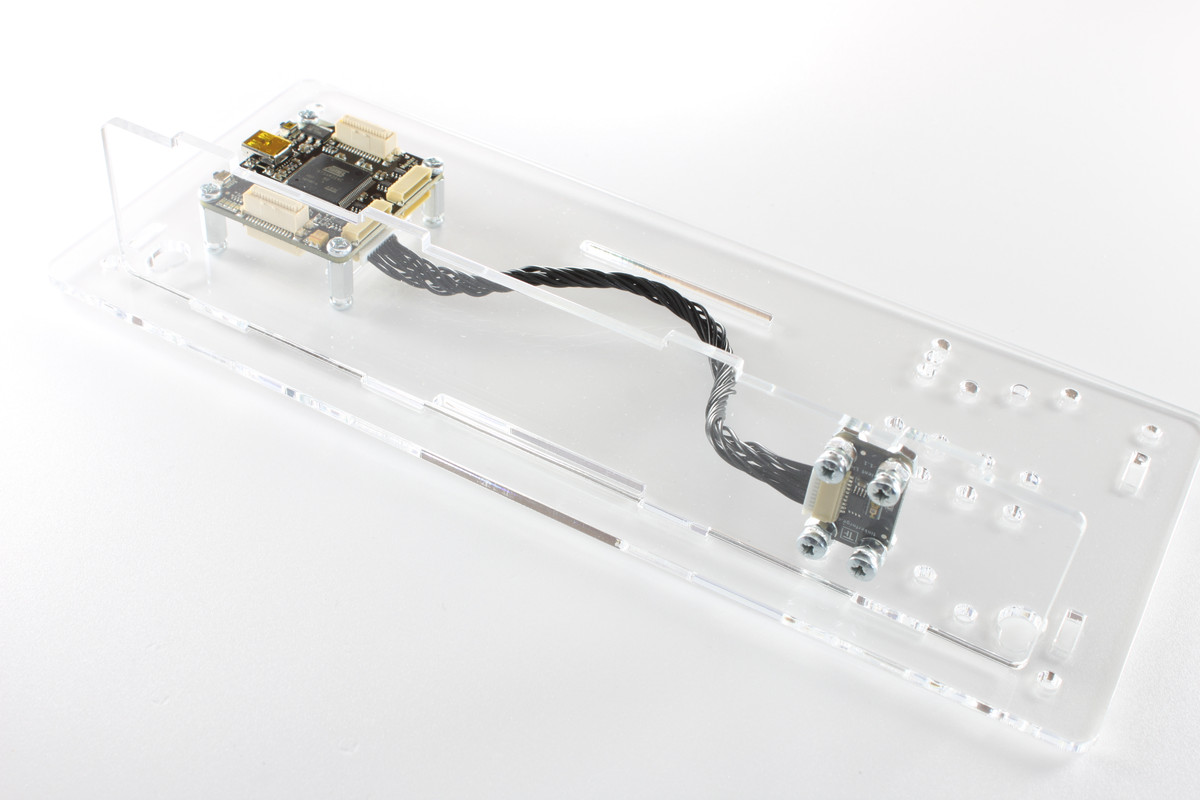
Master Brick on Back Side
In the next step the Master Brick has to be screwed on the back side part:
4x: Screw one 10mm spacer with a 5mm screw on the back side part
Mount the Master Brick with four 5mm screws, the USB port should be oriented to the right side
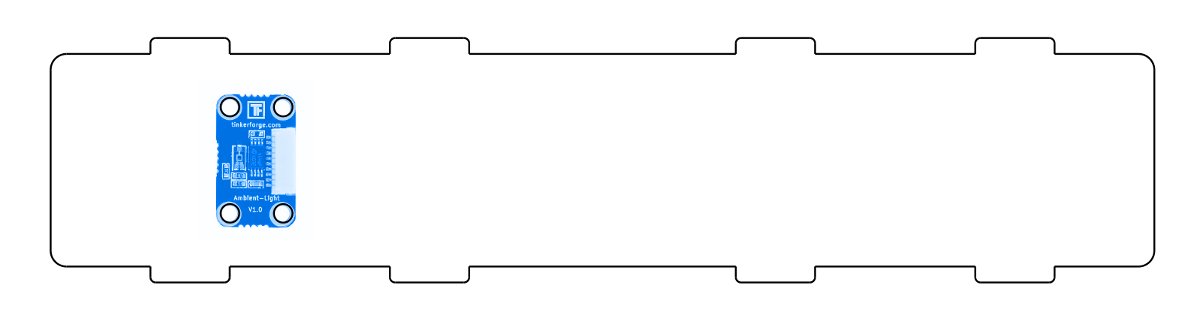
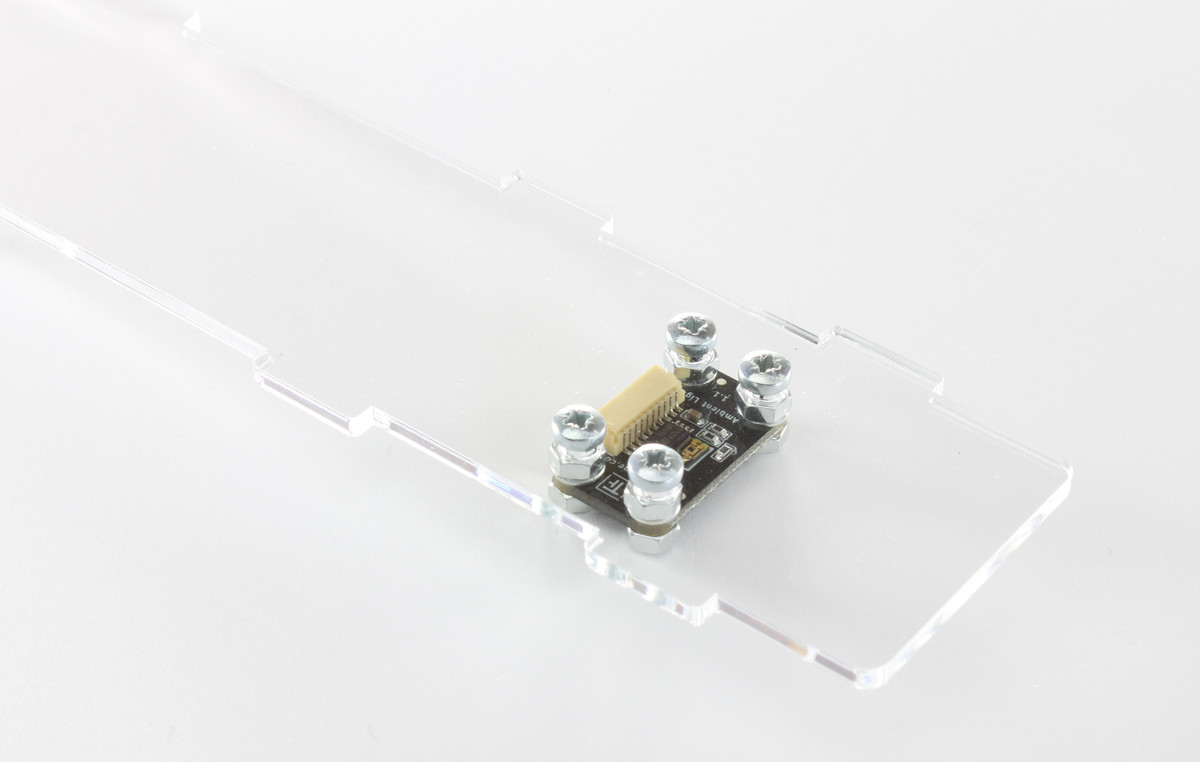
Ambient Light Bricklet on Top Side
At the next step the Ambient Light Bricklet has to be attached to the top side part of the case. To make sure that it picks up as little light as possible from the LCD backlight, it is screwed directly to the top side of the case:
4x: Put a 12mm screw from the outside through the case part and screw a washer and a nut from the other side against it
Screw the Ambient Light Bricklet, as depicted on the following image, with four nuts
If everything went as expected the Bricklet connector should have about 1mm space to the top side part. This way it is still easy to connect the Bricklet cable, and the sensor is at a good position to give useful measurements.
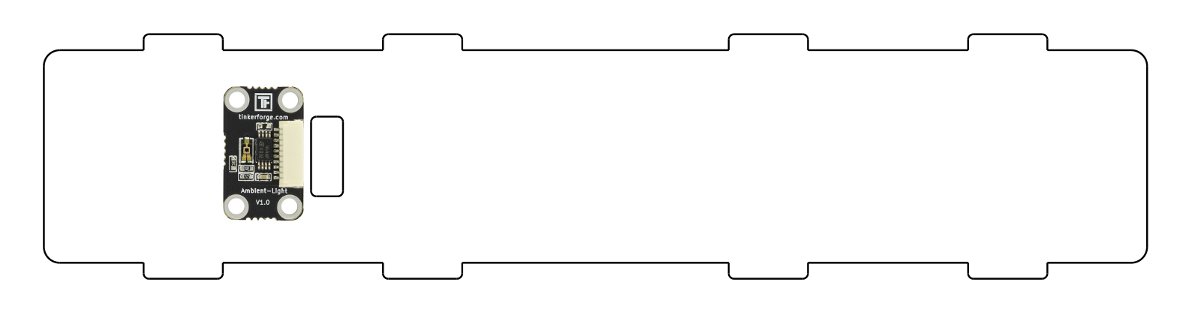
Alternative: In case of the black weather station, the Ambient Light Bricklet is mounted on top of the outside of the top side.
Humidity and Barometer Bricklet on Front Side
Humidity and Barometer Bricklet will be attached directly to the front side part of the case:
8x: Screw a 10mm spacer with a 5mm screw to the inside on the front side part
Mount the Barometer Bricklet with 5mm screws to the spacers
Mount the Humidity Bricklet with 5mm screws to the spacers
Attach the Bricklet cable to the Bricklets

This way there is enough space between the sensors and the case to allow good measurements. If you intend to attach something big on the bottom side, you can attach the Humidity and Barometer Bricklets the same way as the Ambient Light Bricklet to save space. The already attached Bricklet cables will make the installation of the LCD Bricklet in the next step more easy.
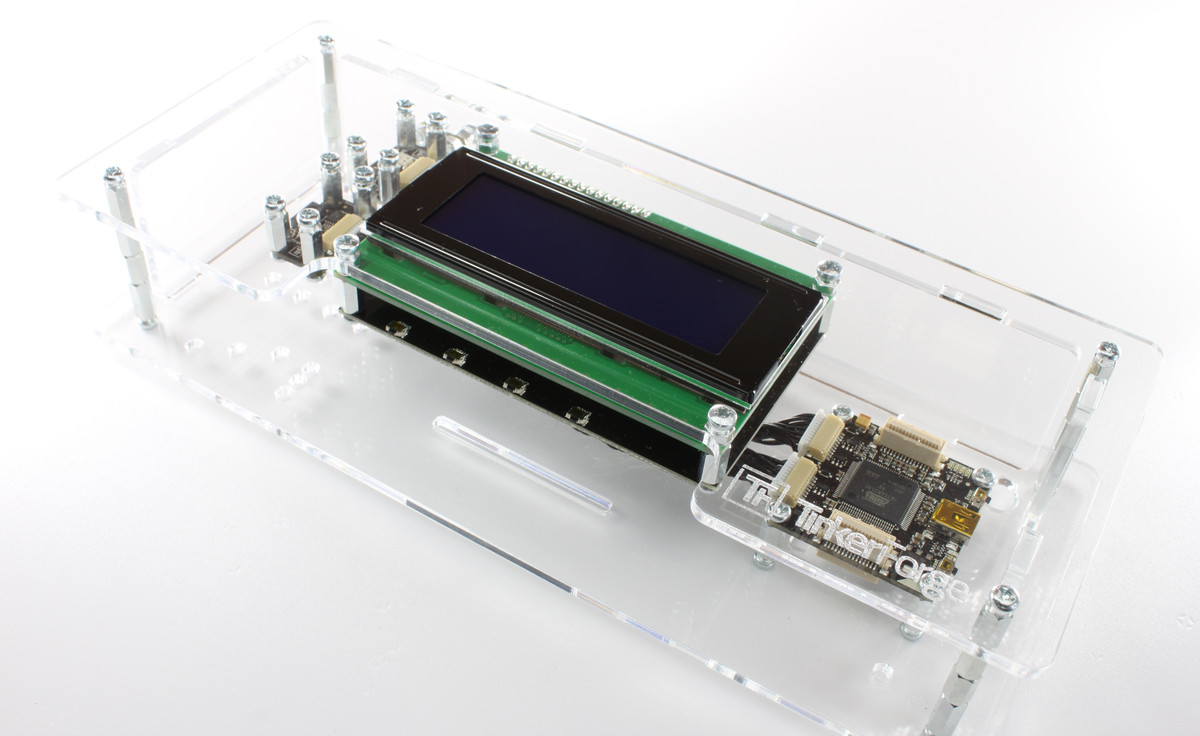
LCD 20x4 Bricklet on Front Side
Now we mount the LCD 20x4 Bricklet to the front side of the case:
4x: Put a 12mm screw from the outside through the case part and screw a washer and a nut from the other side against it
Put the LCD Display on the four screws such that the pin header is not next to the cut-out of the front side part
Fix the display with four 10mm spacers
Attach the LCD 20x4 Bricklet to the display
Fix it with four 5mm screws
At the end the buttons of the LCD Bricklet should be reachable through the cut-out of the front side.
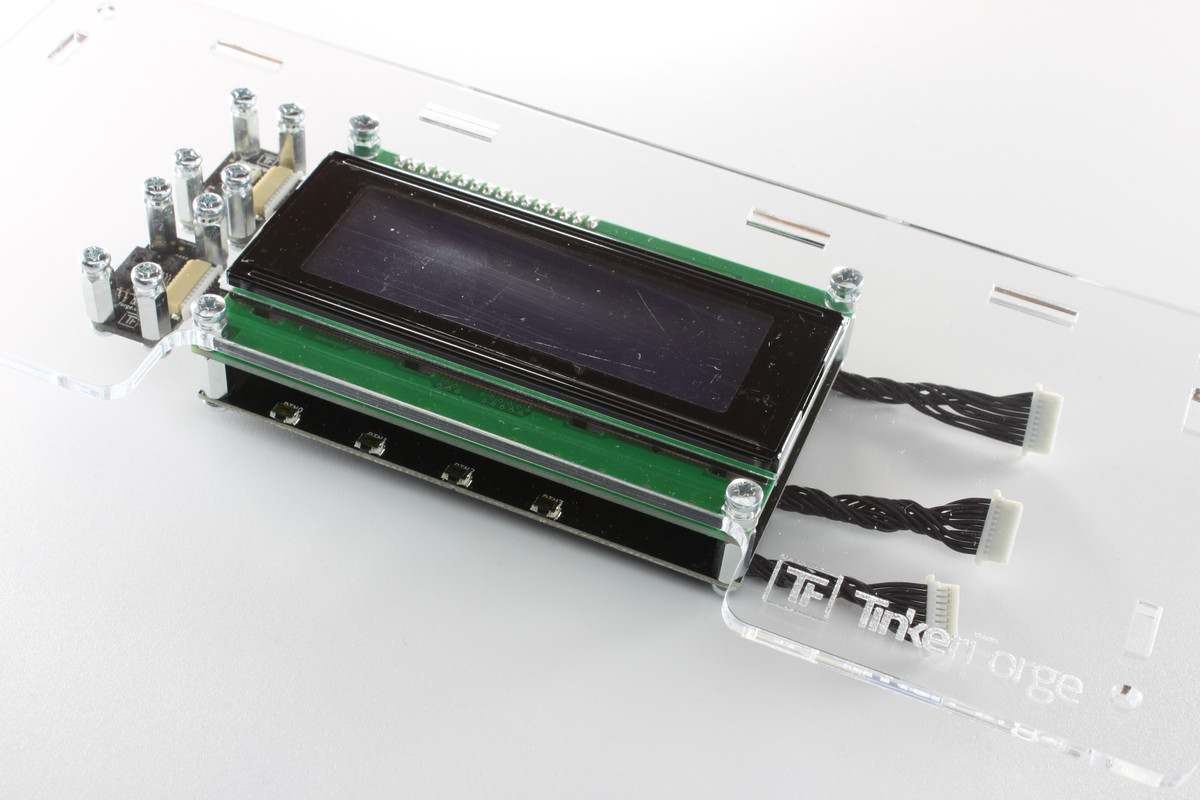
In this instruction the Bricklet cables are routed below the LCD 20x4 Bricklet, but it is also possible to route them between the two circuit boards of the LCD 20x4 Bricklet to hide them a little bit more.
Putting the Case together
In the last step the parts of the case are put together:
Put the top side part in the back side part
Connect the Ambient Light Bricklet with the Master Brick
Attach the side parts to the back side (1x left, 2x right)
4x: Construct spacer consisting of one 12mm, two 9mm and one 10mm spacer
4x: Mount these spacers on the back side part with 5mm screws

Connect the remaining Bricklets to the Master Brick. This can be done by lying the back and the front part side-by-side
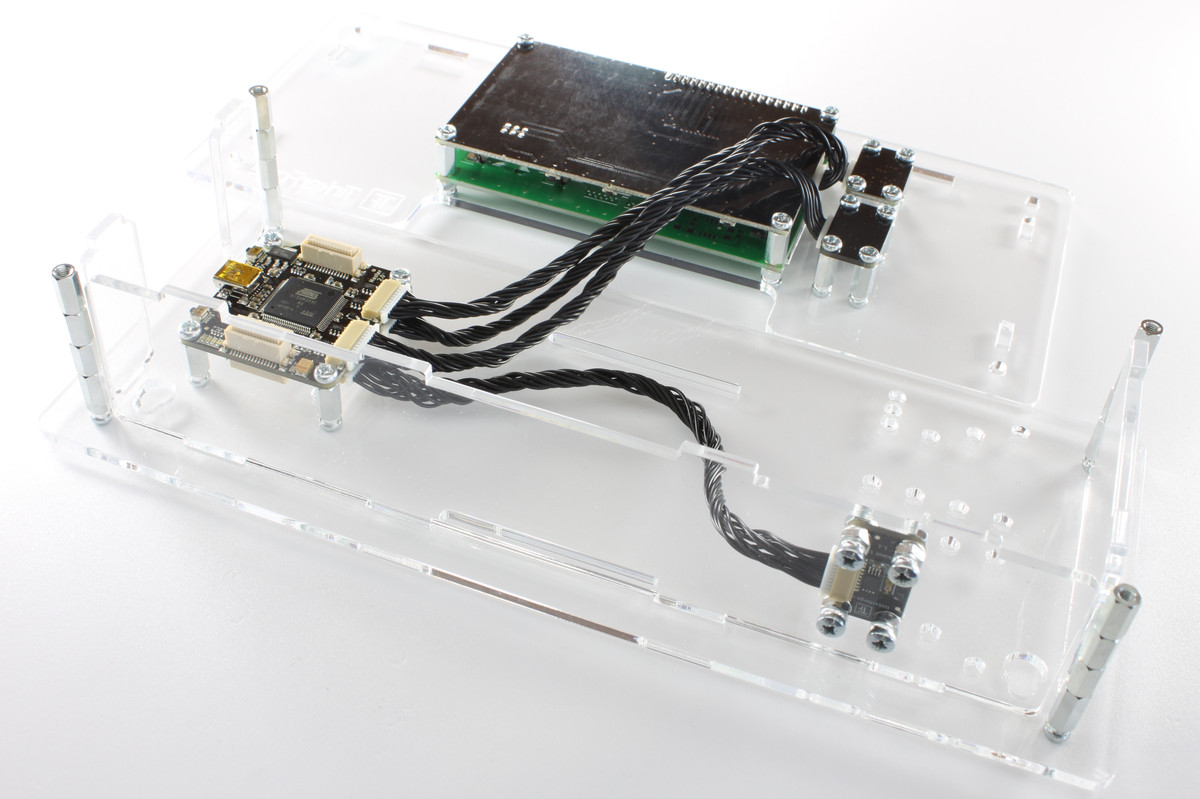
Assemble front- and back side part and fix them with four 5mm screws
That's it, we are done!