- Getting Started
- Hardware
- Software
- Kits
- Embedded Boards
- Specifications
Construction - Raspberry Pi Weather Station
It is possible to control the Weather Station with an embedded board such as the Raspberry Pi. You can put the Raspberry Pi in the case, despite it is a bit tricky to get everything in the case.
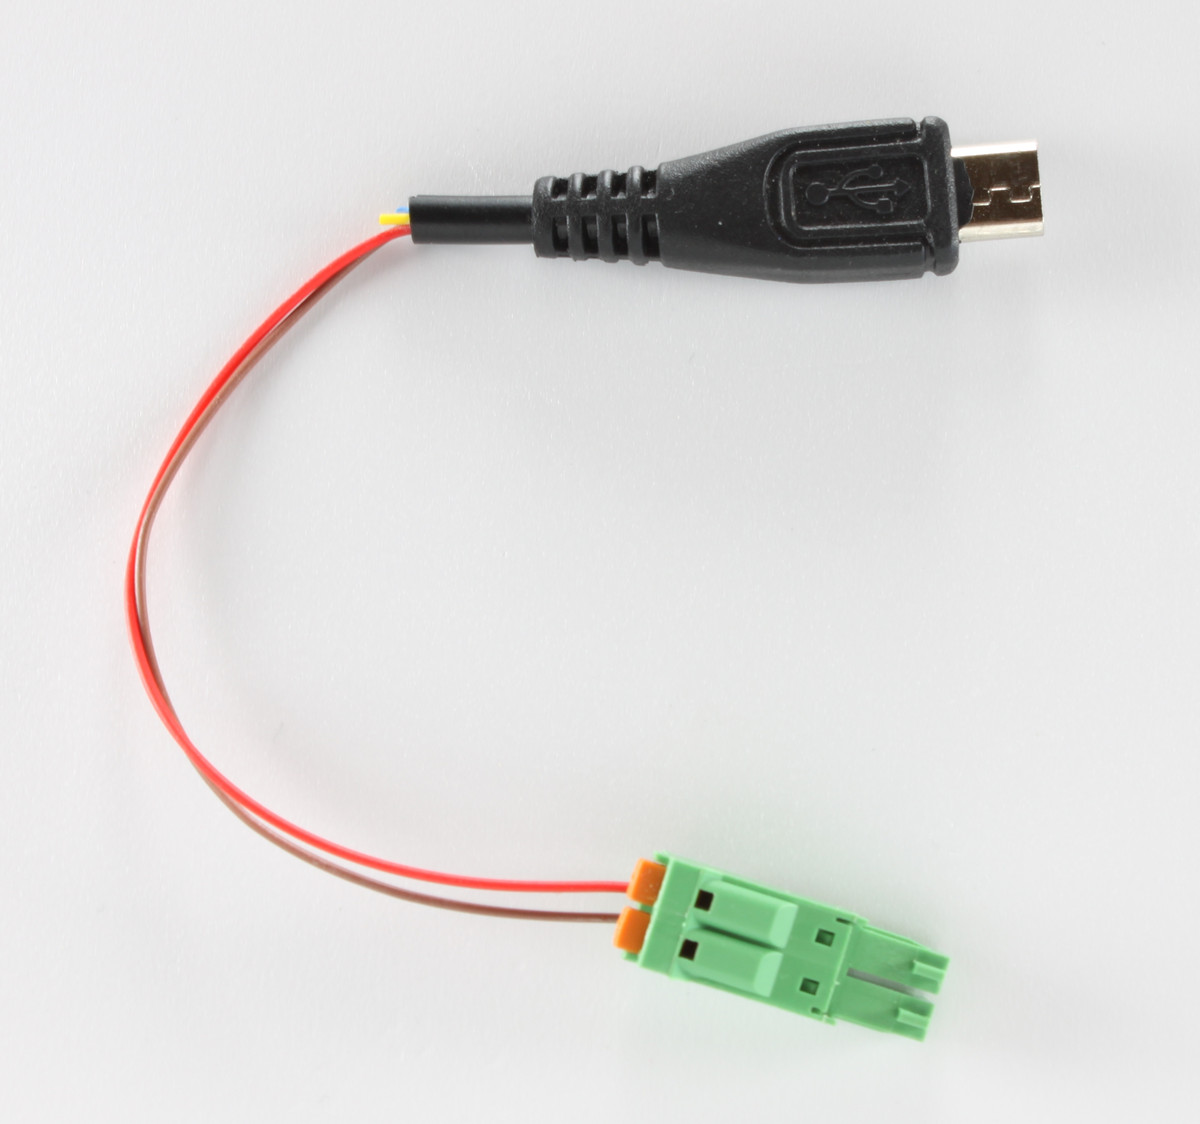
We will put a Master Brick, a Step-Down Power Supply, a DC Jack Adapter and the Raspberry Pi in the case. The Raspberry Pi (and the Master Brick) will be powered over the DC Jack Adapter by the Step-Down Power Supply. To power the Raspberry Pi we have used an Micro USB cable, removed the jack and connected the 5V and GND conductors with the 2 Pole Green Connector supplied with the Step-Down Power Supply (see the following image). Which are the 5V and GND conductors is well documented on the Internet.
The Raspberry Pi Weather Station is an extension of the basic version. You should build the basic version first and then modify it as described down below.
Stack and Raspberry Pi on Backside
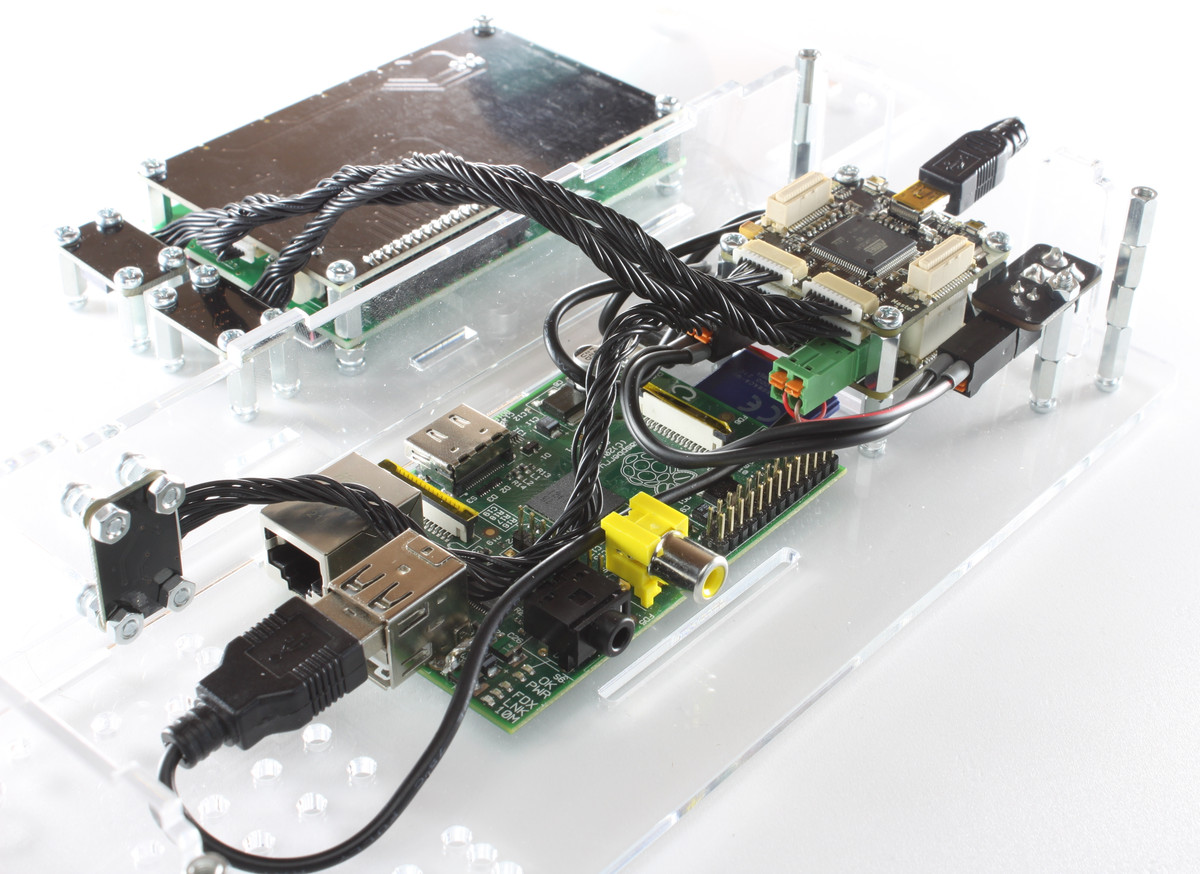
The Step-Down Power Supply (with Master Brick on top) is mounted on 10mm spacers. We can put the SD card below the Step-Down Power Supply, the Micro USB connector goes left from the Step-Down Power Supply spacers. There are slots in the back side of the case that can be used to hold the Raspberry Pi with cable ties.
The green 5V output of the Step-Down Power Supply is connected to the Micro USB input of the Raspberry Pi to power it. The black connector of the Step-Down Power Supply is connected to the DC Jack Adapter and the Mini USB connector of the Master Brick is connected to the USB connector of the Raspberry Pi by a small Mini USB cable.
How to mount the DC Jack Adapter in the case is described in the Wi-Fi Weather Station construction section.
From the back side we can see how the Raspberry Pi fits in.
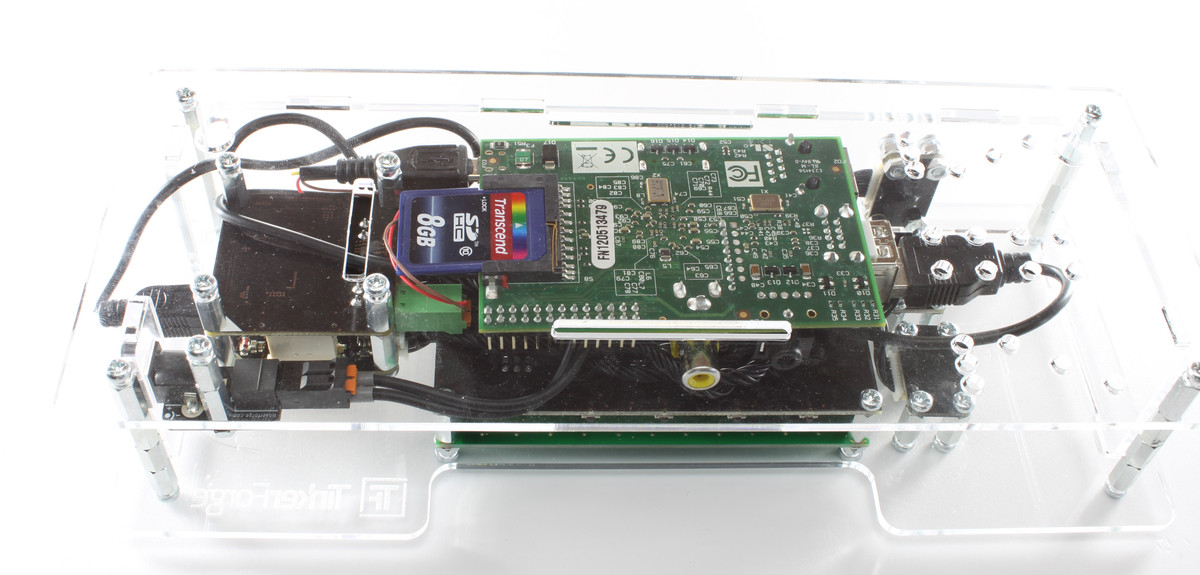
The way the Raspberry Pi is mounted in the images allows to easily connect an Ethernet cable to the Raspberry Pi. You can also mount the Raspberry Pi the other way around (turned 180°). Then you can use a smaller Mini USB cable, but the Ethernet port is obstructed.
Another possible mounting option is to put the Raspberry Pi on the outside of the back side of the case.