- Getting Started
- Hardware
- Software
- Brick Daemon (brickd)
- Brick Viewer (brickv)
- Brick Logger
- API Bindings
- ESP32 Firmware
- APT Repository
- Device Identifier
- Source Code and Bug Tracking
- Programming Interface
- Kits
- Embedded Boards
- Specifications
NetIO Controller App Setup
The NetIO Controller App in combination with the Shell bindings allows your smart phone to interact with Bricks and Bricklets. The NetIO App provides a flexible and online configurable GUI that can send and receive text commands, among other things. The Shell bindings act as a proxy between the NetIO text commands and the binary TCP/IP protocol used to communicate with Bricks and Bricklets.
Tinkerforge Side
As first step you should download the Shell bindings from the download section and test them. You'll also need the Brick Daemon if your Bricks are connected to USB.
Command Format
The Shell bindings can handle commands given on the command line or send over a TCP/IP connection. The command format is almost the same in both cases. For example, this command line:
$ tinkerforge call ambient-light-bricklet gxe get-illuminance
illuminance=721
has to be send over a TCP/IP connection as:
call ambient-light-bricklet gxe get-illuminance\n
Basically, strip tinkerforge from the front and append \n as command
terminator. NetIO has a commandTermination attribute with \n as default
value, so NetIO will take care of appending the final \n to the commands
for you.
The output sent over a TCP/IP connection is also terminated by \n:
illuminance=721\n
If the output contains multiple values then those are printed one value per line on the command line:
$ tinkerforge call dual-relay-bricklet fAa get-state
relay1=true
relay2=false
If they are send over a TCP/IP connection then \t is used as separator:
relay1=true\trelay2=false\n
Listen Command
The text protocol proxy is started by the listen
command of the Shell bindings:
$ tinkerforge listen
By default this will connect to the Brick Daemon on localhost. If you're
running brickd on a different computer or want to connect to a WIFI or Ethernet
Extension then you can use the --host and --port option:
$ tinkerforge --host different-computer --port 5000 listen
By default the listen command binds to port 4217. You can use the --port
option of the listen command to change this:
$ tinkerforge --host different-computer --port 5000 listen --port 6000
This will connect to different-computer on port 5000 and listen for
incoming connections on port 6000.
NetIO Side
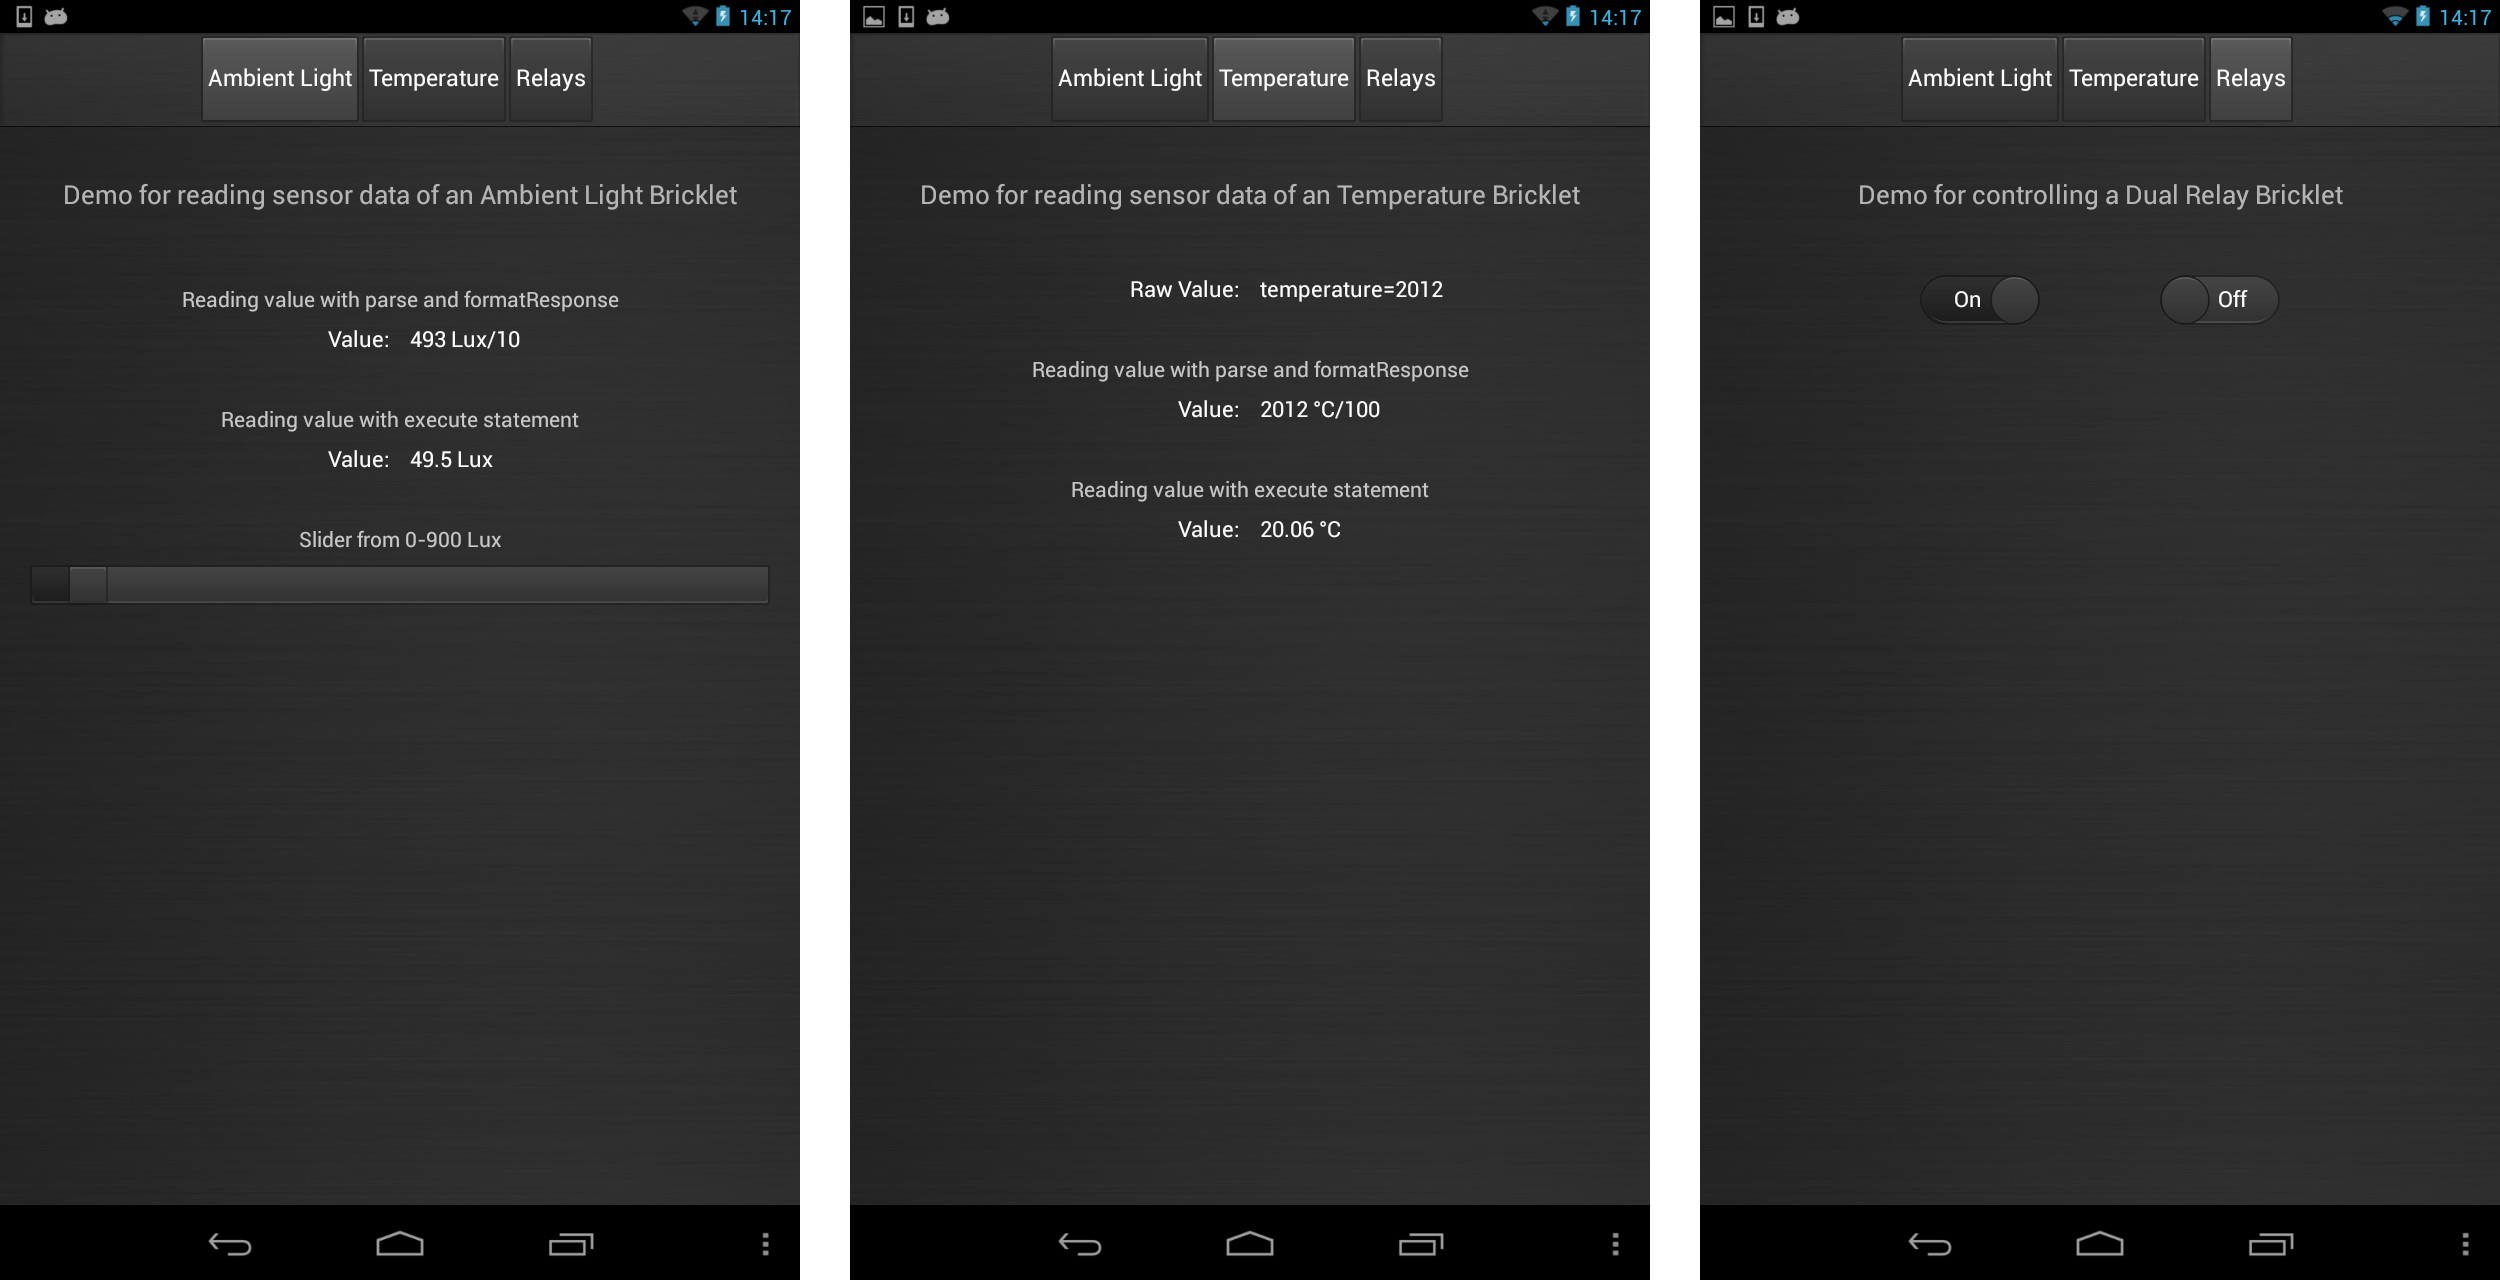
As starting point you can used this demo UI config (iPhone) or this demo UI config (Nexus 7). They demonstrate how to read the values of a Temperature Bricklet and an Ambient Light Bricklet and how to switch a Dual Relay Bricklet. See the API documentation for a complete command reference.
Both demos use advanced output formatting and require that you start the
tinkerforge listen command with the --enable-execute option. More
details about this in the section below.
Before you can use the demo UI configs you need to configure the connection
according to your setup. At least you need to change the host attribute to
the IP address or hostname of the computer on which you started the
tinkerforge listen --enable-execute command.
The Shell bindings require a connection with format set to string and
protocol set to socket. But those are the default values anyway.
As second step you need to figure out the UIDs of the Bricks and Bricklets you
want to interact with. You can use the
enumerate command of the Shell bindings for
this, or you can use the Brick Viewer instead.
Reading Values
To read out the temperature value of a Temperature Bricklet with UID dHd
you can just use a Label and set its reads attribute to:
call temperature-bricklet dHd get-temperature
This will show temperature=2168 as text in the Label. The parseResponse
attribute can be used just get the number part. Here's an example using
a positive lookbehind assertion for this:
(?<=temperature=)[^\n]+
This regular expression matches all characters between temperature= and the
next \n.
A simpler but less robust way to do this would be to just use \d+ to match
a number at any position in the response.
The formatResponse attribute can be used to append a unit to the output:
{0} °C/100
This will show 2168 °C/100 as text in the Label now. This reads a bit
clumsy due to the fact that the Temperature Bricklet reports its value in
°C/100 units.
The Shell bindings have the ability to fed the output of a command to an
arbitrary shell command line that can then take care of formatting the output
as desired. The --execute option is used for this. See the output
formatting section for more details. Because the
--execute option can be used to execute arbitrary shell command lines it is
disabled by default in listen mode. You have to enable it with the
--enable-execute option:
tinkerforge listen --enable-execute
To display the temperature in °C instead of °C/100 the value needs to be divided
by 100. This can be done with the bc command:
echo "scale=2; 2168/100" | bc
This command line prints 21.68 and requires a decent shell as typically
available on Linux and macOS, but not on Windows. So to do output formating
like this requires to run tinkerforge listen on Linux or macOS. Windows
will work too, but you have to work around the limitations of its command
prompt.
Setting the reads attribute of the Label to:
call temperature-bricklet dHd get-temperature --execute "echo scale=2\; {temperature}/100 | bc"
the parseResponse attribute to .* and formatResponse to {0} °C
then results in the desired text of 21.68 °C in the Label.
Triggering Actions
Beside reading sensor values you can also trigger actions such as switching a
Dual Relay Bricklet (its UID for this example is fAa).
A simple way to do this is using two Buttons. One to switch it on and
the other one to switch it off. The sends attribute of the On Button is set
to:
call dual-relay-bricklet fAa set-selected-state 1 true
and the sends attribute of the Off Button:
call dual-relay-bricklet fAa set-selected-state 1 false
This will control relay 1 on the Dual Relay Bricklet. To control relay 2 replace
1 with 2 in the commands.
Another way to do this is using a Switch element. That element has two sends
attributes and also has a reads attribute to read back the current status
of the relay and display it. There are several attributes that needs to be set
to make the Switch element work (in <attribute>: <value> format):
onSend:         call dual-relay-bricklet fAa set-selected-state 1 true
offSend:        call dual-relay-bricklet fAa set-selected-state 1 false
reads:          call dual-relay-bricklet fAa get-state
parseResponse:  (?<=relay1=)[^\t]+
formatResponse: {0}
onValue:        true
interval:       2000
The onSend and offSend attributes use the same commands as in the two
Button example above. The reads attribute is used to read back the current
state of the relay. The response looks like this:
relay1=true\trelay2=false\n
The parseResponse and formatResponse attributes are used to get
the state of relay 1 from the response, which is either true or false.
Finally the Switch element compares the result to its onValue attribute to
decide in which state it should display itself. This process is repeated in an
interval of 2 seconds.
To make this work for relay 2 replace 1 with 2 in the onSend and
offSend commands and change the parseResponse attribute to:
(?<=relay2=)[^\n]+
The demo UI configs contain two Switch elements that work this way.