IMU Brick 2.0
Features
Full fledged IMU/AHRS with 9 degrees of freedom (3-axis each: accelerometer, compass, gyroscope)
No accumulating errors, no gimbal lock!
Factory calibrated, automatic continuous self-calibration during operation
Calculates quaternions, linear acceleration, gravity vector as well as independent heading, roll and pitch angles
Directly readable by USB, extendable by two Bricklet ports
Description
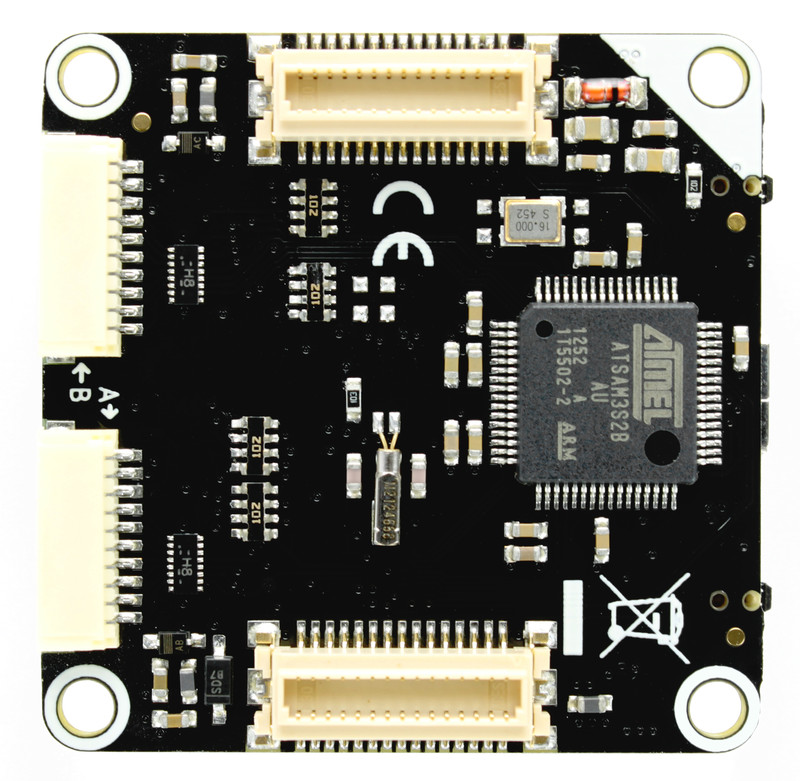
The IMU Brick 2.0 is the successor of the IMU Brick with higher resolution sensors, easier recalibration, additional continuous self-calibration and an accuracy increase by two orders of magnitude.
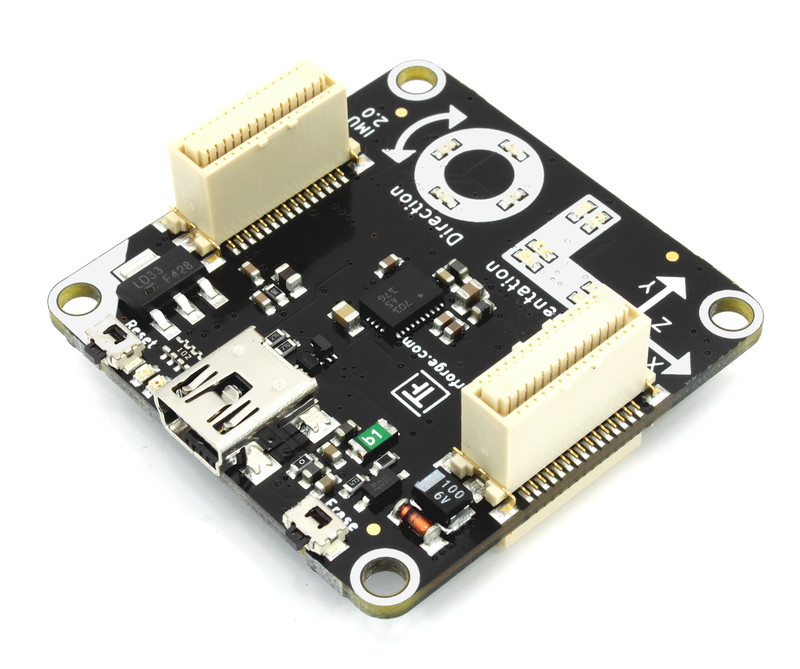
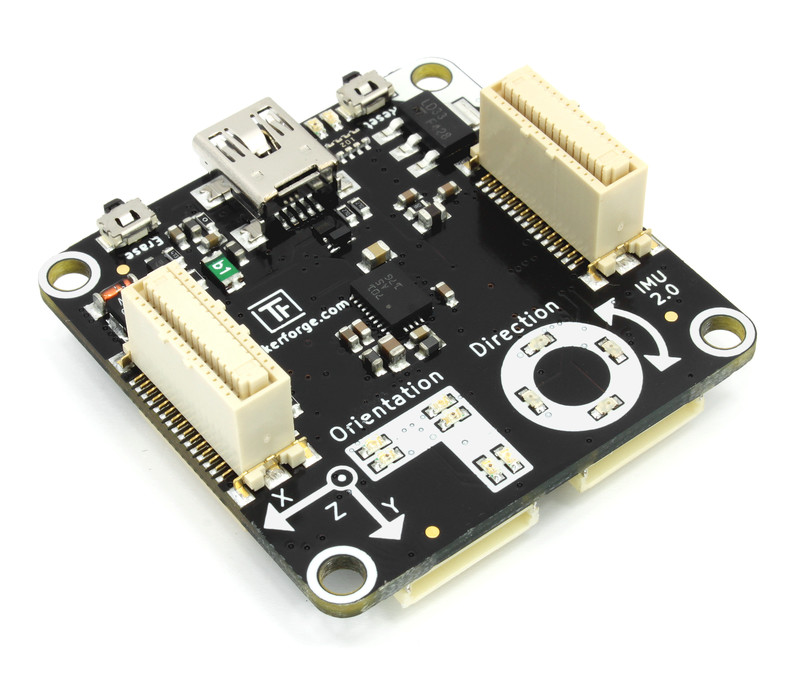
The IMU Brick 2.0 is equipped with a 3-axis accelerometer, magnetometer (compass) and gyroscope and works as a USB inertial measurement unit. It can measure 9 degrees of freedom and computes quaternions, linear acceleration, gravity vector as well as independent heading, roll and pitch angles. It is a complete attitude and heading reference system.
The API, provided for many programming languages, allows access to the calculated data and also the acceleration, magnetic field and angular velocity of the three axes. If the quaternion representation is used, the IMU Brick 2.0 does not have a gimbal lock, as known from Euler angles.
Two Bricklet ports can be used to extend the features of this Brick. For Example a GPS Bricklet can be attached to get position information.
The IMU Brick 2.0 can be use together with other Bricks in a stack. For example an additional Master Brick with Master Extension allows to replace the USB connection by other cable based (RS485, Ethernet) or wireless (WIFI) connections.
The IMU Brick 2.0 currently still uses 10-pole Bricklet connectors. You need 10p-7p Bricklet cables to connect Bricklets to it.
A comparison video between IMU Brick 1.0 and IMU Brick 2.0 is available on Youtube:
Technical Specifications
Property |
Value |
|---|---|
Acceleration, Magnetic, Angular Velocity Resolution |
14bit, 16bit, 16bit |
Heading, Roll, Pitch Resolution |
0.0625° steps |
Quaternion Resolution |
16bit |
Sampling Rate |
100Hz |
Bricklet Ports |
2 |
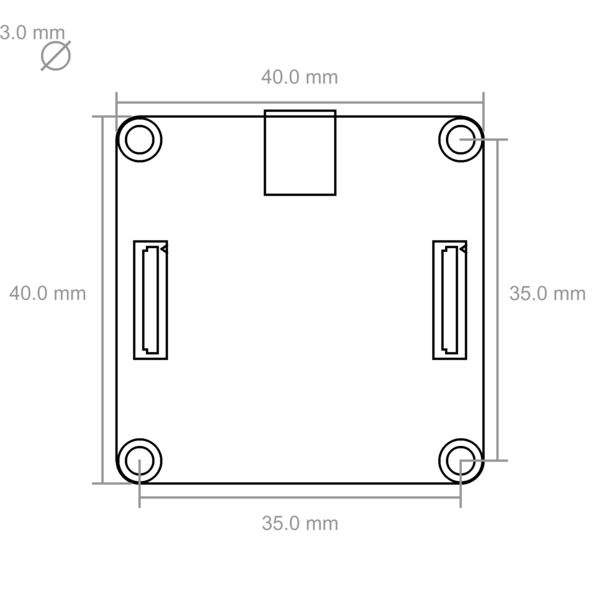
Dimensions (W x D x H) |
40 x 40 x 19mm (1.57 x 1.57 x 0.75") |
Weight |
12g |
Current Consumption |
415mW (83mA at 5V) |
Resources
Connectivity
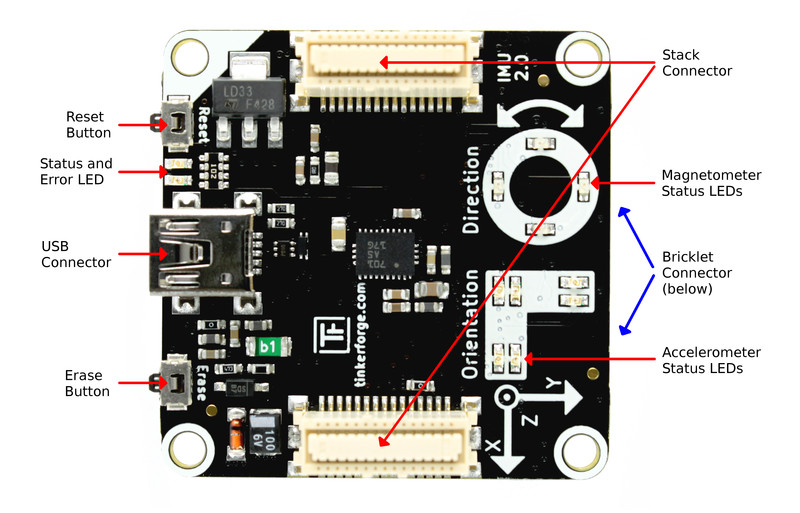
The following picture depicts the different connection possibilities of the IMU Brick 2.0.
Test your IMU Brick 2.0
To test a IMU Brick 2.0 you need to have Brick Daemon and Brick Viewer installed. Brick Daemon acts as a proxy between the USB interface of the Bricks and the API bindings. Brick Viewer connects to Brick Daemon. It helps to figure out basic information about the connected Bricks and Bricklets and allows to test them.
Now connect the Brick to the PC over USB, you should see a new tab named "IMU Brick 2.0" in the Brick Viewer after a moment. Select this tab.
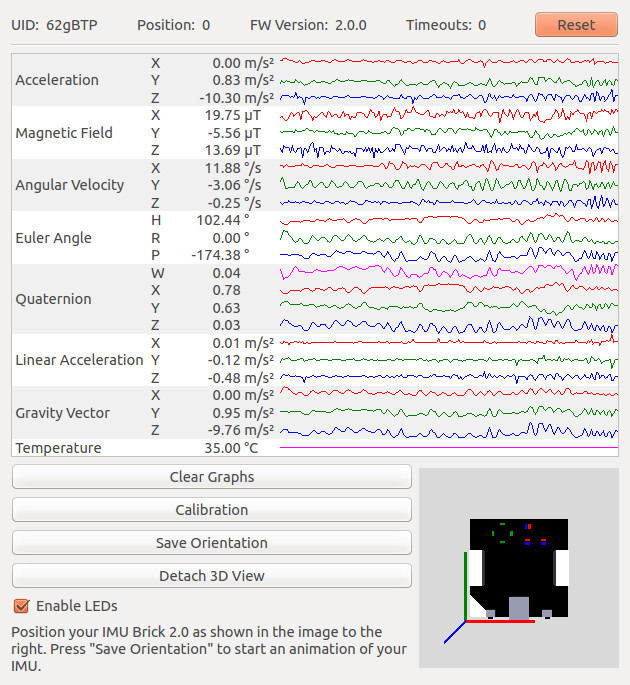
You can see all of the available data form the IMU Brick 2.0. If you hold the IMU Brick in the orientation as shown in the image and press "Save Orientation", the movements that you make with the IMU Brick should be mirrored in the Brick Viewer.
After this test you can go on with writing your own application. See the Programming Interface section for the API of the IMU Brick 2.0 and examples in different programming languages.
Calibration
The IMU Brick 2.0 does continuous self-calibration during usage. It is not necessary to start a specific manual calibration process. The IMU can store the calibration data to speed-up the self-calibration after each restart. This data is initialized at the factory.
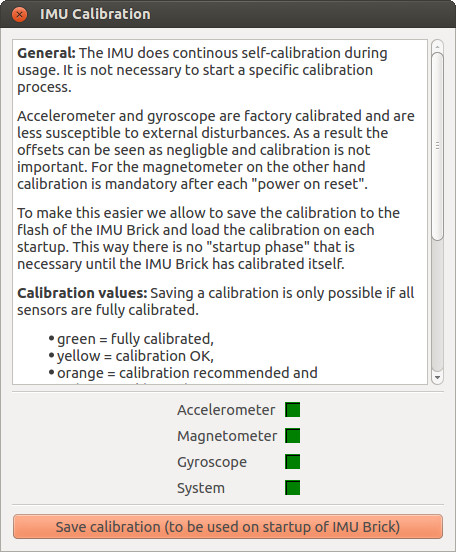
Click the "Calibration" button in Brick Viewer to see the current continuous self-calibration status. The dialog also allows to update the saved calibration data.
Programming Interface
See Programming Interface for a detailed description.
Language |
API |
Examples |
Installation |
|---|---|---|---|
C/C++ |
|||
C# |
|||
Delphi/Lazarus |
|||
Go |
|||
Java |
|||
JavaScript |
|||
LabVIEW |
|||
Mathematica |
|||
MATLAB/Octave |
|||
MQTT |
|||
openHAB |
|||
Perl |
|||
PHP |
|||
Python |
|||
Ruby |
|||
Rust |
|||
Shell |
|||
Visual Basic .NET |
|||
TCP/IP |
|||
Modbus |