- Getting Started
- Hardware
- Bricks
- Bricklets
- Accelerometer Bricklet 2.0
- Air Quality Bricklet
- Ambient Light Bricklet 3.0
- Analog In Bricklet 3.0
- Analog Out Bricklet 2.0
- Analog Out Bricklet 3.0
- Barometer Bricklet
- Barometer Bricklet 2.0
- Breakout Bricklet
- CAN Bricklet
- CAN Bricklet 2.0
- CO2 Bricklet 2.0
- Color Bricklet
- Color Bricklet 2.0
- Compass Bricklet
- DC Bricklet 2.0
- Distance IR Bricklet
- Distance IR Bricklet 2.0
- Distance US Bricklet 2.0
- DMX Bricklet
- Dual Button Bricklet 2.0
- Dust Detector Bricklet
- E-Paper 296x128 Bricklet
- Energy Monitor Bricklet
- GPS Bricklet 2.0
- GPS Bricklet 3.0
- Hall Effect Bricklet
- Hall Effect Bricklet 2.0
- Humidity Bricklet 2.0
- IMU Bricklet 3.0
- Industrial Analog Out Bricklet 2.0
- Industrial Counter Bricklet
- Industrial Digital In 4 Bricklet 2.0
- Industrial Digital Out 4 Bricklet
- Industrial Digital Out 4 Bricklet 2.0
- Industrial Dual 0-20mA Bricklet
- Industrial Dual 0-20mA Bricklet 2.0
- Industrial Dual AC Relay Bricklet
- Industrial Dual Analog In Bricklet 2.0
- Industrial Dual Relay Bricklet
- Industrial PTC Bricklet
- Industrial Quad Relay Bricklet 2.0
- IO-16 Bricklet
- IO-16 Bricklet 2.0
- IO-4 Bricklet 2.0
- Isolator Bricklet
- Joystick Bricklet
- Joystick Bricklet 2.0
- Laser Range Finder Bricklet 2.0
- LCD 128x64 Bricklet
- LCD 20x4 Bricklet
- LED Strip Bricklet 2.0
- Line Bricklet
- Linear Poti Bricklet
- Linear Poti Bricklet 2.0
- Load Cell Bricklet 2.0
- Motion Detector Bricklet 2.0
- Motorized Linear Poti Bricklet
- Multi Touch Bricklet
- Multi Touch Bricklet 2.0
- NFC Bricklet
- OLED 128x64 Bricklet 2.0
- OLED 64x48 Bricklet
- One Wire Bricklet
- Outdoor Weather Bricklet
- Particulate Matter Bricklet
- Performance DC Bricklet
- Piezo Speaker Bricklet
- Piezo Speaker Bricklet 2.0
- Real-Time Clock Bricklet
- Real-Time Clock Bricklet 2.0
- Remote Switch Bricklet 2.0
- RGB LED Bricklet 2.0
- RGB LED Button Bricklet
- Rotary Encoder Bricklet 2.0
- Rotary Poti Bricklet
- Rotary Poti Bricklet 2.0
- RS232 Bricklet
- RS232 Bricklet 2.0
- RS485 Bricklet
- Segment Display 4x7 Bricklet
- Segment Display 4x7 Bricklet 2.0
- Servo Bricklet 2.0
- Silent Stepper Bricklet 2.0
- Solid State Relay Bricklet 2.0
- Sound Intensity Bricklet
- Sound Pressure Level Bricklet
- Temperature Bricklet
- Temperature Bricklet 2.0
- Temperature IR Bricklet 2.0
- Thermal Imaging Bricklet
- Thermocouple Bricklet 2.0
- Tilt Bricklet
- UV Light Bricklet 2.0
- Voltage/Current Bricklet 2.0
- XMC1400 Breakout Bricklet
- Master Extensions
- Power Supplies
- Discontinued Products
- Timeline
- Software
- Kits
- Embedded Boards
- Specifications
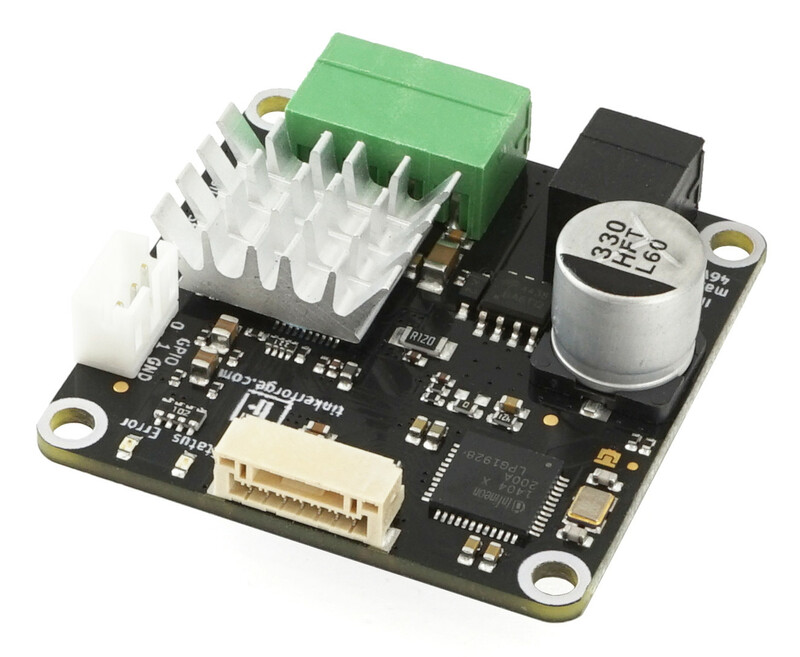
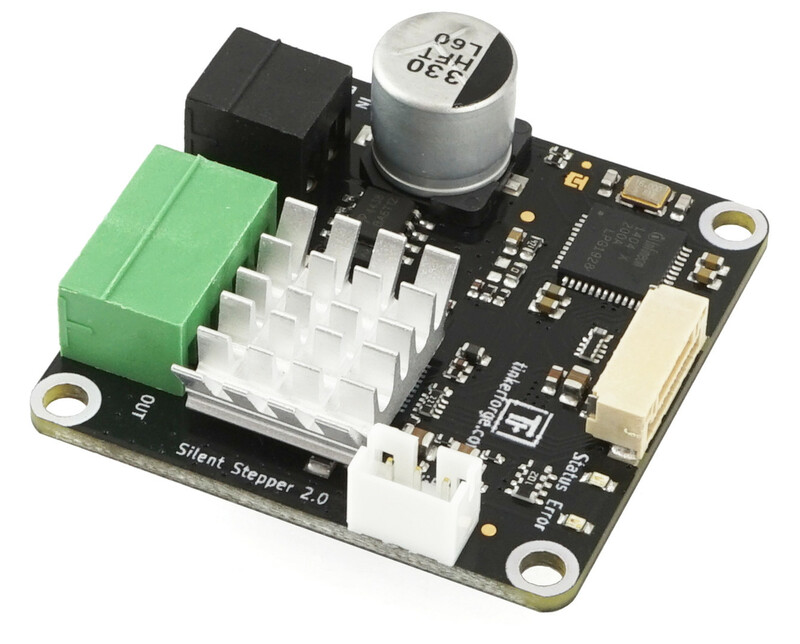
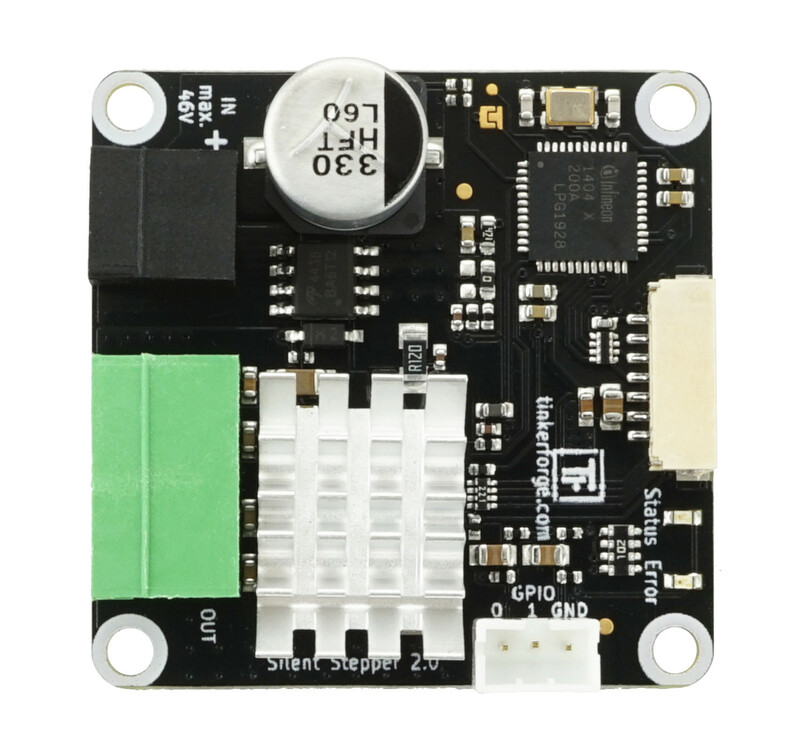
Silent Stepper Bricklet 2.0


Features
- Drives one bipolar stepper motor over USB (max. 46V, 1.6A per phase)
- Noiseless operation of stepper motors
- Position, velocity and acceleration controllable
- Stepper resolution from full-step to 1/256-step
- Two configurable GPIOs for end-stops or similar
Description
With the Silent Stepper Bricklet 2.0 one bipolar stepper motor with a maximum current of 1.6A and a maximum voltage of 46V per phase can be controlled. With the provided API for many programming languages you can control the direction, velocity and acceleration of the connected motor. Step modes of the motor can be chosen between full-step and 1/256-steps.
The stepper motor is powered by an external power supply connected directly to the Bricklet (black connector).
It is possible to run the Silent Stepper Bricklet 2.0 in a variety of different modes. The stepper motor can be driven completely noiseless (Stealth Mode), with smart energy optimizations (Coolstep Mode) or with maximized torque (Classic mode). The Silent Stepper Bricklet 2.0 can be configured to switch between these modes automatically dependent on motor velocity.
The Bricklet comes with two inputs that can be configured as end-stops.
Technical Specifications
| Property | Value |
|---|---|
| Current Consumption | 100mW (20mA at 5V) without stepper motor |
| Maximum Motor Current per Phase | 1.6A |
| Minimum/Maximum Input Voltage | 8V/46V |
| Step Resolution | 1, 1/2, 1/4, 1/8, 1/16, 1/32, 1/64, 1/128, 1/256 |
| Maximum Velocity | 0 to 65535, configurable as limit, in steps/s |
| Maximum Acceleration | 0 to 65535, configurable as limit, in steps/s² |
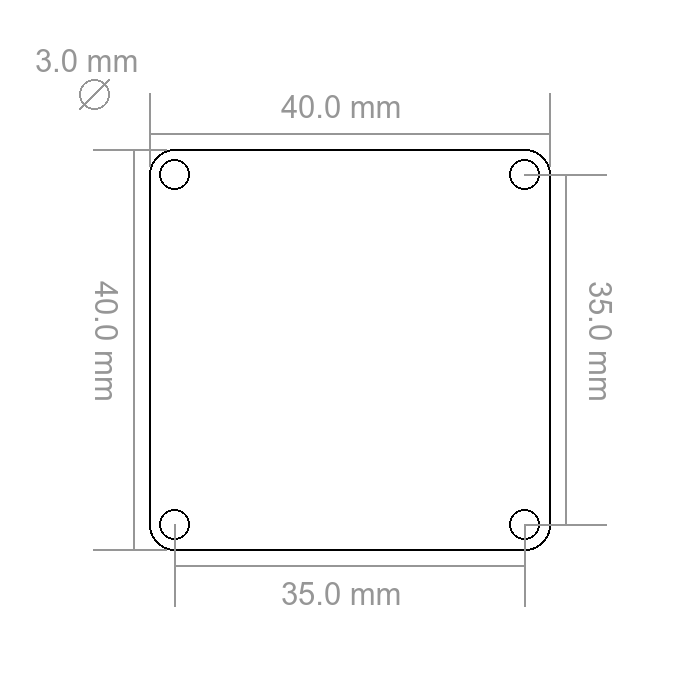
| Dimensions (W x D x H) | 40 x 40 x 15mm (1,57 x 1,57 x 0,59") |
| Weight | 12g |
Resources
Connectivity
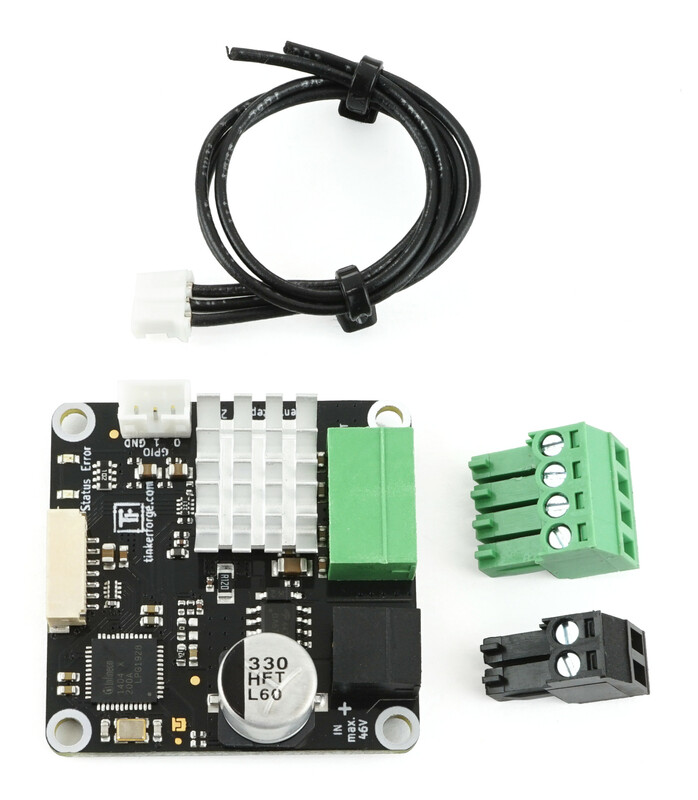
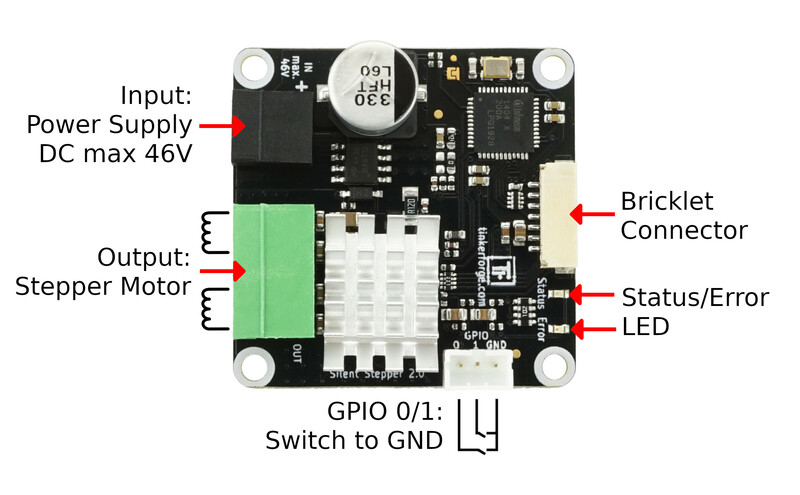
The following picture shows the different connection possibilities of the Silent Stepper Bricklet 2.0.
Test your Silent Stepper Bricklet 2.0
To test a Silent Stepper Bricklet 2.0 you need to have Brick Daemon and Brick Viewer installed. Brick Daemon acts as a proxy between the USB interface of the Bricks and the API bindings. Brick Viewer connects to Brick Daemon. It helps to figure out basic information about the connected Bricks and Bricklets and allows to test them.
Connect a stepper motor to the Brick and a suitable power supply (see here). Your setup should look like below.
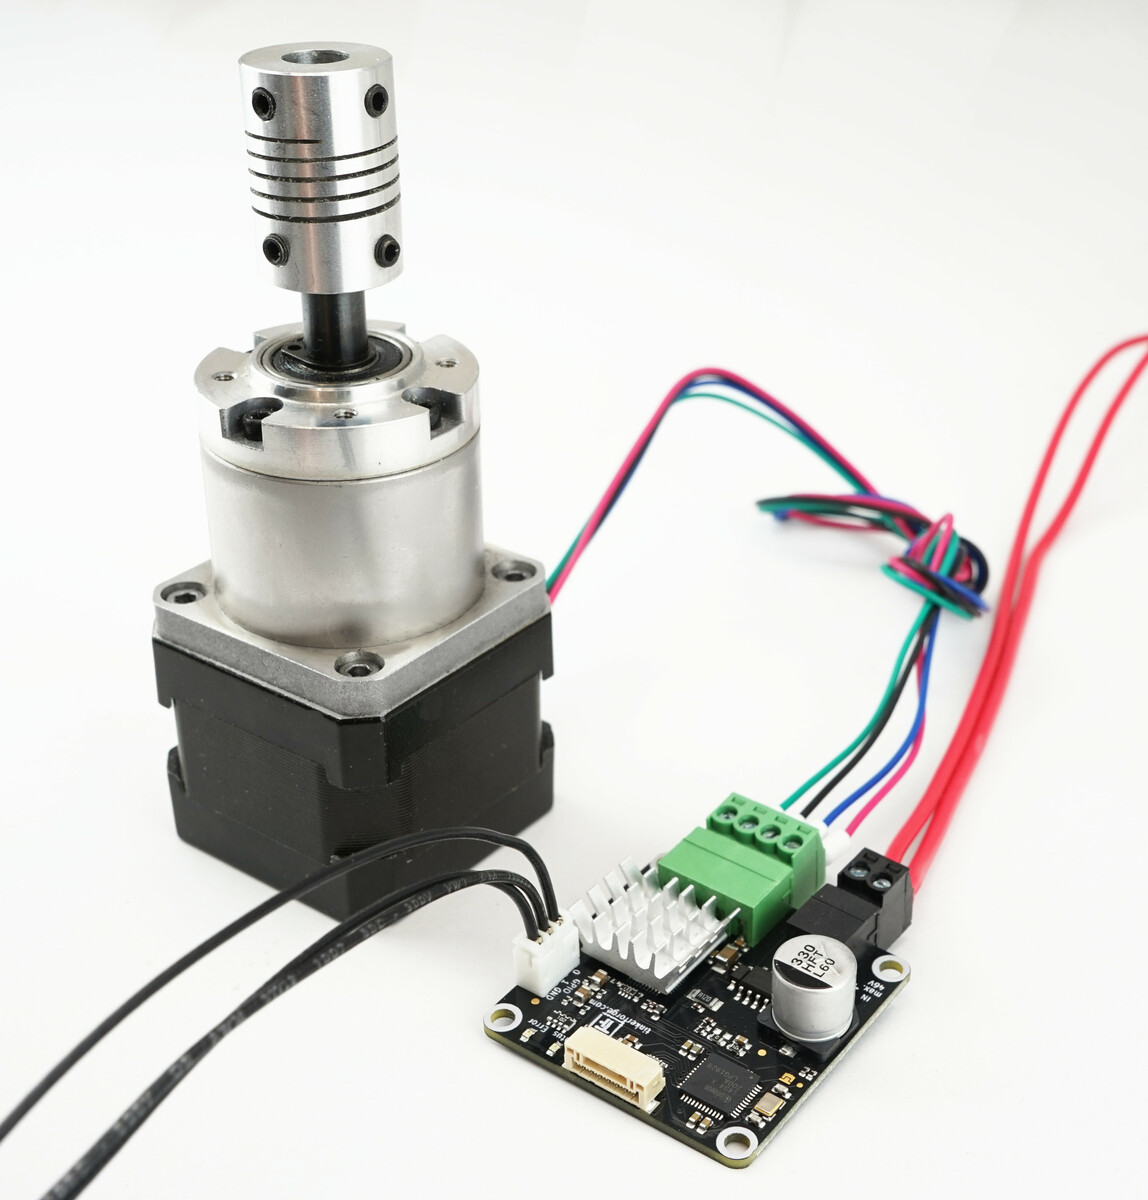
If you connect the Brick to the PC over USB, you should see a new tab named "Silent Stepper Bricklet 2.0" in the Brick Viewer after a moment. Select this tab.

In the left part of the GUI you can enable the driver and control the velocity, acceleration and deceleration of the stepper. Below there are three buttons that control the direction of the stepper and stop it. For example if you press "Forward", the stepper will increase its speed to "Max Velocity" with the given acceleration. If you press "Stop" it will decrease its speed to "0" with the given deceleration.
Below you can set the stepping modes (full- to 1/256-step) and trigger a "Full Brake", which stops the motor immediately.
You can drive to a specific position (measured in steps) by entering it at "Drive To" an press "Go". Also you can drive a specific number of steps. By using these controls the motor will accelerate until reaching the maximum velocity and decelerate before reaching the specified position.
On the right side the current position and remaining steps are shown as well as the stack voltage and the voltage of the external power-connector (black). Below is a graphical representation of the velocity of the stepper. Beneath you can configure the minimum input voltage, which allows for undervoltage signals if the voltage is too low. In the bottom right the motor current can be configured according to the connected motor.
At the very bottom all of the Basic, Stealth, Coolstep, Spreadcycle and Misc configurations can be set. The last tab shows the current status of the driver.
After this test you can go on with writing your own application. See the Programming Interface section for the API of the Silent Stepper Bricklet 2.0 and examples in different programming languages.
Error LED
The red error LED has four different states:
- Off: No error present.
- 250ms interval blink: Overtemperature warning.
- 1s interval blink: Input voltage too small.
- full red: motor disabled because of short to ground in phase a or b or because of overtemperature.
If an over-temperature or short to ground event occurs the motor will stop running and the driver will be turned off. You need to explicitely call the enable function to start the driver again.
Modes and their Features
Basic Configuration
In most applications you can keep all of the settings as default and only configure the basic configuration:
- Standstill Current: This value can be used to lower the current during stand still. This might be reasonable to reduce the heating of the motor and the Brick. When the motor is in standstill the configured motor phase current will be driven until the configured Power Down Time is elapsed. After that the phase current will be reduced to the standstill current. The elapsed time for this reduction can be configured with the Standstill Delay Time. The unit is in mA and the maximum allowed value is the configured maximum motor current.
- Motor Run Current: The value sets the motor current when the motor is running. Use a value of at least one half of the global maximum motor current for a good microstep performance. The unit is in mA and the maximum allowed value is the current motor current. The API maps the entered value to 1/32 ... 32/32 of the maximum motor current. This value should be used to change the motor current during motor movement, whereas the global maximum motor current should not be changed while the motor is moving.
- Standstill Delay Time: Controls the duration for motor power down after a motion as soon as standstill is detected and the Power Down Time is expired. A high Standstill Delay Time results in a smooth transition that avoids motor jerk during power down. The value range is 0 to 307ms
- Power Down Time: Sets the delay time after a stand still. The value range is 0 to 5222ms.
- Stealth Threshold: Sets the upper threshold for stealth mode in steps/s. The value range is 0-65536 steps/s. If the velocity of the motor goes above this value, stealth mode is turned off. Otherwise it is turned on. In stealth mode the torque declines with high speed.
- Coolstep Threshold: Sets the lower threshold for Coolstep mode in steps/s. The value range is 0-65536 steps/s. The Coolstep Threshold needs to be above the Stealth Threshold.
- Classic Threshold: Sets the lower threshold for Classic mode. The value range is 0-65536 steps/s. In classic mode the stepper becomes more noisy, but the torque is maximized.
- High Velocity Shopper Mode: If High Velocity Shopper Mode is enabled, the stepper control is optimized to run the stepper motors at high velocities.
Stealth Mode
In stealth mode the stepper motor is driven quietly and with little vibrations. The mode is usable for low and medium velocities.
Coolstep Mode
In Coolstep mode the stepper motor is driven with smart energy optimizations. In applications with varying loads, the power consumption is automatically reduced during low load times. This means that less heat is generated and less cooling is necessary.
Classic Mode
In Classic mode Stealth and Coolstep are disabled. The stepper motor is driven without any of the advanced features, but in return the torque is maximized.
Spreadcycle
Spreadcycle is a cycle-by-cycle current control. It has a fast reaction time to changes in velocity and motor load. It can be used together with Coolstep mode.
Stallguard
Stallguard can be used to measure motor load and for stall detection. In Coolstep mode the measurement is used internally to adjust the motor current to the load.
Help! I don't understand half of the words
The used TMC2130 is a powerful stepper motor driver. Unfortunately this comes with lots of modes, features and configuration possibilities. In our experience, you can leave all of the configurations but the Basic Configurations (first tab in Brick Viewer) as default. We did choose sane default values for all of the configurations.
If you want to understand all of the features in detail and the description in this documentation is not enough, you can take a look at the TMC2130 datasheet.
For convenience, we provide a table that shows which API function parameters changes what TMC2130 register.
| Function | Parameter | Register Name @Address[bits] | Note |
|---|---|---|---|
| SetBasicConfiguration | Standstill Current | ihold @0x10[4..0] | Value is converted to 0-31 |
| Motor Run Current | irun @0x10[12..8] | Value is converted to 0-31 | |
| Standstill Delay Time | iholddelay @0x10[19..16] | Value is converted to 2^18 clock cycles | |
| Power Down Time | tpowerdown @0x11 | Value is converted to 2^18 clock cycles | |
| Stealth Threshold | tpwmthrs @0x13 | Value is converted to time between two steps | |
| Coolstep Threshold | tcoolthrs @0x14 | Value is converted to time between two steps | |
| Classic Threshold | thigh @0x15 | Value is converted to time between two steps | |
| High Velocity Chopper Mode | vhighchm @0x6C[19] | ||
| SetSpreadcycleConfiguration | Slow Decay Duration | toff @0x6C[3..0] | |
| Enable Random Slow Decay | rndtf @0x6C[13] | ||
| Fast Decay Duration | fd3/hstrt @0x6C[11/6..4] | Used if chm=1, otherwise ignored | |
| Hysteresis Start Value | hstrt @0x6C[6..4] | Used if chm=0, otherwise ignored | |
| Hysteresis End Value | hend @0x6C[10..7] | Used if chm=0, otherwise ignored | |
| Sinewave Offset | hend @0x6C[10..7] | Used if chm=1, otherwise ignored | |
| Chopper Mode | chm @0x6C[14] | ||
| Comperator Blank Time | tbl @0x6C[16..15] | ||
| Fast Decay Without Comparator | disfdcc @0x6C[12] | ||
| SetStealthConfiguration | Enable Stealth | en_pwm_mode @0x00[2] | |
| Amplitude | pwm_ampl @0x70[7..0] | ||
| Gradient | pwm_grad @0x70[15..8] | ||
| Enable Autoscale | pwm_autoscale @0x70[18] | ||
| Force Symmetric | pwm_symmetric @0x70[19] | ||
| Freewheel Mode | freewheel @0x70[21..20] | ||
| SetCoolstepConfiguration | Minimum Stallguard Value | semin @0x6D[3..0] | |
| Maximum Stallguard Value | semax @0x6D[11..8] | ||
| Current Up Step Width | seup @0x6D[7..4] | ||
| Current Down Step Width | sedn @0x6D[14..13] | ||
| Minimum Current | seimin @0x6D[15] | ||
| Stallguard Threshold Value | sgt @0x6D[22..16] | ||
| Stallguard Mode | sfilt 0x6D@[24] | ||
| SetMiscConfiguration | Disable Short To Ground Protection | diss2g @0x6C[30] | |
| Synchronize Phase Frequency | sync @0x6C[23..20] |
Case
TODO
Programming Interface
See Programming Interface for a detailed description.
| Language | API | Examples | Installation |
|---|---|---|---|
| C/C++ | API | Examples | Installation |
| C/C++ for Microcontrollers | API | Examples | Installation |
| C# | API | Examples | Installation |
| Delphi/Lazarus | API | Examples | Installation |
| Go | API | Examples | Installation |
| Java | API | Examples | Installation |
| JavaScript | API | Examples | Installation |
| LabVIEW | API | Installation | |
| Mathematica | API | Examples | Installation |
| MATLAB/Octave | API | Examples | Installation |
| MQTT | API | Examples | Installation |
| Perl | API | Examples | Installation |
| PHP | API | Examples | Installation |
| Python | API | Examples | Installation |
| Ruby | API | Examples | Installation |
| Rust | API | Examples | Installation |
| Shell | API | Examples | Installation |
| Visual Basic .NET | API | Examples | Installation |
| TCP/IP | API | ||
| Modbus | API |