- Getting Started
- Hardware
- Bricks
- Bricklets
- Accelerometer Bricklet 2.0
- Air Quality Bricklet
- Ambient Light Bricklet 3.0
- Analog In Bricklet 3.0
- Analog Out Bricklet 2.0
- Analog Out Bricklet 3.0
- Barometer Bricklet
- Barometer Bricklet 2.0
- Breakout Bricklet
- CAN Bricklet
- CAN Bricklet 2.0
- CO2 Bricklet 2.0
- Color Bricklet
- Color Bricklet 2.0
- Compass Bricklet
- DC Bricklet 2.0
- Distance IR Bricklet
- Distance IR Bricklet 2.0
- Distance US Bricklet 2.0
- DMX Bricklet
- Dual Button Bricklet 2.0
- Dust Detector Bricklet
- E-Paper 296x128 Bricklet
- Energy Monitor Bricklet
- GPS Bricklet 2.0
- GPS Bricklet 3.0
- Hall Effect Bricklet
- Hall Effect Bricklet 2.0
- Humidity Bricklet 2.0
- IMU Bricklet 3.0
- Industrial Analog Out Bricklet 2.0
- Industrial Counter Bricklet
- Industrial Digital In 4 Bricklet 2.0
- Industrial Digital Out 4 Bricklet
- Industrial Digital Out 4 Bricklet 2.0
- Industrial Dual 0-20mA Bricklet
- Industrial Dual 0-20mA Bricklet 2.0
- Industrial Dual AC Relay Bricklet
- Industrial Dual Analog In Bricklet 2.0
- Industrial Dual Relay Bricklet
- Industrial PTC Bricklet
- Industrial Quad Relay Bricklet 2.0
- IO-16 Bricklet
- IO-16 Bricklet 2.0
- IO-4 Bricklet 2.0
- Isolator Bricklet
- Joystick Bricklet
- Joystick Bricklet 2.0
- Laser Range Finder Bricklet 2.0
- LCD 128x64 Bricklet
- LCD 20x4 Bricklet
- LED Strip Bricklet 2.0
- Line Bricklet
- Linear Poti Bricklet
- Linear Poti Bricklet 2.0
- Load Cell Bricklet 2.0
- Motion Detector Bricklet 2.0
- Motorized Linear Poti Bricklet
- Multi Touch Bricklet
- Multi Touch Bricklet 2.0
- NFC Bricklet
- OLED 128x64 Bricklet 2.0
- OLED 64x48 Bricklet
- One Wire Bricklet
- Outdoor Weather Bricklet
- Particulate Matter Bricklet
- Performance DC Bricklet
- Piezo Speaker Bricklet
- Piezo Speaker Bricklet 2.0
- Real-Time Clock Bricklet
- Real-Time Clock Bricklet 2.0
- Remote Switch Bricklet 2.0
- RGB LED Bricklet 2.0
- RGB LED Button Bricklet
- Rotary Encoder Bricklet 2.0
- Rotary Poti Bricklet
- Rotary Poti Bricklet 2.0
- RS232 Bricklet
- RS232 Bricklet 2.0
- RS485 Bricklet
- Segment Display 4x7 Bricklet
- Segment Display 4x7 Bricklet 2.0
- Servo Bricklet 2.0
- Silent Stepper Bricklet 2.0
- Solid State Relay Bricklet 2.0
- Sound Intensity Bricklet
- Sound Pressure Level Bricklet
- Temperature Bricklet
- Temperature Bricklet 2.0
- Temperature IR Bricklet 2.0
- Thermal Imaging Bricklet
- Thermocouple Bricklet 2.0
- Tilt Bricklet
- UV Light Bricklet 2.0
- Voltage/Current Bricklet 2.0
- XMC1400 Breakout Bricklet
- Master Extensions
- Power Supplies
- Discontinued Products
- Timeline
- Software
- Kits
- Embedded Boards
- Specifications
DC Bricklet 2.0
Features
- Controls one brushed DC motor with max. 28V and 5A (peak) over USB
- API for many programming languages available
- Direction, velocity and acceleration controllable
- Configurable overtemperature and overcurrent callbacks
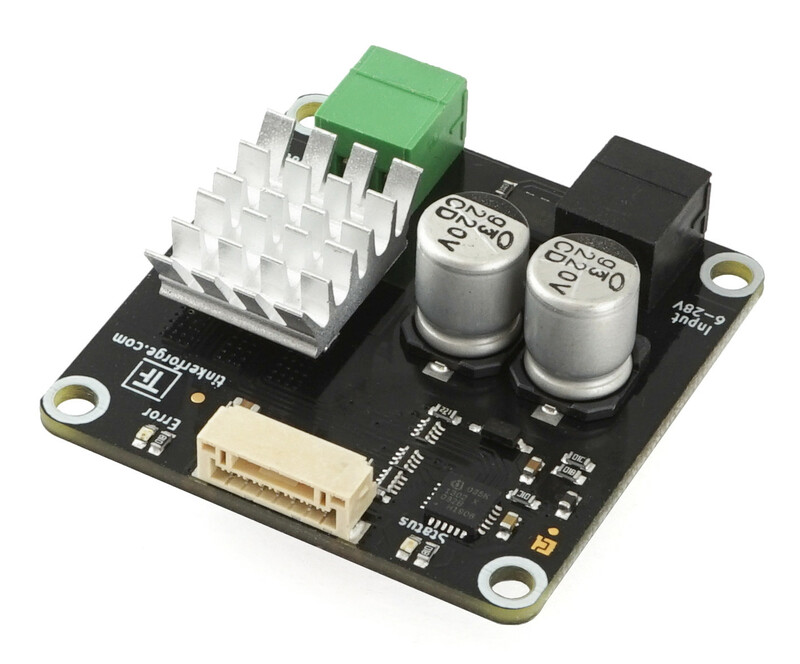
Description
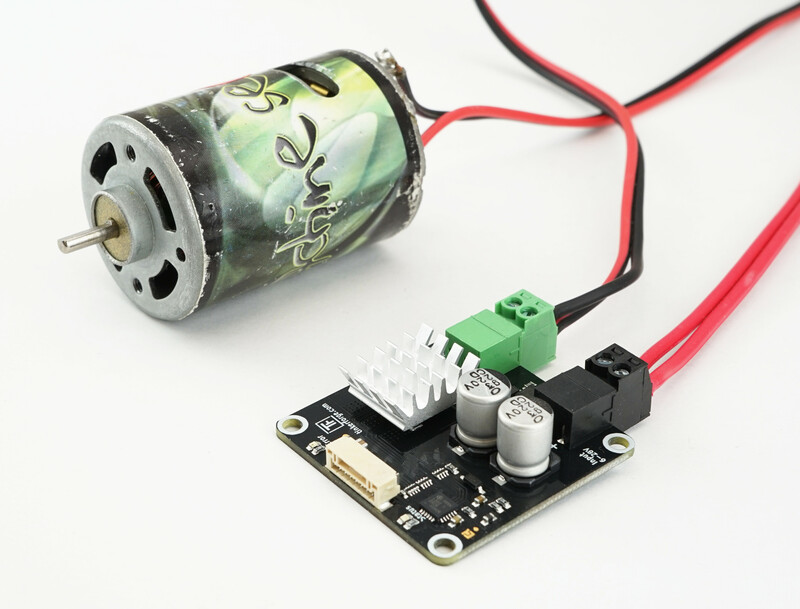
With the DC Bricklet 2.0 you are able to control one DC brushed motor (max. 28V and 5A (peak)) over USB. With the provided API for many programming languages you can control the direction, velocity and acceleration of the connected motor.
Besides methods to control the connected motor the API provide the possibility to measure current consumption and the voltage of the power supply. In case of overtemperature and overcurrent callbacks can be triggered. These can be used to react properly in your own program to these events.
The drive mode can be switched between Drive/Brake and Drive/Coast (see Drive Modes).
Technical Specifications
| Property | Value |
|---|---|
| Current Consumption | 50mW (10mA at 5V) without motor |
| Maximum Motor Current | Peak: 5A
Continous: > 3A (depends on cooling)
|
| Minimum/Maximum Input Voltage | 6V/28V |
| PWM Frequency | Configurable, 1-20kHz, default 15kHz |
| Velocity | -32767 to 32767, full reverse to full forward, 0=stop |
| Acceleration | 0 to 65535, velocity/s, increment for velocity/s |
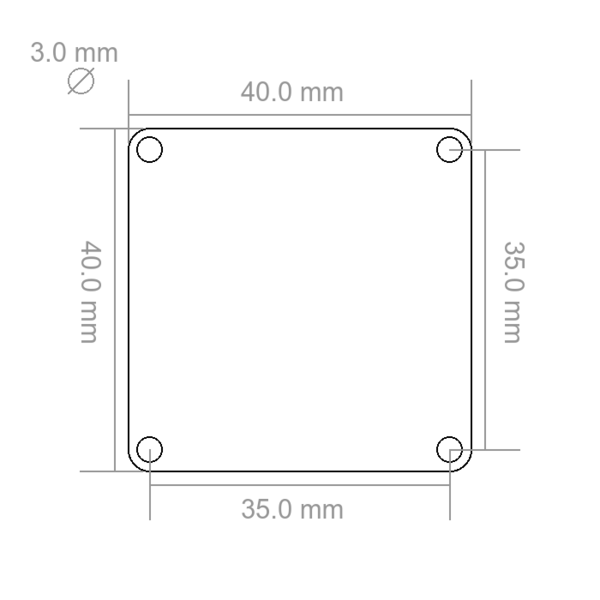
| Dimensions (W x D x H) | 40 x 40 x 15mm (1,57 x 1,57 x 0,59") |
| Weight | 12g |
Resources
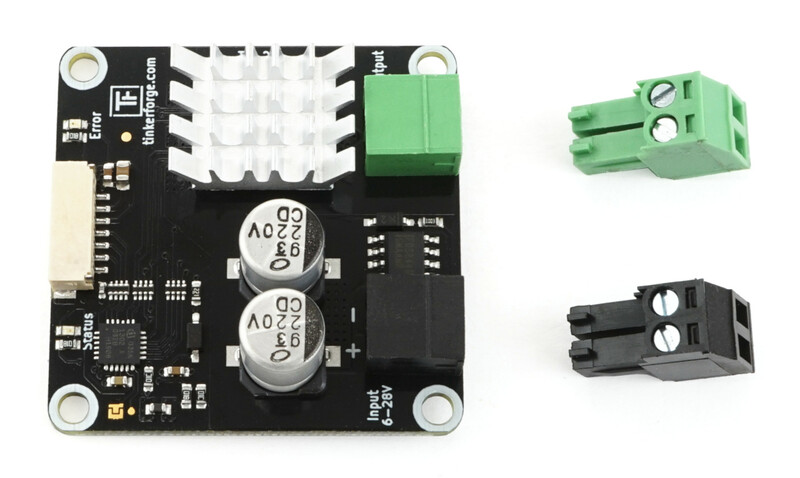
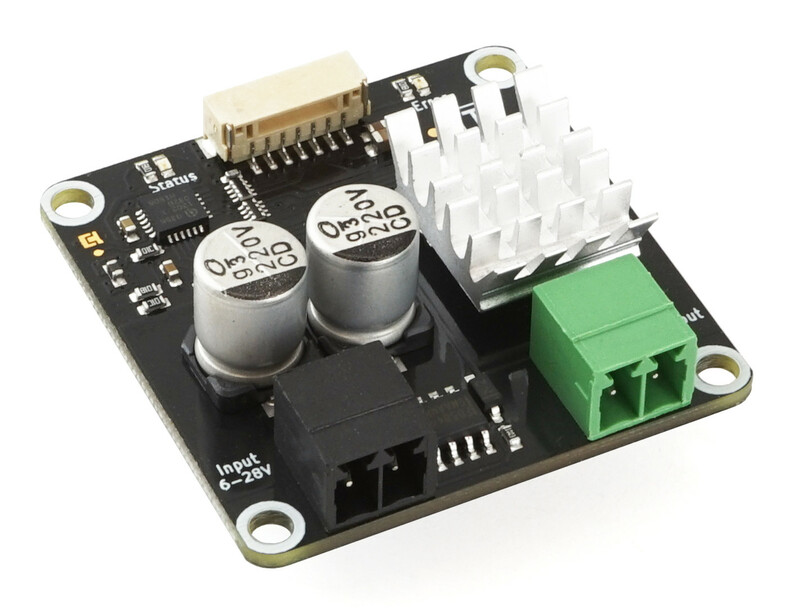
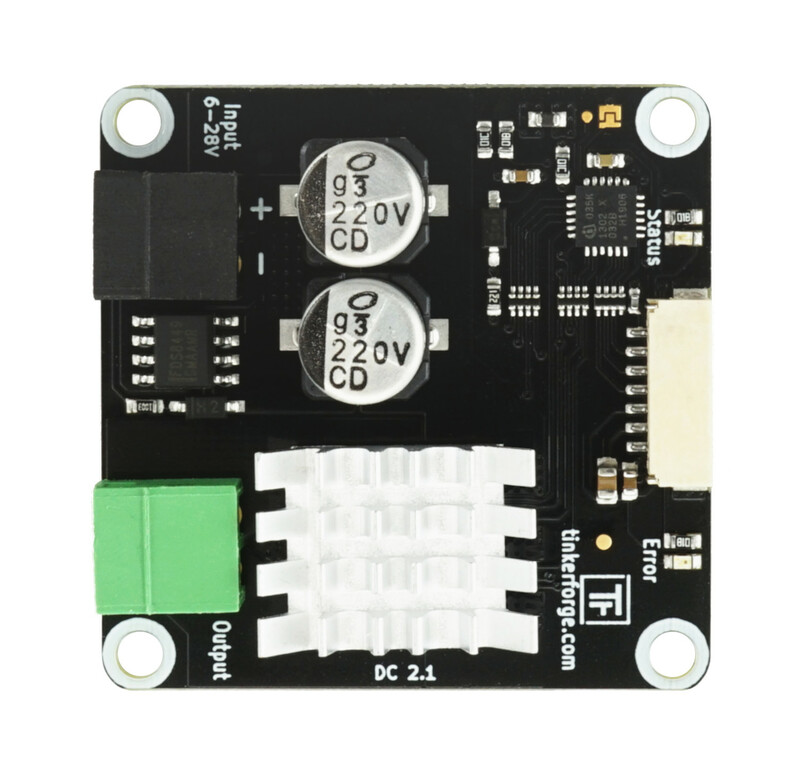
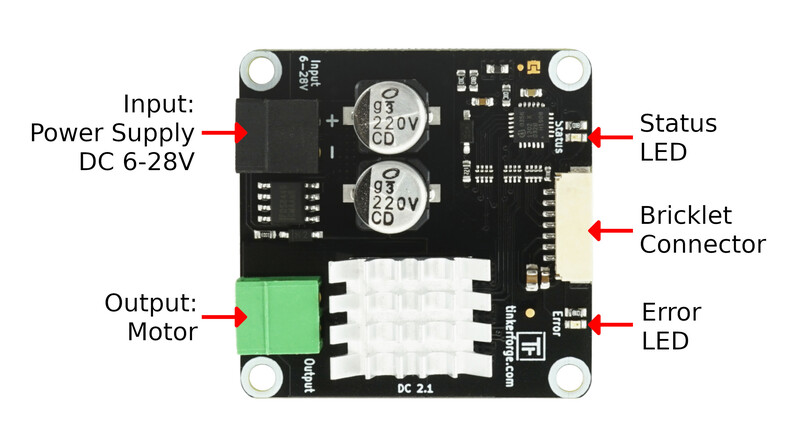
Connectivity
The following picture depicts the different connection possibilities of the DC Bricklet 2.0.
Test your DC Bricklet 2.0
To test a DC Bricklet 2.0 you need to have Brick Daemon and Brick Viewer installed. Brick Daemon acts as a proxy between the USB interface of the Bricks and the API bindings. Brick Viewer connects to Brick Daemon. It helps to figure out basic information about the connected Bricks and Bricklets and allows to test them.
Connect the DC Bricklet 2.0 to a Brick with a Bricklet Cable. Connect a DC brushed motor and a suitable power supply to the Bricklet and a suitable power supply.
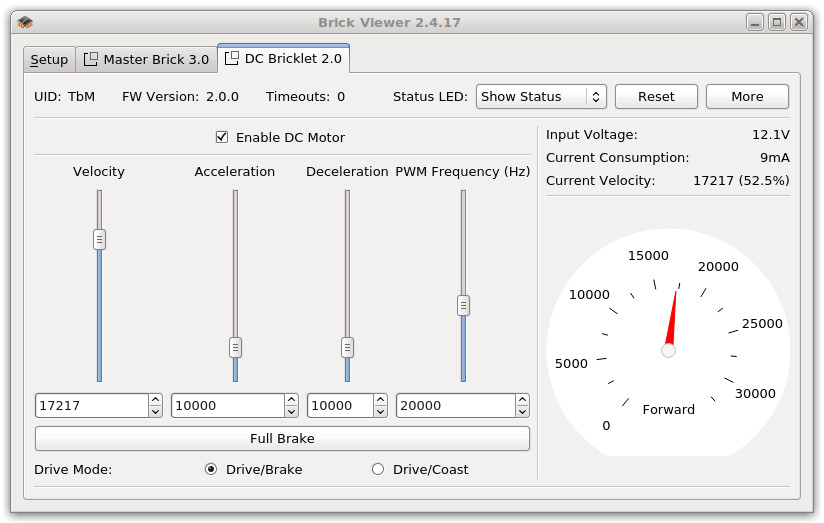
If you connect the Brick to the PC over USB, you should see a new tab named "DC Bricklet 2.0" in the Brick Viewer after a moment. Select this tab.
After this test you can go on with writing your own application. See the Programming Interface section for the API of the DC Bricklet 2.0 and examples in different programming languages.
Before you can test your Bricklet you need to enable the driver chip by ticking the "Enable" checkbox. You have four sliders to control the velocity (forward and backward), the acceleration, deceleration and the PWM frequency which is used by the driver chip to control the connected motor.
On the right you see the input voltage and the current consumption. Below you find a graphical representation of the velocity of the motor.
Below the sliders you can test the "Full Brake" and change the driving modes (see here for more information).
Drive Modes
There are two possible modes of motor controls:
Drive/Brake
In this mode the motor is always either driving or braking, there is no freewheeling possible. A more linear correlation between PWM and velocity is an advantage of this mode. Therefore it is possible to accelerate more precise. Typically motors can be driven with slower velocities in this mode. Disadvantageous is a higher current consumption and a resulting faster heat-up of the driver chip.
Drive/Coast
In this mode the motor is either driving or freewheeling. Advantageous is a lower current consumption and a resulting slower heat-up. The control of the velocity and acceleration is less precise, it can "lag behind".
Error LED
The red error LED has three different states:
- Off: No error present.
- 1s interval blinking: Input voltage too low (below 6V).
- 250ms interval blinking: Overtemperature or overcurrent.
If an over-temperature or -current event occurs the motor will stop running and the driver will be turned off. You need to explicitely call the enable function to start the driver again.
Case
TBD
Programming Interface
See Programming Interface for a detailed description.
| Language | API | Examples | Installation |
|---|---|---|---|
| C/C++ | API | Examples | Installation |
| C/C++ for Microcontrollers | API | Examples | Installation |
| C# | API | Examples | Installation |
| Delphi/Lazarus | API | Examples | Installation |
| Go | API | Examples | Installation |
| Java | API | Examples | Installation |
| JavaScript | API | Examples | Installation |
| LabVIEW | API | Installation | |
| Mathematica | API | Examples | Installation |
| MATLAB/Octave | API | Examples | Installation |
| MQTT | API | Examples | Installation |
| Perl | API | Examples | Installation |
| PHP | API | Examples | Installation |
| Python | API | Examples | Installation |
| Ruby | API | Examples | Installation |
| Rust | API | Examples | Installation |
| Shell | API | Examples | Installation |
| Visual Basic .NET | API | Examples | Installation |
| TCP/IP | API | ||
| Modbus | API |