- Getting Started
- Hardware
- Software
- Kits
- Embedded Boards
- Specifications
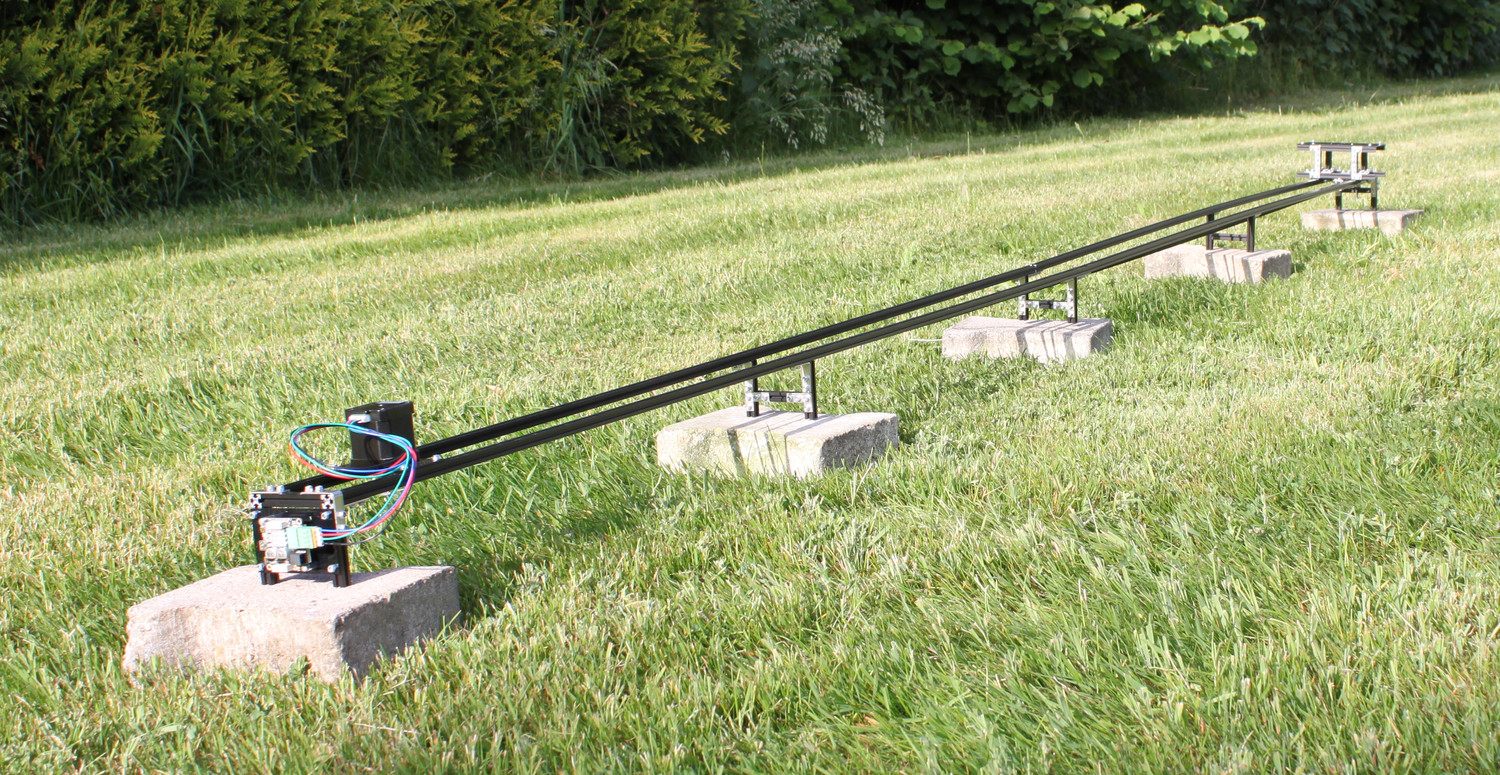
Construction - Extending the Frame
The basic kit uses two 900mm MakerBeams for the long rails of the frame. A simple way to extend the frame is to replace the 900mm MakerBeams with 1500mm MakerBeams. The timing belt in the basic kit is long enough for such an extended frame.
Extra Legs
Depending on the load you want to put on the cart you might need an extra pair of legs in the middle of the extended frame to support the weight. For one extra pair of legs you need the following parts:
From the basic kit you should have enough 60mm MakerBeams, 6mm bolts and lock nuts leftover for one extra pair for legs. You should only need additional MakerBeam Corner Brackets, L-Brackets and 3D printed end caps.
Assembly
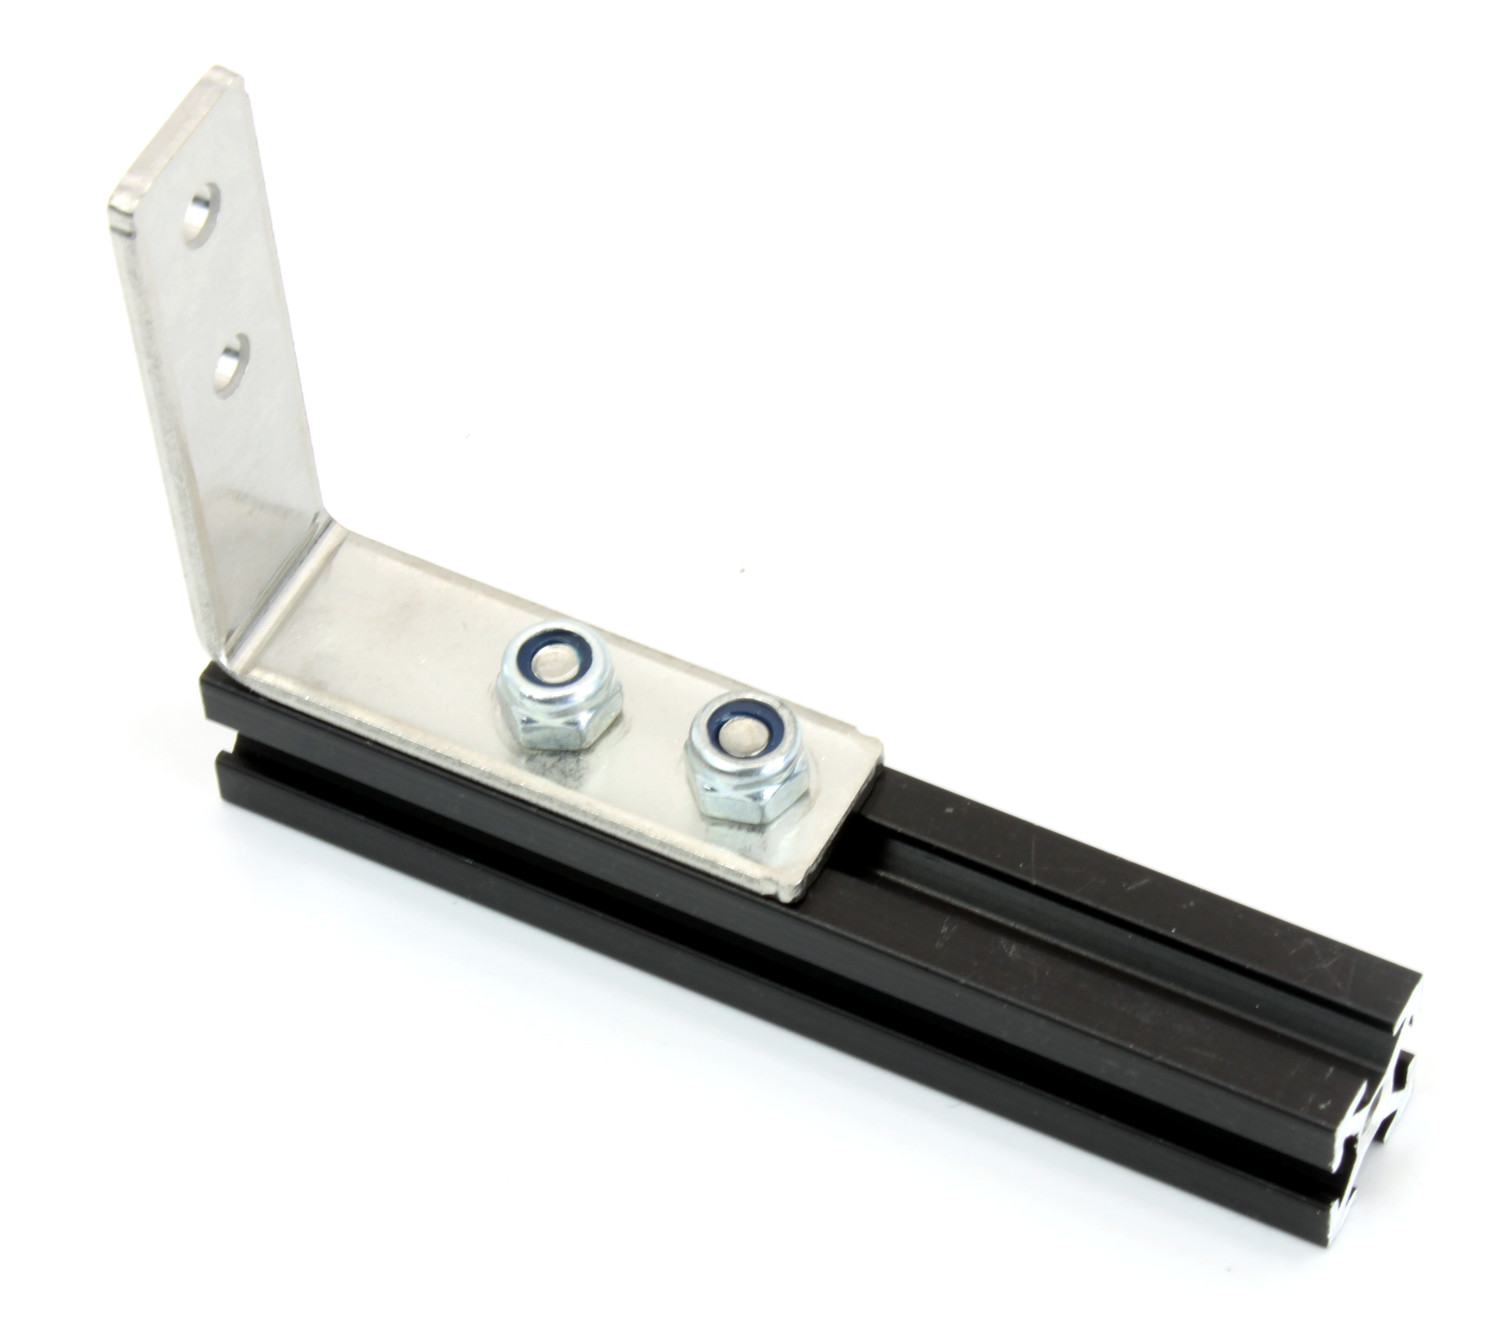
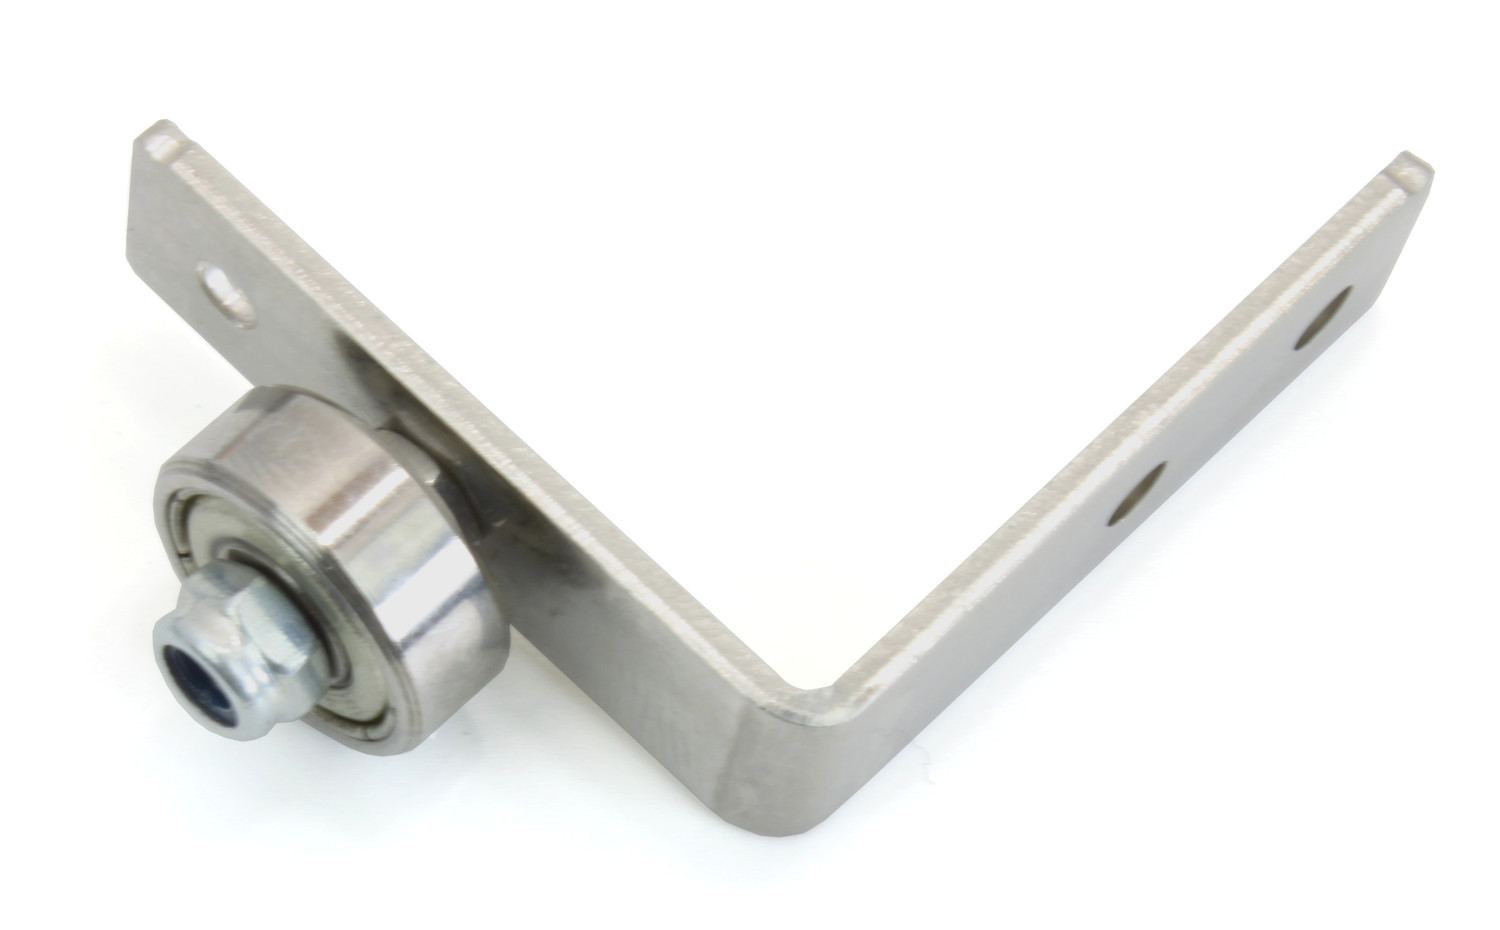
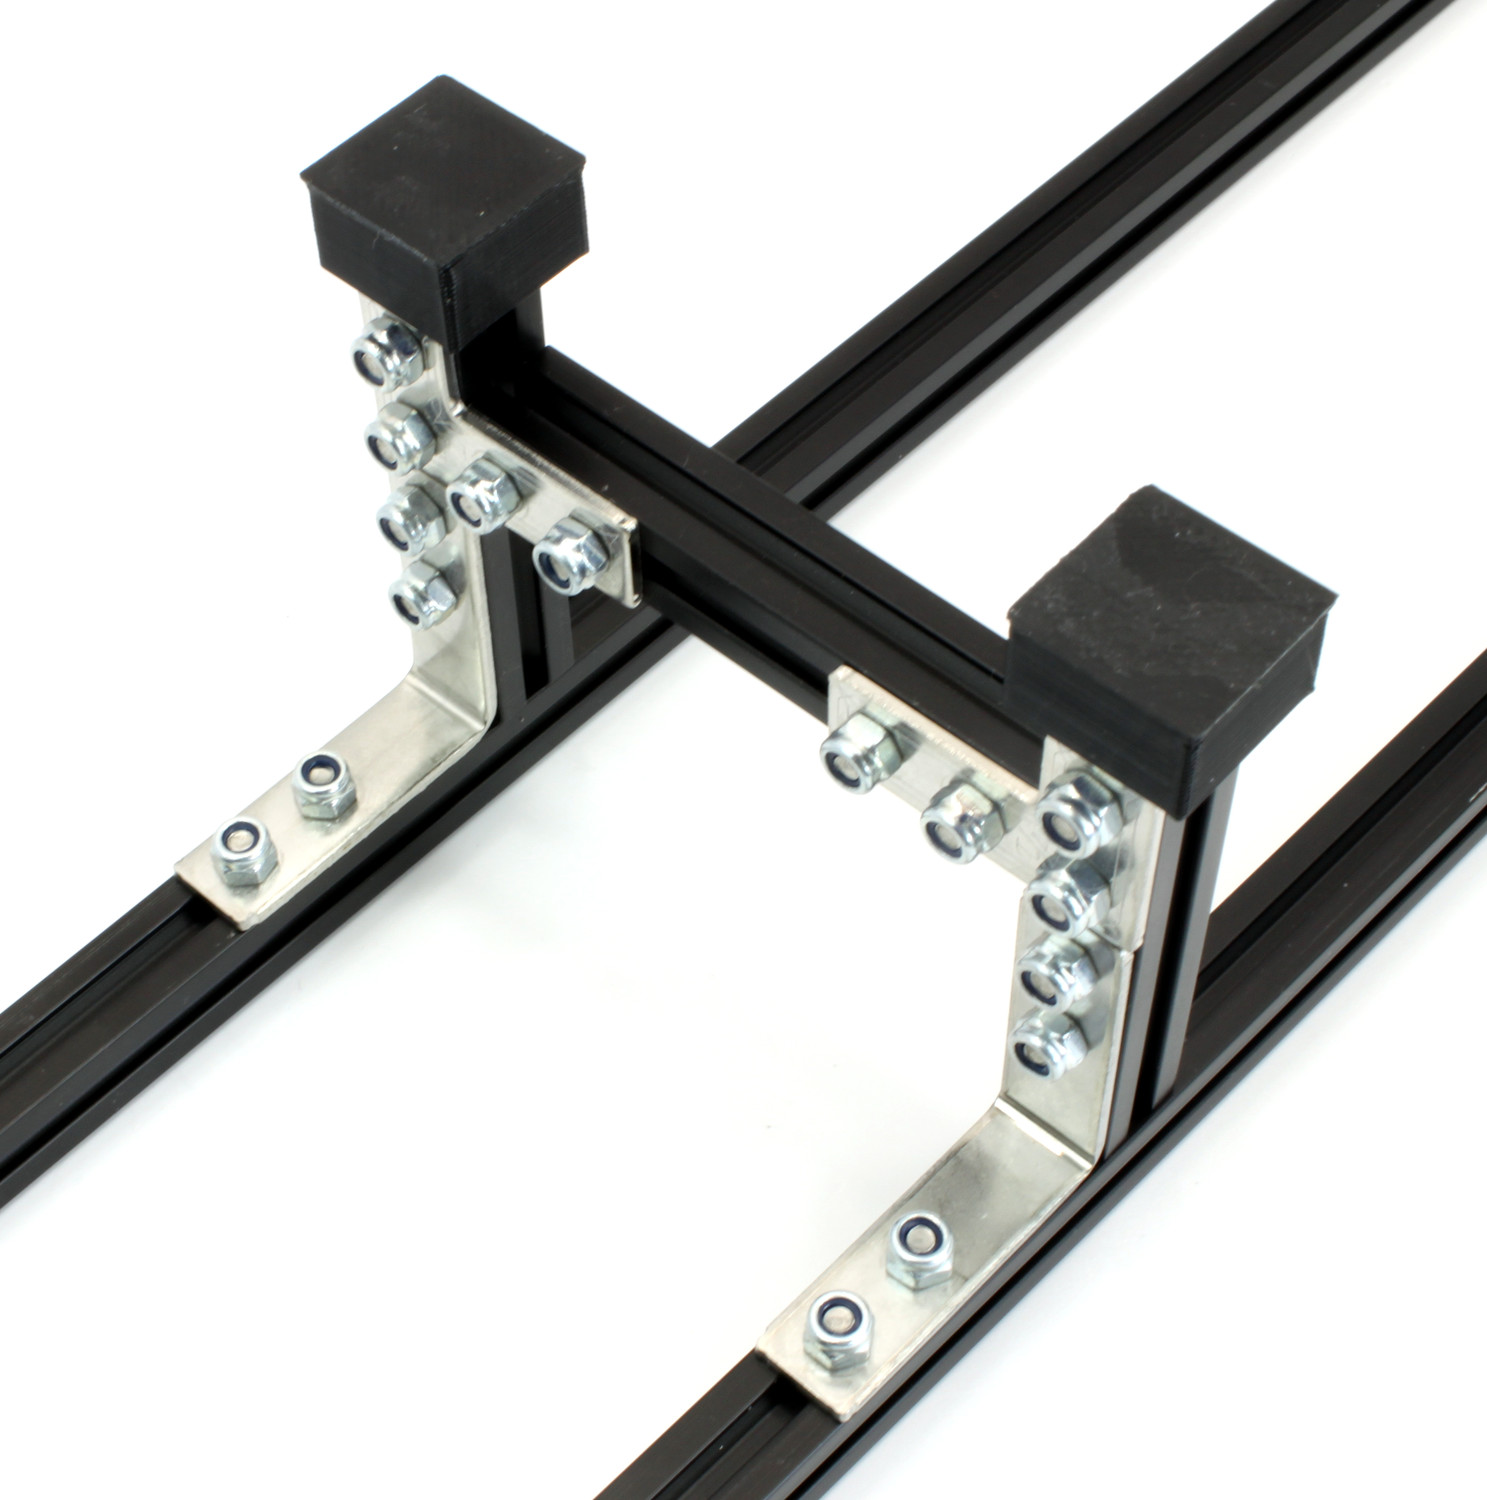
This extra pair of legs is similar to the original legs of the frame but more H-shaped. It consists of three 60mm MakerBeams connected by two MakerBeam L-Brackets to form an H-shape that is connected to the frame with two MakerBeam Corner Brackets. For the upright MakerBeams:
Insert two 6mm bolts into a 60mm MakerBeam.
Fasten a MakerBeam Corner Bracket to the MakerBeam with two lock nuts.
Repeat these steps for the second upright MakerBeam.
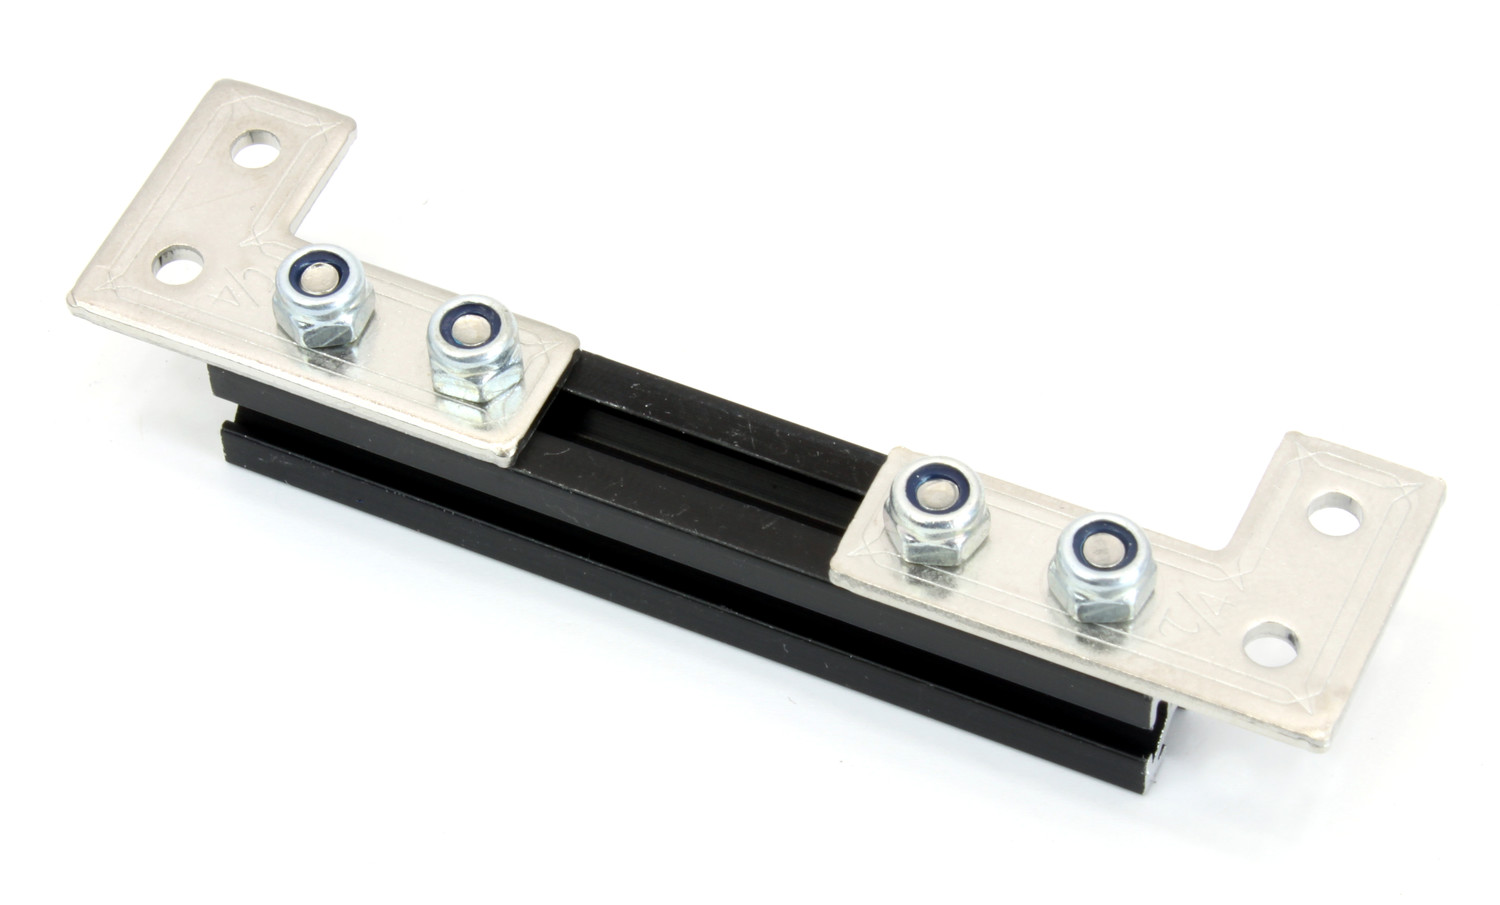
For the crossbeam:
Insert four 6mm bolts into a 60mm MakerBeam.
Fasten two MakerBeam L-Bracket to the MakerBeam with two lock nuts each.
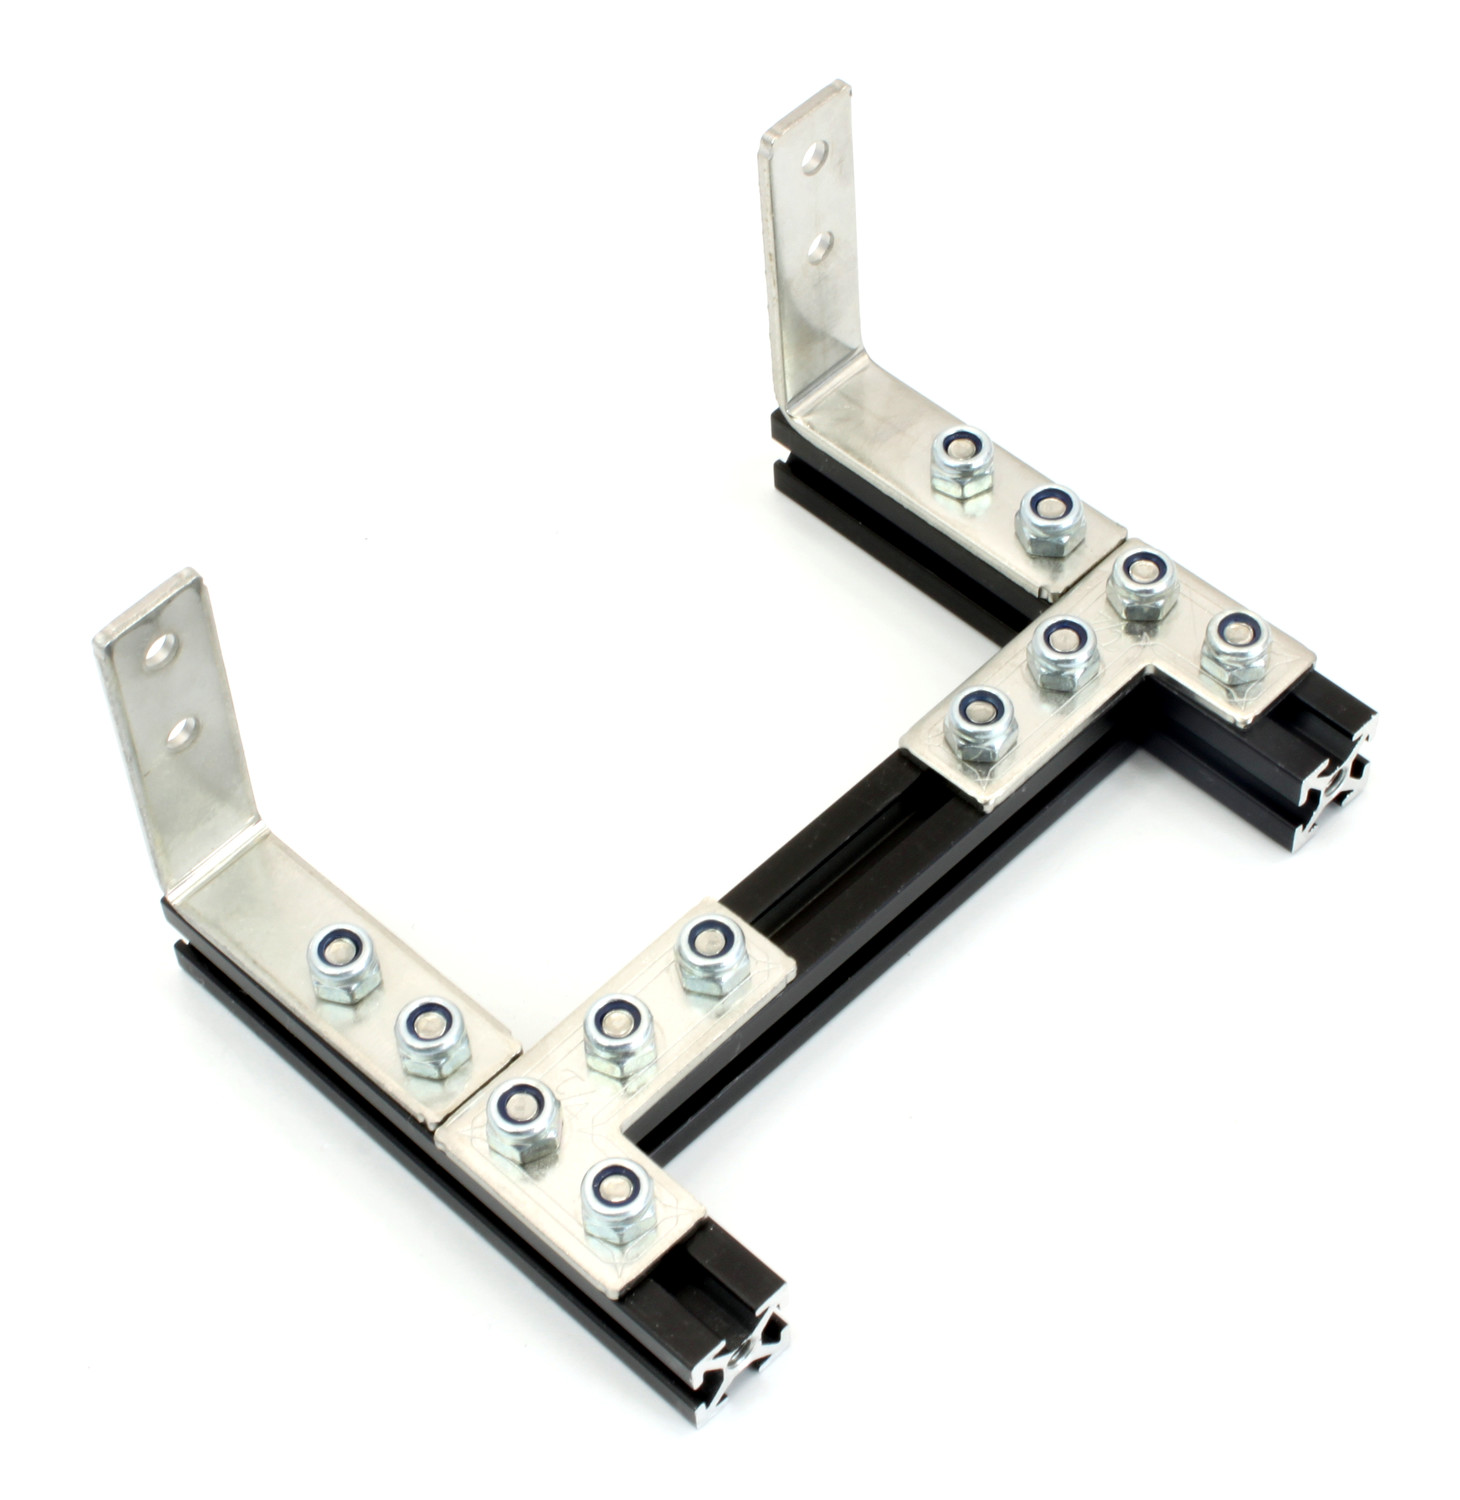
Connect the three MakerBeams to form an H-shape:
Insert two 6mm bolts into each MakerBeam on the same side as the corner bracket.
Fasten the crossbeam to the MakerBeams with four lock nuts.
The cart has bearings that run on all four sides of the long MakerBeams. But now with the extra pair of legs about to be connected to the middle of the frame, the bearings that run on the bottom of the frame don't have a free path anymore and have to be disconnected from the cart:
Disconnect the four 1-bearings assemblies from the bottom of the cart.
Connect the extra pair of legs to the frame:
Disconnect the stack-side pair of legs from the frame.
Insert two 6mm bolts into the bottom side of each long MakerBeam.
Reconnect the stack-side pair of legs to the frame.
Fasten the extra pair of legs to the long MakerBeams with four lock nuts.
Extra Timing Belt
Two 1500mm MakerBeams can be connected to form a 3m long frame with three extra pairs of legs. For three extra pairs of legs you need the following parts:
From the basic kit you should have four 60mm MakerBeams leftover. You should only need one additional pack of 60mm MakerBeams and the other parts from the list.
Finally, you need the 1500mm MakerBeams, straight brackets and an additional timing belt:
Assembly
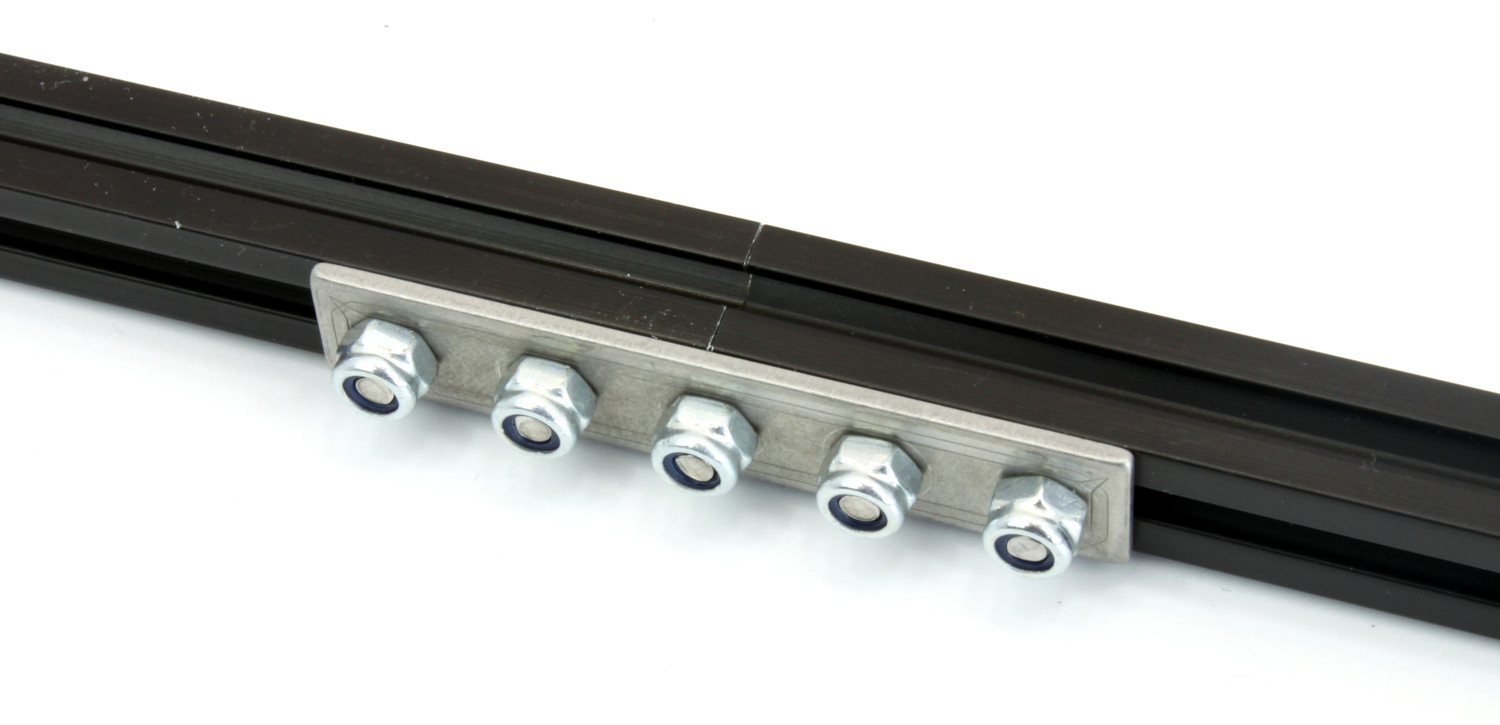
Two 1500mm MakerBeams get connected with a straight bracket:
Insert two 6mm bolts into each 1500mm MakerBeam.
Insert one 6mm bolt into the junction between the MakerBeams.
Fasten a MakerBeam Straight Bracket to the MakerBeams with five lock nuts.
Repeat these steps for the second pair of 1500mm MakerBeams.
Build three extra pairs of legs and connect one to the middle of each 1500mm MakerBeam section and one beside their junction. Then replace the long MakerBeams in the frame with this 3m long assembly.
Finally, the timing belt has to be extended:
Disconnect one end of the timing belt from the cart.
Staple the second timing belt to the loose end of the first one.
Reconnect the 6m timing belt assembly to the cart.
Tension the timing belt.

Done!
The camera slider frame is now 3m long.