- Getting Started
- Hardware
- Software
- Kits
- Starter Kit: Weather Station
- Starter Kit: Hardware Hacking
- Starter Kit: Server Room Monitoring
- Starter Kit: Server Room Monitoring 2.0
- Starter Kit: Blinkenlights
- Starter Kit: Internet of Things
- Starter Kit: Camera Slider
- Tabletop Weather Station
- Embedded Boards
- Specifications
Starter Kit: Weather Station

Note
The Starter Kit: Weather Station is discontinued and is no longer sold. The Tabletop Weather Station is the recommended replacement.
Features
Fully-fledged open source weather station
Measures Temperature, Humidity, Air Pressure and Illuminance
High Precision and Resolution
e.g. Air Pressure 0.012hPa and Temperature 0.01°C
Control over USB, Wi-Fi and Ethernet or with RED Brick and Raspberry Pi
Modifiable: more buttons, more sensors and customized software
Demo Application available
Internet of Things (IoT) capable
Description
The Starter Kit: Weather Station is a fully-fledged open source weather station. It measures temperature, humidity, air pressure and illuminance with high precision.
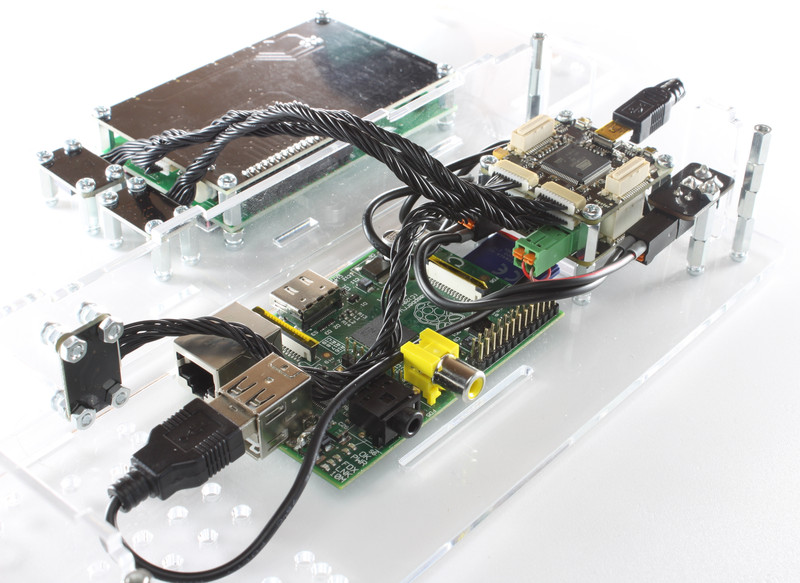
It can be controlled by an (Embedded-) PC. Control via Wi-Fi is possible if a WIFI Extension is added. As alternative the weather station can be controlled over your local network when adding an Ethernet Extension. To use it standalone you can add a RED Brick or another embedded board such as a Raspberry Pi which can be mounted in the case. Thus Internet of Things applications are a possible with this kit.
There are several example projects available, e.g. the measurements can be displayed on the 20x4 character LCD or shown on a website. With the four buttons of the LCD 20x4 Bricklet it is possible to control different modes.
A demo application, available for Windows, Linux and macOS, implements some of these example projects and can be used to test the station.
The kit allows to modify soft- and hardware. The casing consists of tinker-friendly PMMA which can be easily modified (e.g. drill new holes with simple wood drill). Additionally mounting holes for Analog In and IO-4 Bricklets are provided, this gives the possibility to add more sensors (anemometer, pluviometer etc).
Programming of the weather station can be done with all of the available bindings (C/C++, C/C++ for Microcontrollers, C#, Delphi/Lazarus, Go, Java, JavaScript, LabVIEW, Mathematica, MATLAB/Octave, MQTT, openHAB, Perl, PHP, Python, Ruby, Rust, Shell, Visual Basic .NET). Example implementations for many supported programming languages and a demo application are available. This will give you a starting point into the programming with Tinkerforge.
A small video that shows the construction and some applications is available on Youtube:
Technical Specifications
Property |
Value |
|---|---|
Air Pressure |
10hPa - 1200hPa in 0.012hPa steps |
Illumination |
0lx - 64000lx in 0.01lx steps |
Relative Humidity |
0%RH - 100%RH in 0.1%RH steps |
Temperature |
-40°C - 85°C in 0.01°C steps |
Dimensions (W x D x H) |
240 x 46 x 100mm (9.45 x 1.81 x 3.94") |
Weight |
376g |
Resources
Weather Station Case as FreeCAD CAD files (Download)
Example Source Code for Display Environment Measurements on LCD (Download: C, C#, Delphi, Java, PHP, Python, Ruby, Visual Basic .NET)
Example Source Code for Embed Live Measurements on Website (Download: PHP)
Example Source Code for Show Statistics with Button Control (Download: C#)
Example Configuration for Smart Home Integration using openHAB (Download)
Demo Application (Download: Windows, Linux, macOS, Source Code)
Firmware updating and first tests
As a very first step you should try out and update your Bricks and Bricklets.
For that you need to install the Brick Daemon and the Brick Viewer. Connect all Bricklets to the Master Brick and connect it via USB to your PC. Afterwards use Brick Viewer to check if all of the firmwares up to date (Updates / Flashing button). If not, you can update the Bricks and update the Bricklets with the Brick Viewer, too:
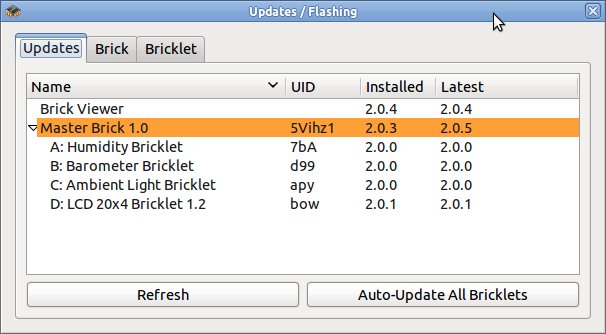
As next step click through the tabs of the Brick Viewer to see if all of the sensors are working correctly. Now you can be sure that the Bricks and Bricklets have versions that work together and that everything will work if it is screwed together in the weather station enclosure.
Demo Application
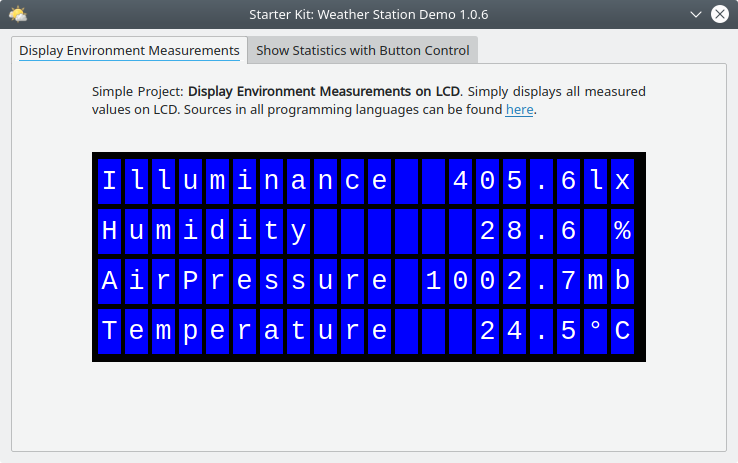
If the hardware is running correctly you can also try the demo application for this Starter Kit: Weather Station. It implements two of the presented projects for demonstration purposes:
Each project can be selected with its own tab. The first project only displays the measured values. The second project is more complex and displays min, max and average values as well as graphs for these measurements. The display mode can be changed by pressing the buttons at the LCD 20x4 Bricklet or in the application. In some modes the buttons can be pressed multiple times, such that other measurements will be shows.
The download link is in the resources section.
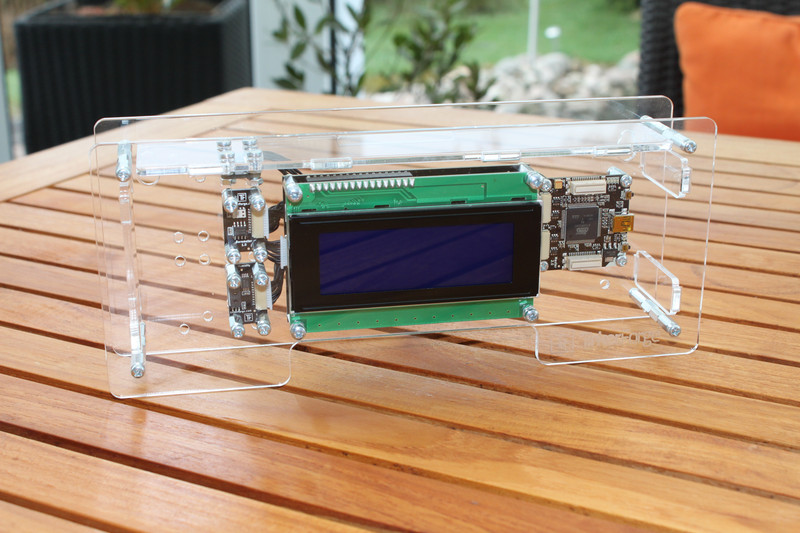
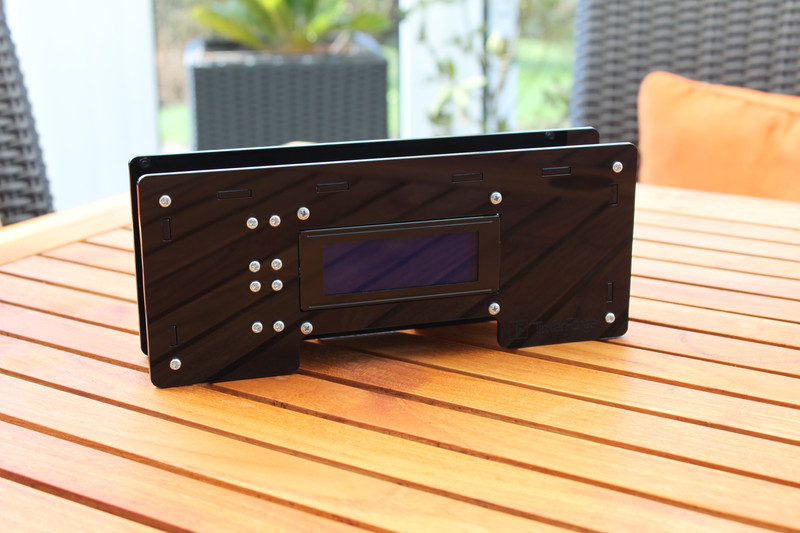
Construction
There is no singular way to build the Weather Station. In the following we will show one way to build different variants. The idea of the Weather Station Starter Kit is, that it is easily extensible and modifiable.
For example: You can put the Bricks and Bricklets on spacers (as is mostly shown below), but you can also screw them directly to the case to save space. There are several holes that allow to mount addition Analog In, Temperature or IO-4 Bricklets to read out more sensors.
The utilized PMMA plastic is easy to work with, so you will be able to add new holes or slots or similar if needed.
Here are four different construction variants:
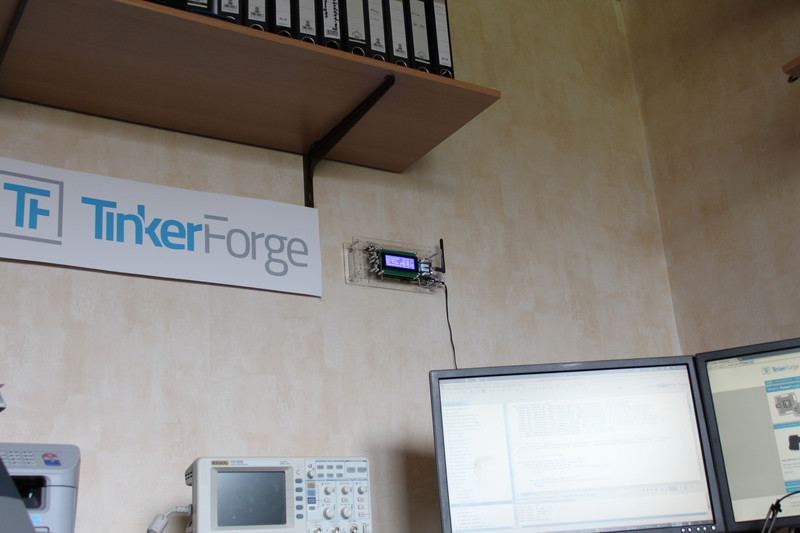
We could also control the Weather Station with the RS485 or Ethernet Extension. The setup in this case is the same as with the "Wi-Fi Weather Station" described above, we just have to exchange the WIFI Extension with the RS485 or Ethernet Extension.
If the Ethernet Extension with PoE is used, the stack can also be powered by PoE. in this case the Step-Down Power Supply and the DC Jack Adapter are not needed.
Projects
There are several applications for the Weather Station:
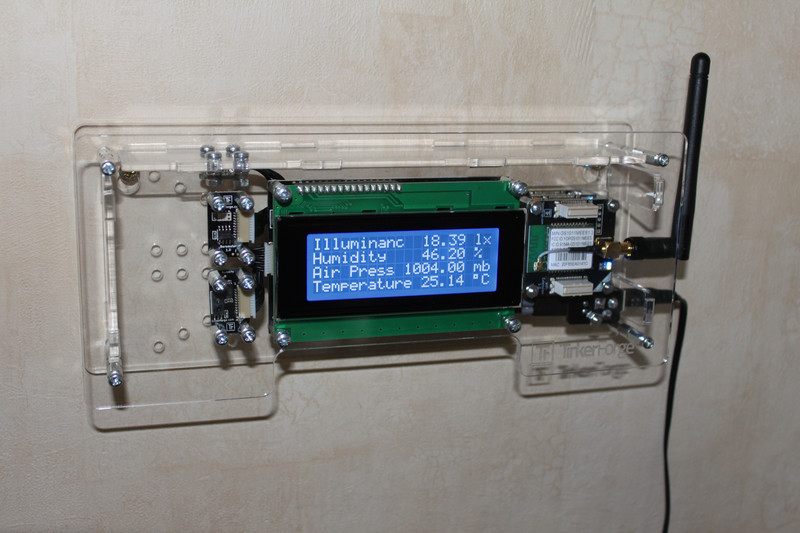
Display Environment Measurements on LCD
The most obvious application for the Weather Station Starter Kit is to display the measurements of the environment on the LCD 20x4 Bricklet. This can be done through four different paths:
USB connection to PC: Install Brick Daemon and application on PC, connect Master Brick of Weather Station to PC via USB.
Wi-Fi connection to PC: Install application on PC, connect to Weather Station directly over Wi-Fi or through an access point.
RED Brick: Use Brick Viewer to upload the application. How this works in detail is described in the RED Brick documenation.
Raspberry Pi or other embedded board integrated in Weather Station: Install Brick Daemon and application on embedded board, connect Master Brick of Weather Station to embedded board via USB.
All four possible solutions can use the same source code.
Example implementations with step-by-step instructions are available for: C, C#, Delphi, Java, PHP, Python, Ruby, Visual Basic .NET.
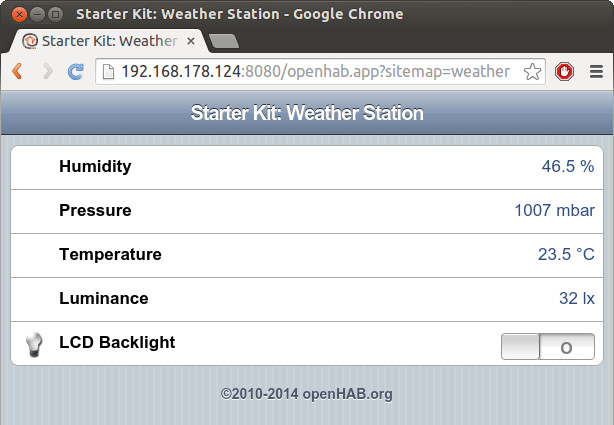
Embed Live Measurements on Website
Another application for the Weather Station, is to embed the weather data on a website:
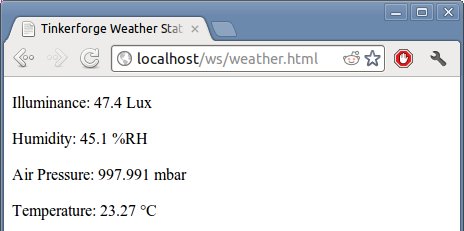
In this project we will use JavaScript/AJAX to update the measurements every 5 seconds, without the need to reload the website.
An example implementation is available in PHP.
Show Statistics with Button Control
Since the LCD 20x4 Bricklet features four buttons, we can enhance the first application by more data that can be switched with the buttons.
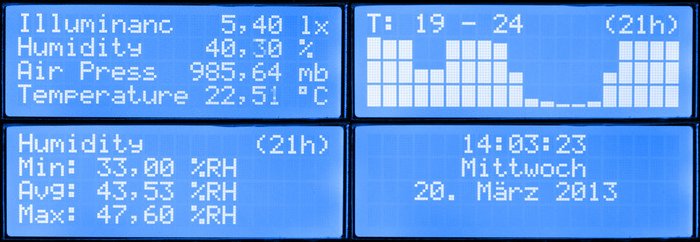
The four buttons in this project will be used to switch through
standard weather measurement,
24h min/max/average,
24h graph and
time and date.
An example implementation is available in C#.
Smart Home Integration using openHAB
The Weather Station can be integrated into an openHAB managed smart home using the openHAB Tinkerforge bindings.
As an example the required openHAB configuration steps for the integration are demonstrated using a RED Brick.
Further Enhancements
If you modded, extended or improved your Weather Station in any way and you have published your results on our forum, on your blog or similar: Please give us a notice. We would love to add a link to your project here!
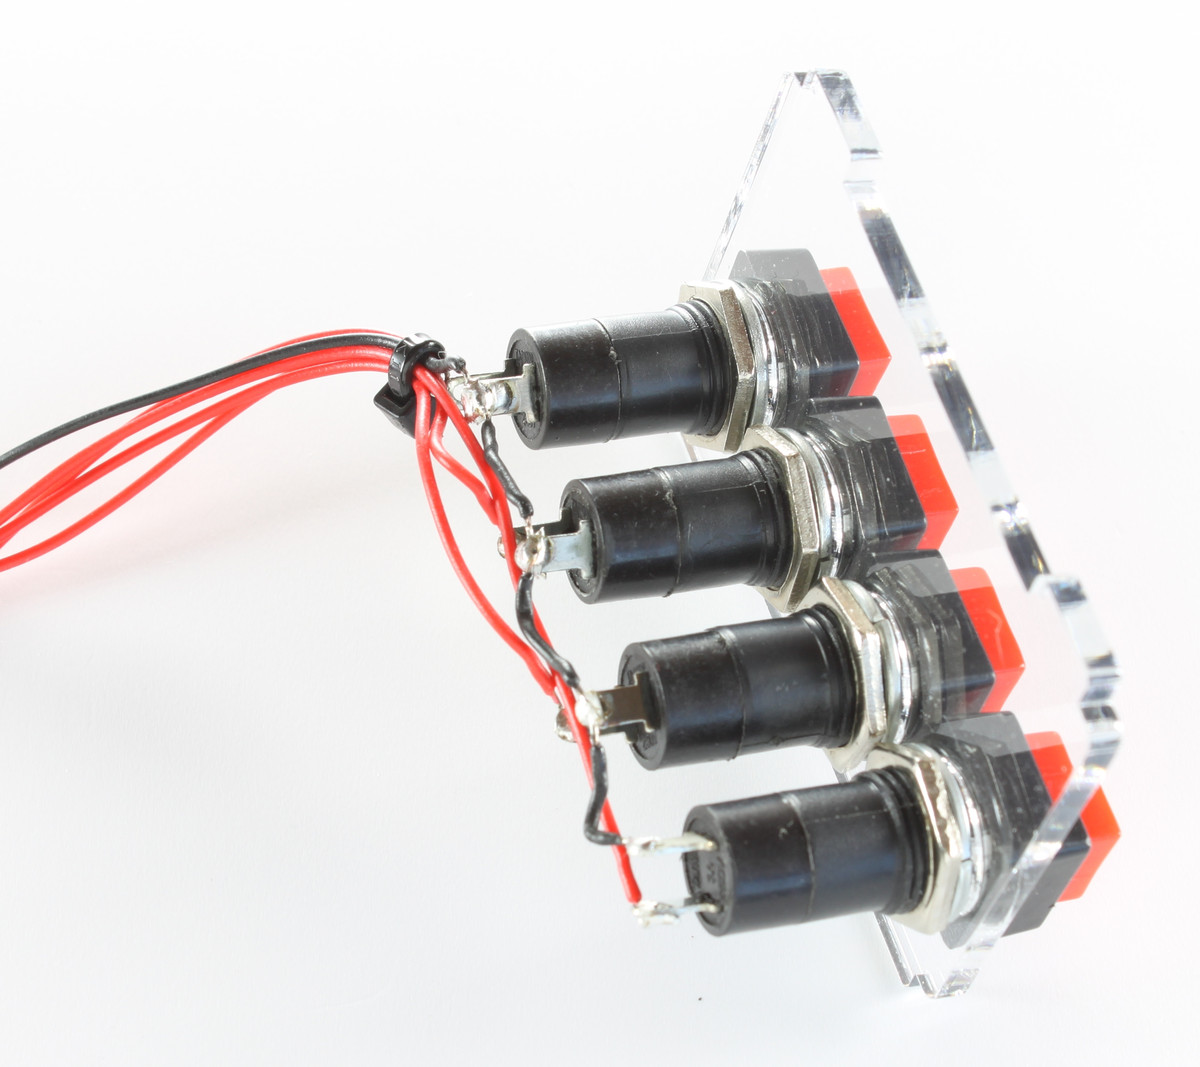
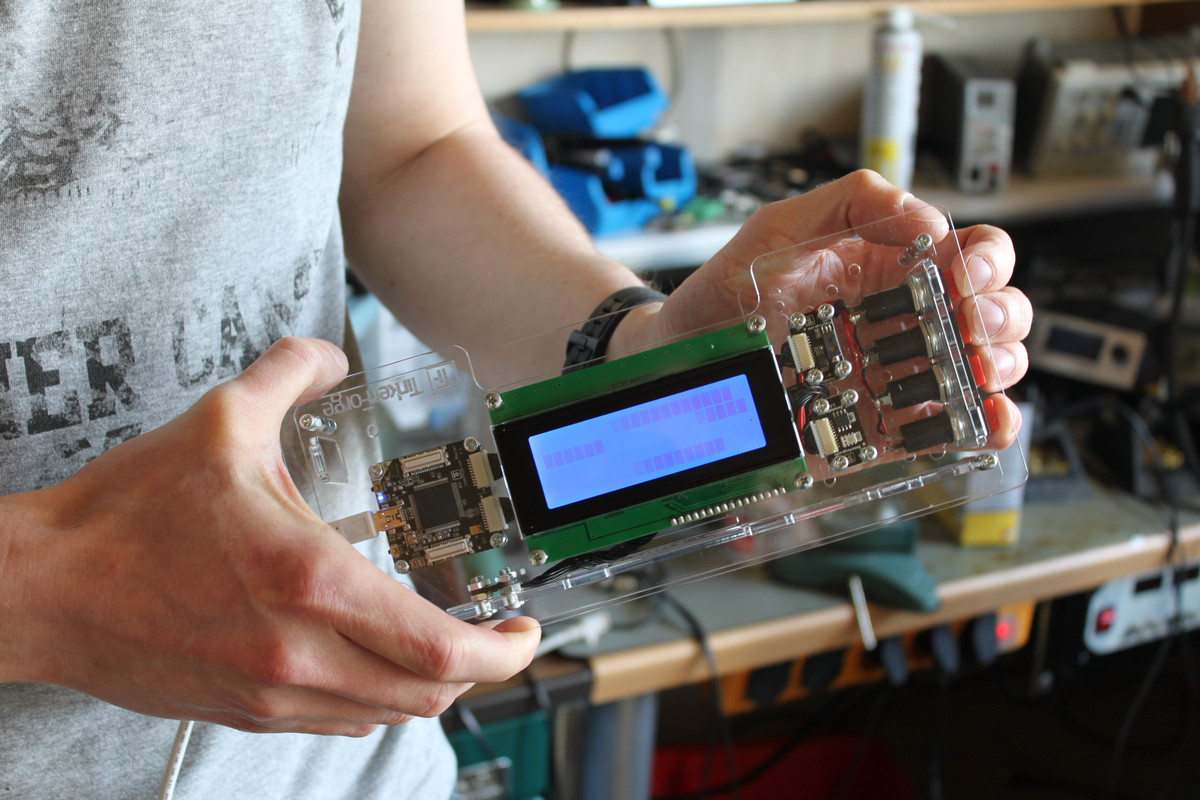
Bigger Push Buttons
The push buttons on the LCD 20x4 Bricklet are a bit fiddly. To extend the Weather Station with bigger buttons we provide the Weather Station Push Button Extension.

The extension consists of four big push buttons, a replacement wall for the left side of the Weather station case and a right angle 2x3 pin header.
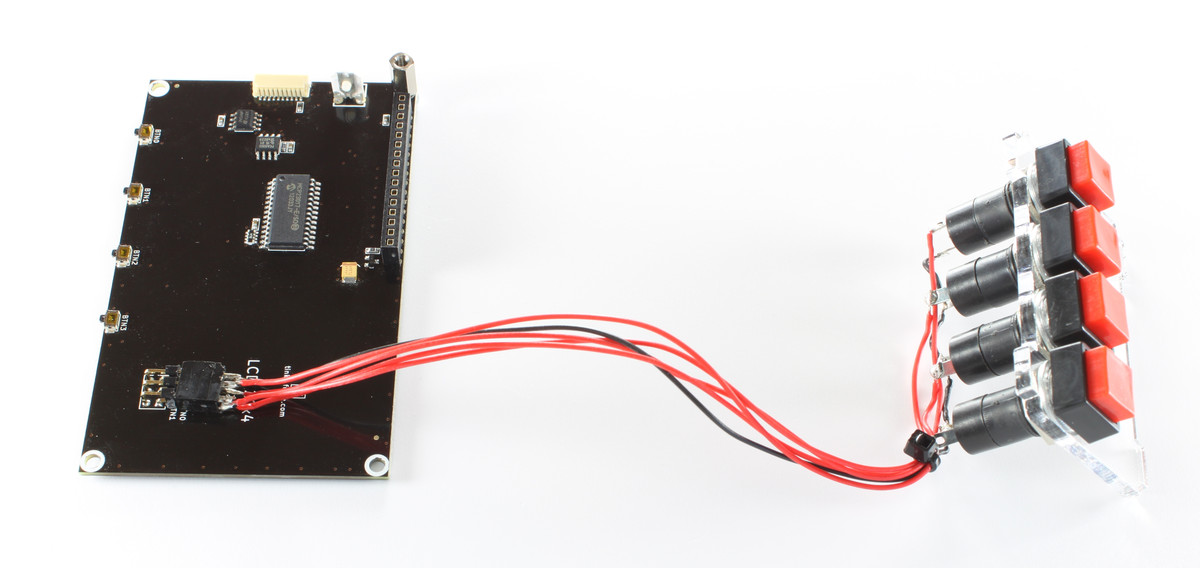
We can connect the push buttons to the LCD 20x4 Bricklet with a little bit of soldering and some wires.
Changes in software are not needed.
To connect a button to the LCD 20x4 Bricklet you have to connect one pin of the button with GND and the other with one input of the LCD 20x4 Bricklet (BTN0-BTN3). In the pictures above we have used a black wire to connect GND through and red wires to connect each button with one input.

As a fun example we have implemented a demonstrator for a game like Guitar Hero. It does not have much functions. The application basically shows bars which will be randomly rendered and moved to one side of the LCD. With the four big push buttons you can make different sounds and you can choose the used instrument from the General MIDI definition, but the game logic is completely missing.
This demonstrator should show that it is possible to implement not only weather station applications.
The source code can be downloaded here: Download