Today we released two new Bricks: The HAT Zero Brick and the HAT Brick.
These two Bricks are the first Bricks that are not in the standard 4x4cm Brick form factor. As you might have already expected from the name: They are Raspberry Pi HATs.
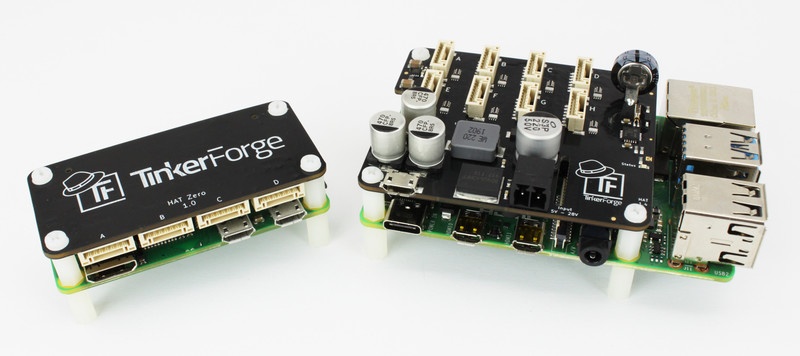
HAT Zero Brick
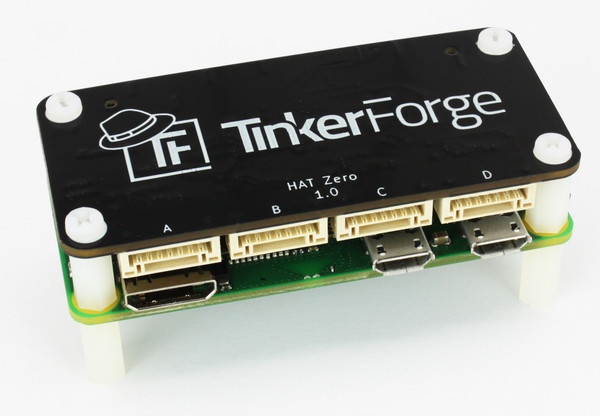
The HAT Zero Brick is in the standard Raspberry Pi Zero HAT form factor and it has four Bricklet ports. You can connect any of our >60 Bricklets with 7 pole connector to these ports.
We offer the HAT Zero Brick in our Shop for 14.99€ incl. VAT.
HAT Brick
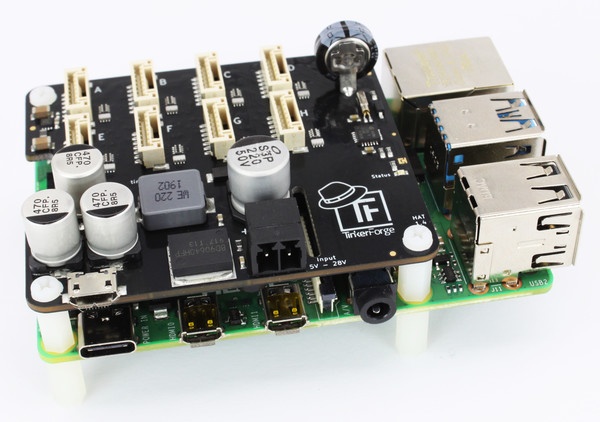
The HAT Brick is in the standard Raspberry Pi HAT form factor and it has eight Bricklet ports. It comes with a 5V-28V DC power supply that puts out 5.3V/4A for the Raspberry Pi and Bricklets. This HAT is feature-packed. It has a battery backed real-time clock, watchdog for the RPi, sleep mode, it can measure and monitor the input voltages and the RPi and Bricklets can be turned on/off individually.
We offer the HAT Brick in our Shop for 49.99€ incl. VAT.
Both HATs are compatible to the new Raspberry Pi 4.
We also added a Mounting Kit for Raspberry Pi to our shop. It consists of M2.5 nylon spacers, screws and nuts. It can be used to properly mount our HATs to a Raspberry Pi and also to mount the Rapsberry Pi to something else.
The HATs are possible because of the new standardized protocol that comes with the 7 pole connector and co-processor on the new Bricklets. You need a 7p-7p Bricklet Cable to connect a Bricklet to one of the HATs. You can not connect old Bricklets with 10 pole connector.