- Getting Started
- Hardware
- Bricks
- Bricklets
- Accelerometer Bricklet 2.0
- Air Quality Bricklet
- Ambient Light Bricklet 3.0
- Analog In Bricklet 3.0
- Analog Out Bricklet 3.0
- Barometer Bricklet
- Barometer Bricklet 2.0
- Breakout Bricklet
- CAN Bricklet
- CAN Bricklet 2.0
- CO2 Bricklet 2.0
- Color Bricklet
- Color Bricklet 2.0
- Compass Bricklet
- DC Bricklet 2.0
- Distance IR Bricklet
- Distance IR Bricklet 2.0
- Distance US Bricklet 2.0
- DMX Bricklet
- Dual Button Bricklet 2.0
- Dust Detector Bricklet
- E-Paper 296x128 Bricklet
- Energy Monitor Bricklet
- GPS Bricklet 2.0
- GPS Bricklet 3.0
- Hall Effect Bricklet
- Hall Effect Bricklet 2.0
- Humidity Bricklet 2.0
- IMU Bricklet 3.0
- Industrial Analog Out Bricklet 2.0
- Industrial Counter Bricklet
- Industrial Digital In 4 Bricklet 2.0
- Industrial Digital Out 4 Bricklet
- Industrial Digital Out 4 Bricklet 2.0
- Industrial Dual 0-20mA Bricklet
- Industrial Dual 0-20mA Bricklet 2.0
- Industrial Dual AC In Bricklet
- Industrial Dual AC Relay Bricklet
- Industrial Dual Analog In Bricklet 2.0
- Industrial Dual Relay Bricklet
- Industrial PTC Bricklet
- Industrial Quad Relay Bricklet 2.0
- IO-16 Bricklet
- IO-16 Bricklet 2.0
- IO-4 Bricklet 2.0
- Isolator Bricklet
- Joystick Bricklet
- Joystick Bricklet 2.0
- Laser Range Finder Bricklet 2.0
- LCD 128x64 Bricklet
- LCD 20x4 Bricklet
- LED Strip Bricklet 2.0
- Line Bricklet
- Linear Poti Bricklet
- Linear Poti Bricklet 2.0
- Load Cell Bricklet 2.0
- Motion Detector Bricklet 2.0
- Motorized Linear Poti Bricklet
- Multi Touch Bricklet
- Multi Touch Bricklet 2.0
- NFC Bricklet
- OLED 128x64 Bricklet 2.0
- OLED 64x48 Bricklet
- One Wire Bricklet
- Outdoor Weather Bricklet
- Particulate Matter Bricklet
- Performance DC Bricklet
- Piezo Speaker Bricklet
- Piezo Speaker Bricklet 2.0
- Real-Time Clock Bricklet
- Real-Time Clock Bricklet 2.0
- Remote Switch Bricklet 2.0
- RGB LED Bricklet 2.0
- RGB LED Button Bricklet
- Rotary Encoder Bricklet 2.0
- Rotary Poti Bricklet
- Rotary Poti Bricklet 2.0
- RS232 Bricklet
- RS232 Bricklet 2.0
- RS485 Bricklet
- Segment Display 4x7 Bricklet
- Segment Display 4x7 Bricklet 2.0
- Servo Bricklet 2.0
- Silent Stepper Bricklet 2.0
- Solid State Relay Bricklet 2.0
- Sound Intensity Bricklet
- Sound Pressure Level Bricklet
- Temperature Bricklet
- Temperature Bricklet 2.0
- Temperature IR Bricklet 2.0
- Thermal Imaging Bricklet
- Thermocouple Bricklet 2.0
- Tilt Bricklet
- UV Light Bricklet 2.0
- Voltage/Current Bricklet 2.0
- XMC1400 Breakout Bricklet
- Master Extensions
- Power Supplies
- Discontinued Products
- Timeline
- Software
- Kits
- Embedded Boards
- Specifications
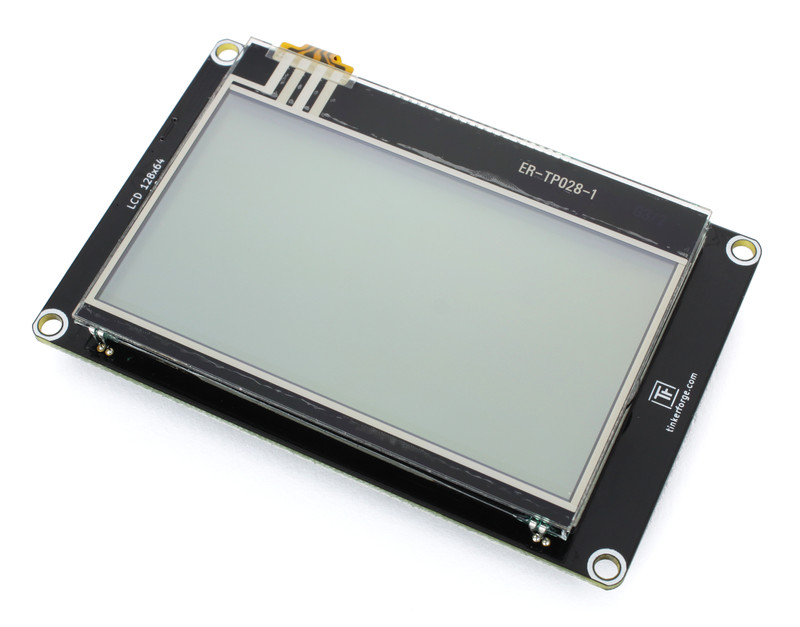
LCD 128x64 Bricklet
Features
7.1cm (2.8") LCD with a resolution of 128x64 pixel
Embedded font and GUI for easy drawing of text and GUI elements
Touchscreen with x/y-coordinate and touch pressure callback
Automatic swipe gesture recognition (left, right, up and down)
Description
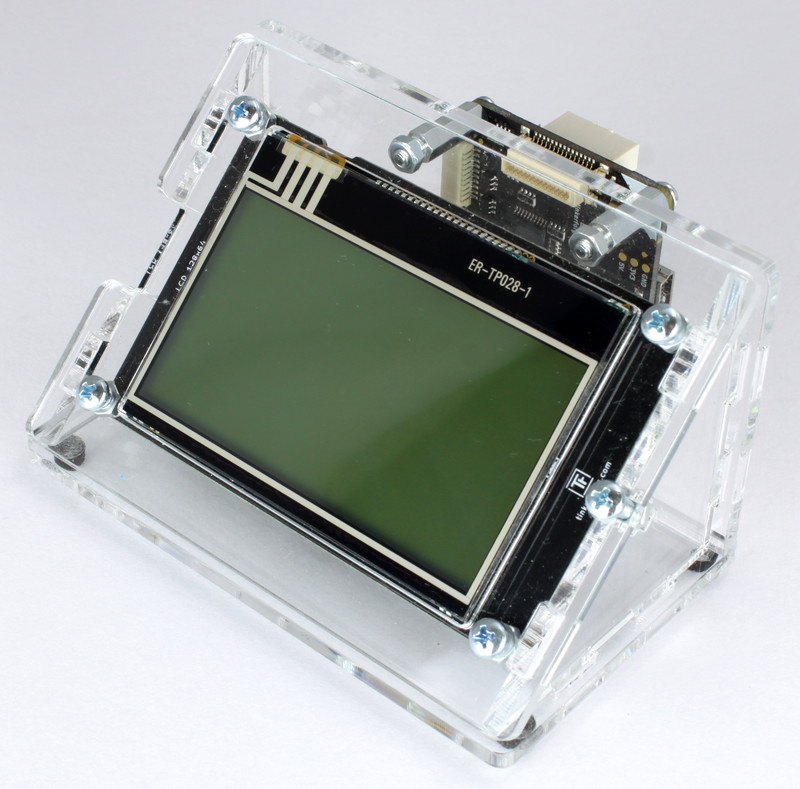
The LCD 128x64 Bricklet is a LC Display with a resolution of 128x64 pixel and resistive touchscreen.
Each pixel can be set individually, so the display can show graphics. This allows for more versatile and detailed drawings on the display, compared to the alphanumeric LCD 20x4 Bricklet with its fixed character display. The screen size is very similar to the screen size of the old LCD 20x4 Bricklet, so it can be used as a direct replacement.
Text can easily be drawn onto the display with the embedded font of the Bricklet. The Bricklet also comes with an embedded GUI.
The touch screen has easy to use callbacks with x/y coordinates and touch pressure. The Bricklet can automatically detect standard swipe gestures.
High update rates of up to 60Hz are possible.
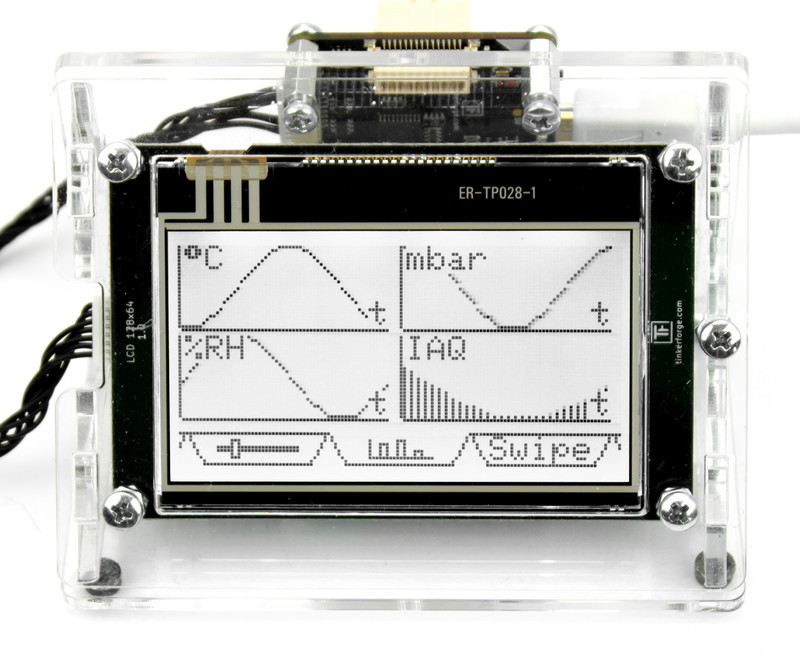
The LCD 128x64 Bricklet together with Air Quality Bricklet in the Tabletop Weather Station:
Technical Specifications
Property |
Value |
|---|---|
Current Consumption |
40mW (8mA at 5V, backlight off)
545mW (107mA at 5V, backlight at 100%)
|
Display Resolution |
128x64 pixel, 22x8 characters |
Display Size |
7.1cm (2.8") |
Display Colors |
Black/White |
Touchscreen Type |
Resistive |
Touchscreen Resolution |
128x64 |
Touchscreen Pressure |
0-300 |
Dimensions (W x D x H) |
55 x 85 x 8mm (2.17 x 3.35 x 0.32") |
Weight |
55g |
Resources
Test your LCD 128x64 Bricklet
To test a LCD 128x64 Bricklet you need to have Brick Daemon and Brick Viewer installed. Brick Daemon acts as a proxy between the USB interface of the Bricks and the API bindings. Brick Viewer connects to Brick Daemon. It helps to figure out basic information about the connected Bricks and Bricklets and allows to test them.
Connect the LCD 128x64 Bricklet to a Brick with a Bricklet Cable.
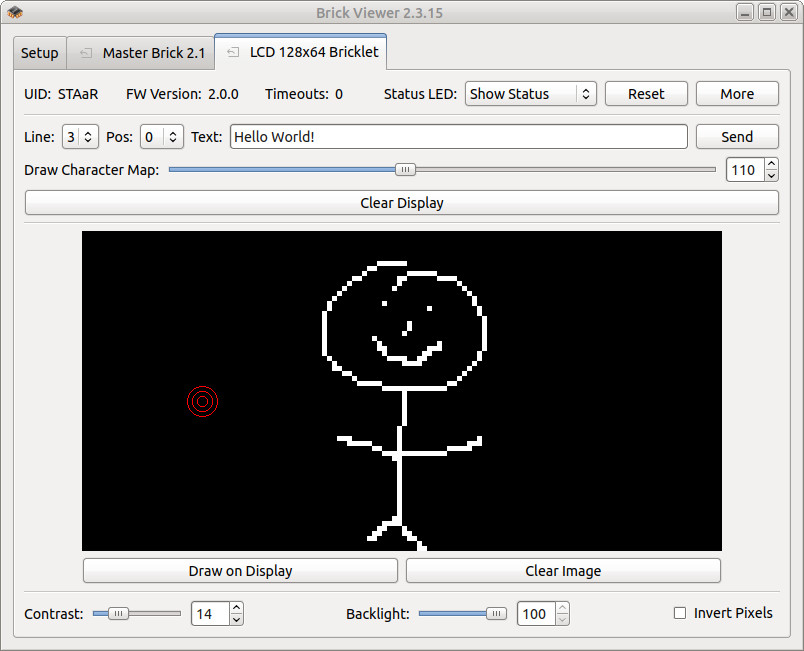
If you connect the Brick to the PC over USB, you should see a new tab named "LCD 128x64 Bricklet" in the Brick Viewer after a moment. Select this tab. If everything went as expected the Brick Viewer should look as depicted below.
You can draw and write text to the display. With the slider it is also possible to show the available character set on the LCD.
If you press with your finger or a stylus on the display you can see a red circle at the press-position in Brick Viewer. The number of circles corresponds to the touch pressure.
After this test you can go on with writing your own application. See the Programming Interface section for the API of the LCD 128x64 Bricklet and examples in different programming languages.
Usage
To draw to the display we recommend that you use an image library that is native to your programming language (for example PIL for Python). This way you can use all of the available drawing primitives and fonts of the library and then copy the image buffer to the Bricklet.
We provide examples for:
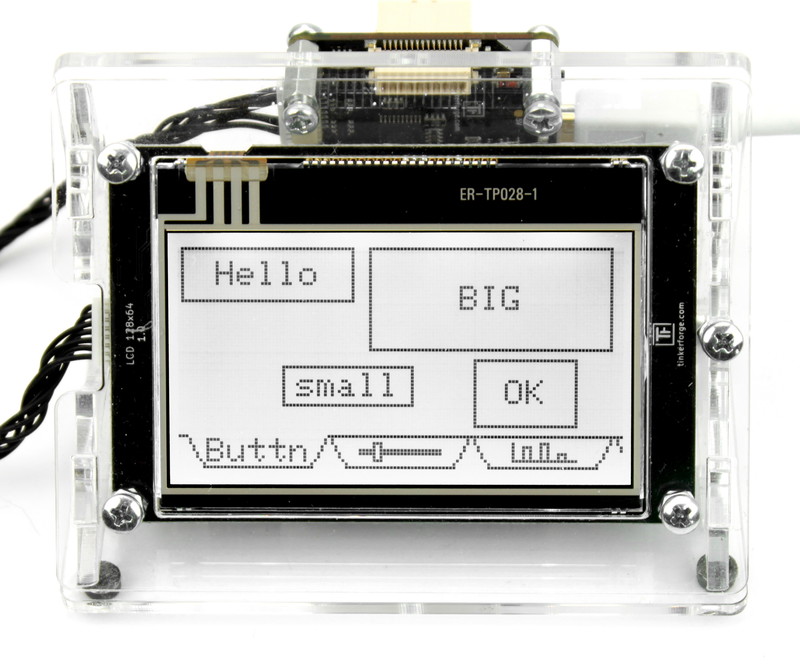
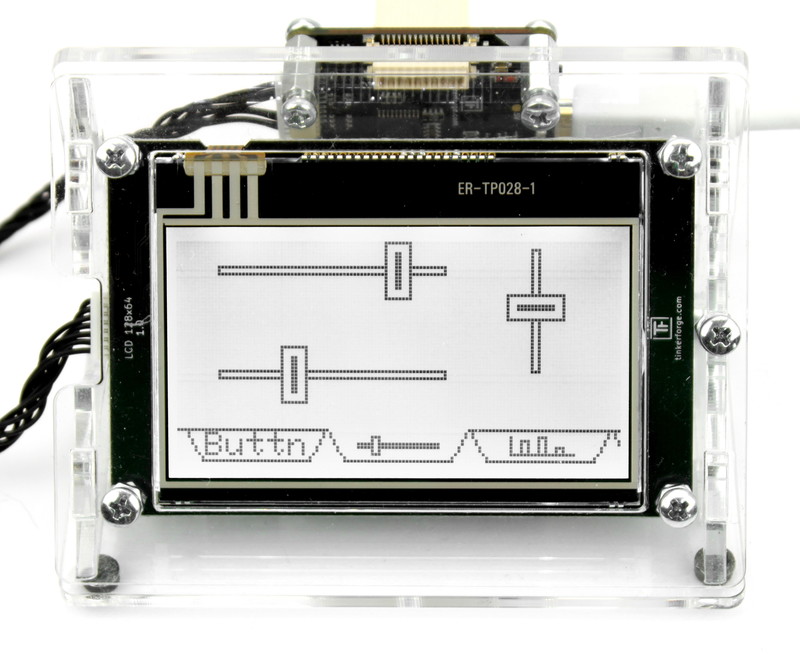
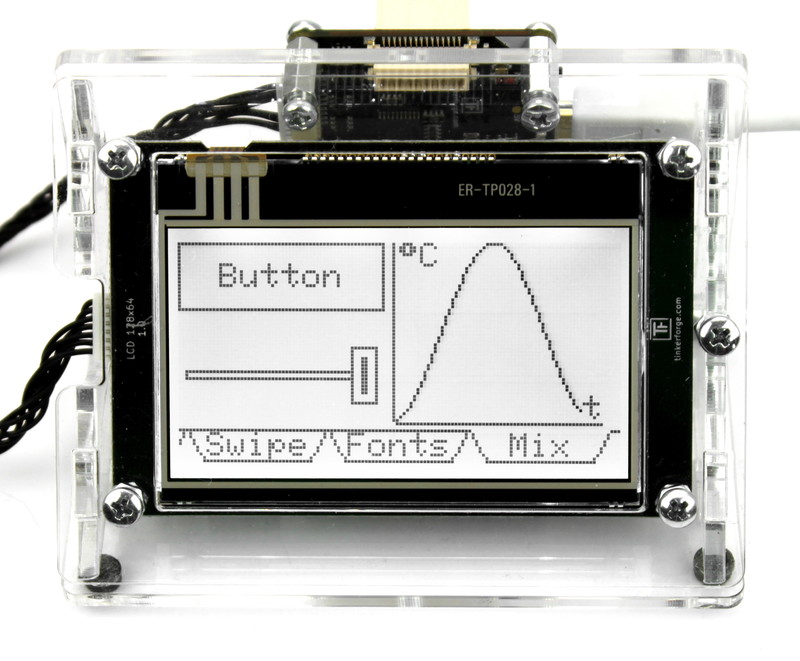
Graphical User Interface
Since firmware version 2.0.2 the LCD 128x64 Bricklet comes with an API for an easy to use graphical user interface (GUI). The user interface consists of four basic UI elements:
Buttons: Up to 12 buttons can be placed with arbitrary position/width/height and custom text. They automatically generate a press- and release-event.
Slider: Up to 6 slider can be placed at arbitrary position/length. You can use horizontal and vertical slider. They automatically generate a position-event.
Graphs: Up to 4 graphs can be placed with arbitrary position/width/height. You can use dot-, line- and bar-graphs and a caption text for the x and y axis can be used. You can stream a list of data-points, the graph is drawn automatically.
Tabs: Up to 10 tabs can be used. Tabs can have text or icons. They automatically generate an event on tab selection changes.
These GUI elements can be added, updated and removed with an easy-to-use API. Interaction is done with callbacks on a user-event (click/swipe) basis. See the examples for your programming languages in the API documentation for the details.
The LCD 128x64 Bricklet has a buffer for the normal drawing functions (WritePixels, WriteLine, DrawBox, etc) and an additional buffer for the GUI elements. The GUI buffer will be drawn on top of the standard buffer.
Additionally both of those buffers can be double-buffered for smooth uninterrupted drawing.
This means that GUI will always stay on the display and react to user interaction until explicitly removed. With this approach the cooperation between GUI elements and self drawn addtions is easy to achieve, since there is never any z-fighting.
For Example: If you want to use a button with an icon, you can create a button with the position, width/height as you need it and leave the text empty. After that you can draw the icon inside of the button with the standard WritePixels function. This will work without problems and the highlight effect of the button during a click will not permanently overwrite your custom icon.
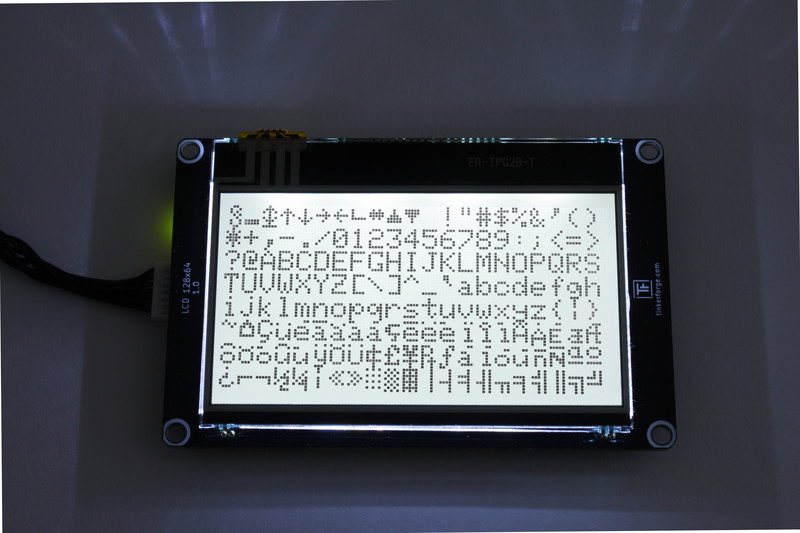
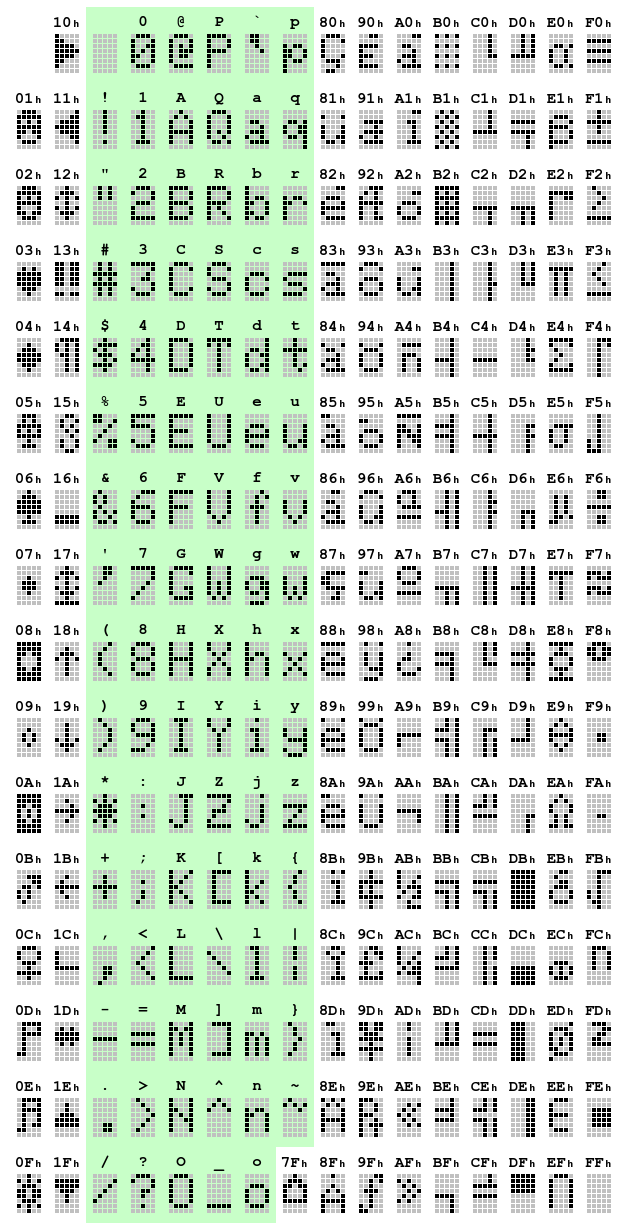
Font
The Bricklet has an embedded font (code page 437, ASCII subset in green) that allows fast and easy text rendering (up to 22x8 characters):
Touchscreen
The Bricklet has a resistive touchscreen. This means that you may have to touch with a little bit more pressure then you are used to with your smart phone, but you can also use a stylus or similar instead of your finger.
With the API you can get the currently pressed x/y coordinate as well as the touch pressure. You can use this for detection of "clicks" or gestures.
Some gestures (swipe left, right, up, down with the start- and end-position of the swipe) are calculated by the Bricklet and can be received directly through the API with callbacks.
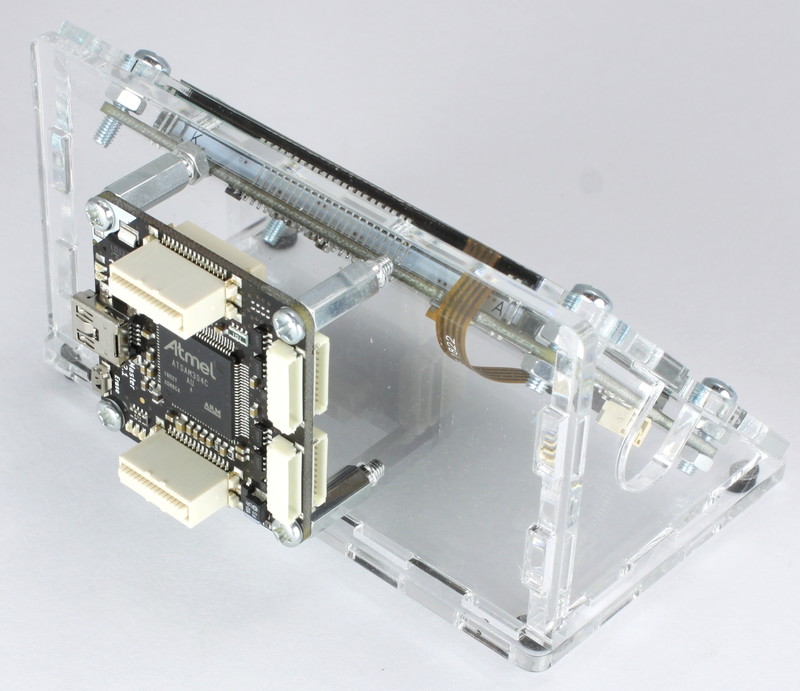
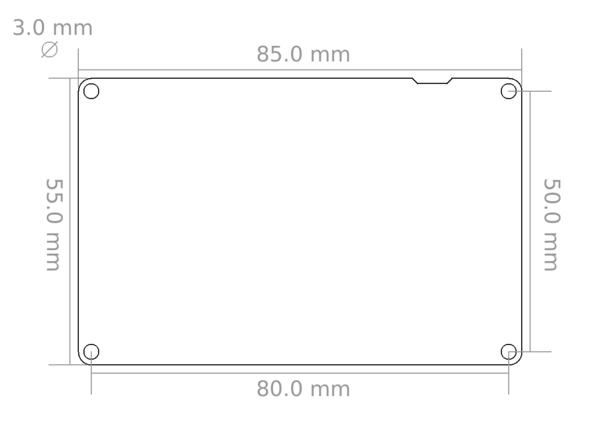
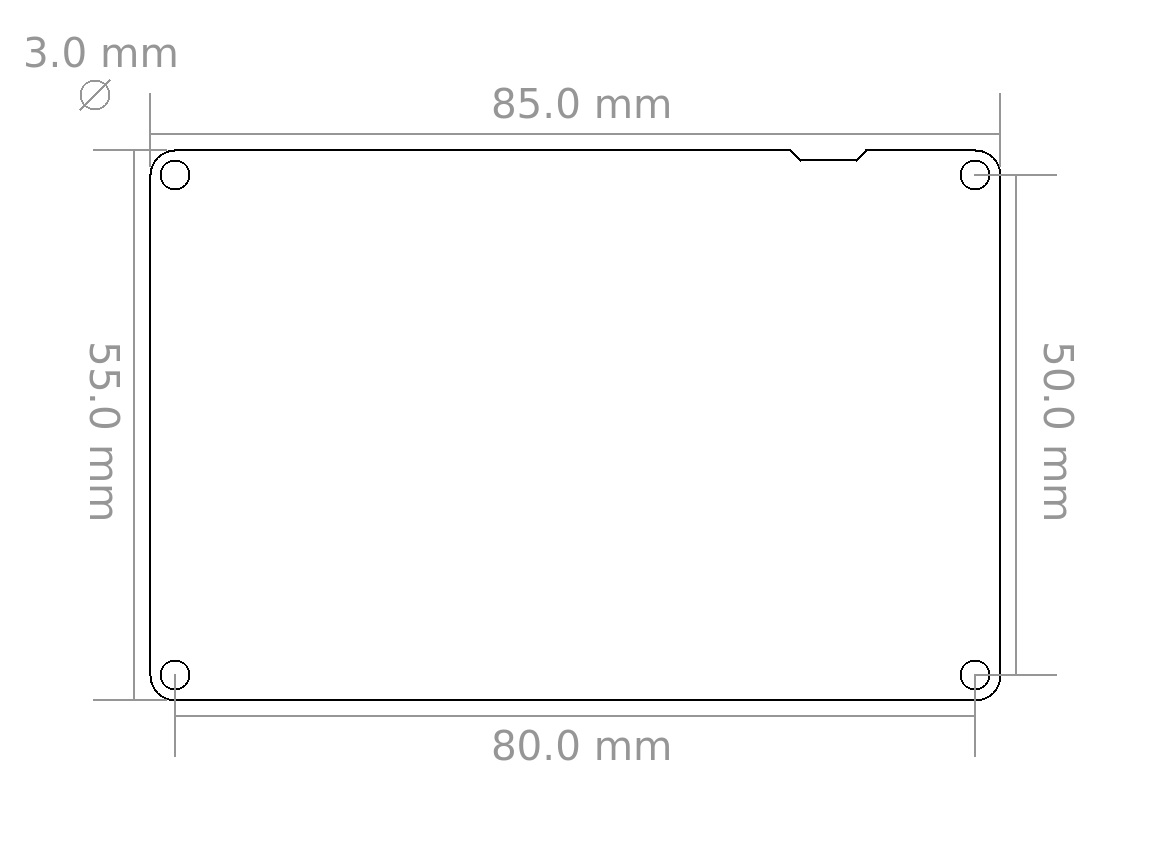
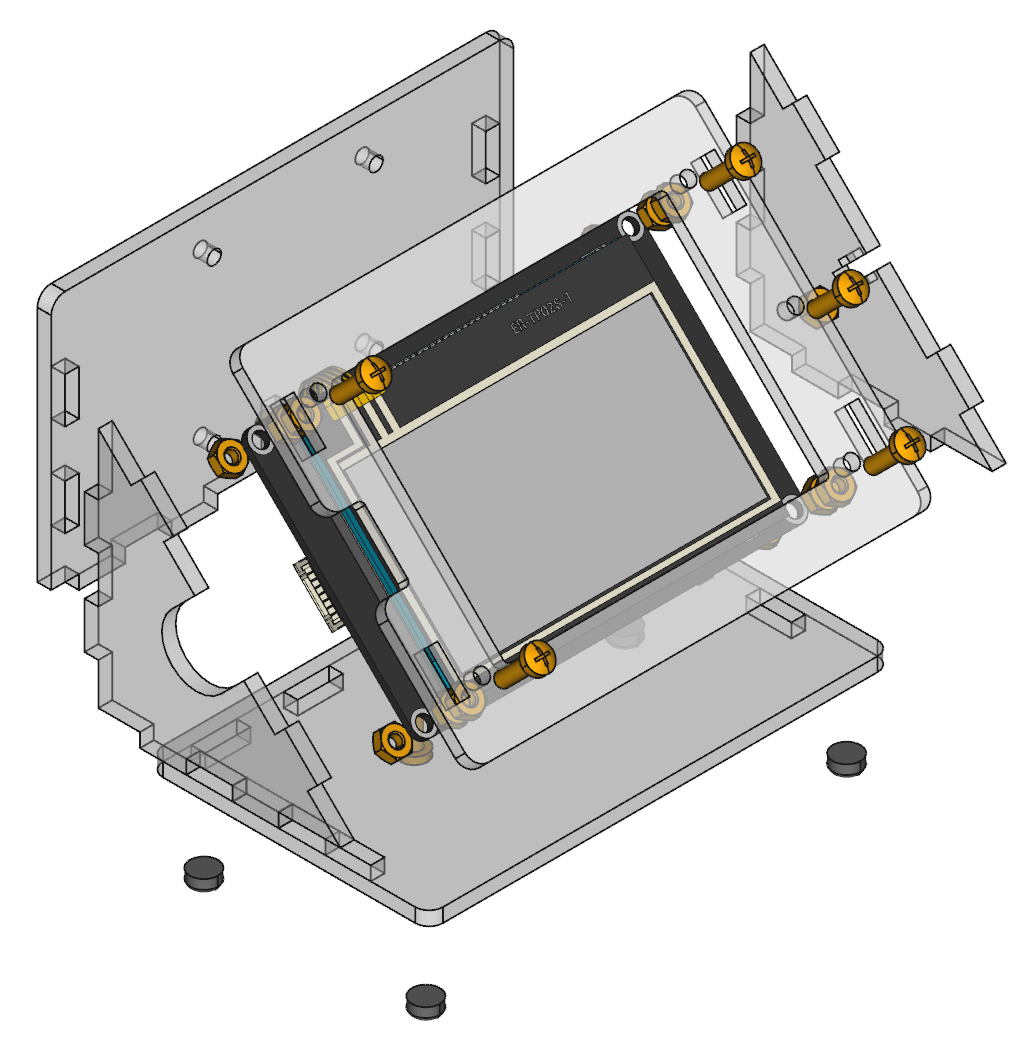
Case
A laser-cut case for the LCD 128x64 Bricklet is available.

The assembly is easiest if you follow the following steps:
Screw front plate to Bricklet,
build up side plates and bottom/back plate,
screw front plate to side plates.
Optional: Screw Master Brick to the back plate.
Below you can see an exploded assembly drawing of the LCD 128x64 Bricklet case:
Hint: There is a protective film on both sides of the plates, you have to remove it before assembly.
Programming Interface
See Programming Interface for a detailed description.
Language |
API |
Examples |
Installation |
|---|---|---|---|
C/C++ |
|||
C/C++ for Microcontrollers |
|||
C# |
|||
Delphi/Lazarus |
|||
Go |
|||
Java |
|||
JavaScript |
|||
LabVIEW |
|||
Mathematica |
|||
MATLAB/Octave |
|||
MQTT |
|||
openHAB |
|||
Perl |
|||
PHP |
|||
Python |
|||
Ruby |
|||
Rust |
|||
Shell |
|||
Visual Basic .NET |
|||
TCP/IP |
|||
Modbus |