- Getting Started
- Hardware
- Bricks
- Bricklets
- Accelerometer Bricklet 2.0
- Air Quality Bricklet
- Ambient Light Bricklet 3.0
- Analog In Bricklet 3.0
- Analog Out Bricklet 3.0
- Barometer Bricklet
- Barometer Bricklet 2.0
- Breakout Bricklet
- CAN Bricklet
- CAN Bricklet 2.0
- CO2 Bricklet 2.0
- Color Bricklet
- Color Bricklet 2.0
- Compass Bricklet
- DC Bricklet 2.0
- Distance IR Bricklet
- Distance IR Bricklet 2.0
- Distance US Bricklet 2.0
- DMX Bricklet
- Dual Button Bricklet 2.0
- Dust Detector Bricklet
- E-Paper 296x128 Bricklet
- Energy Monitor Bricklet
- GPS Bricklet 2.0
- GPS Bricklet 3.0
- Hall Effect Bricklet
- Hall Effect Bricklet 2.0
- Humidity Bricklet 2.0
- IMU Bricklet 3.0
- Industrial Analog Out Bricklet 2.0
- Industrial Counter Bricklet
- Industrial Digital In 4 Bricklet 2.0
- Industrial Digital Out 4 Bricklet
- Industrial Digital Out 4 Bricklet 2.0
- Industrial Dual 0-20mA Bricklet
- Industrial Dual 0-20mA Bricklet 2.0
- Industrial Dual AC In Bricklet
- Industrial Dual AC Relay Bricklet
- Industrial Dual Analog In Bricklet 2.0
- Industrial Dual Relay Bricklet
- Industrial PTC Bricklet
- Industrial Quad Relay Bricklet 2.0
- IO-16 Bricklet
- IO-16 Bricklet 2.0
- IO-4 Bricklet 2.0
- Isolator Bricklet
- Joystick Bricklet
- Joystick Bricklet 2.0
- Laser Range Finder Bricklet 2.0
- LCD 128x64 Bricklet
- LCD 20x4 Bricklet
- LED Strip Bricklet 2.0
- Line Bricklet
- Linear Poti Bricklet
- Linear Poti Bricklet 2.0
- Load Cell Bricklet 2.0
- Motion Detector Bricklet 2.0
- Motorized Linear Poti Bricklet
- Multi Touch Bricklet
- Multi Touch Bricklet 2.0
- NFC Bricklet
- OLED 128x64 Bricklet 2.0
- OLED 64x48 Bricklet
- One Wire Bricklet
- Outdoor Weather Bricklet
- Particulate Matter Bricklet
- Performance DC Bricklet
- Piezo Speaker Bricklet
- Piezo Speaker Bricklet 2.0
- Real-Time Clock Bricklet
- Real-Time Clock Bricklet 2.0
- Remote Switch Bricklet 2.0
- RGB LED Bricklet 2.0
- RGB LED Button Bricklet
- Rotary Encoder Bricklet 2.0
- Rotary Poti Bricklet
- Rotary Poti Bricklet 2.0
- RS232 Bricklet
- RS232 Bricklet 2.0
- RS485 Bricklet
- Segment Display 4x7 Bricklet
- Segment Display 4x7 Bricklet 2.0
- Servo Bricklet 2.0
- Silent Stepper Bricklet 2.0
- Solid State Relay Bricklet 2.0
- Sound Intensity Bricklet
- Sound Pressure Level Bricklet
- Temperature Bricklet
- Temperature Bricklet 2.0
- Temperature IR Bricklet 2.0
- Thermal Imaging Bricklet
- Thermocouple Bricklet 2.0
- Tilt Bricklet
- UV Light Bricklet 2.0
- Voltage/Current Bricklet 2.0
- XMC1400 Breakout Bricklet
- Master Extensions
- Power Supplies
- Discontinued Products
- Timeline
- Software
- Kits
- Embedded Boards
- Specifications
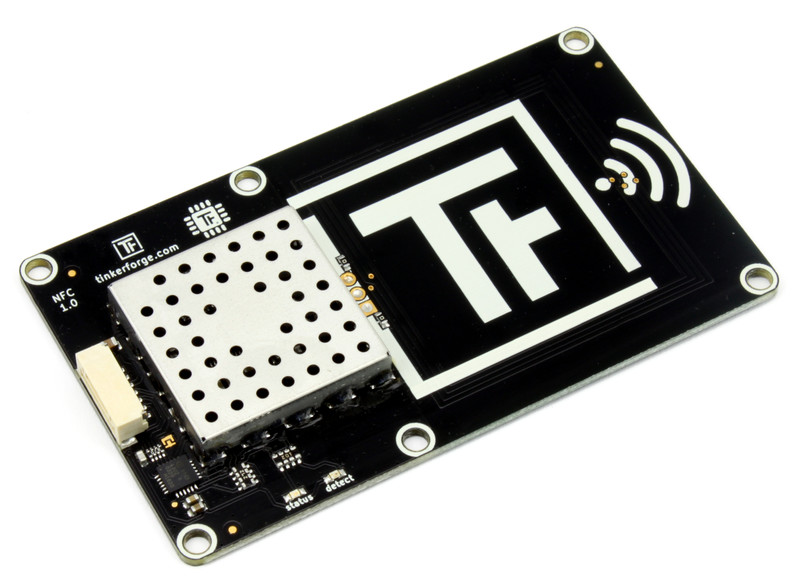
NFC Bricklet
Features
Can read and write NFC Forum Type 1, 2, 3, 4, 5 and Mifare Classic tags.
NDEF definitions can be directly read/written with API.
Supports NFC P2P mode
Supports card emulation mode
Range is restricted to 10cm (3.94")
Description
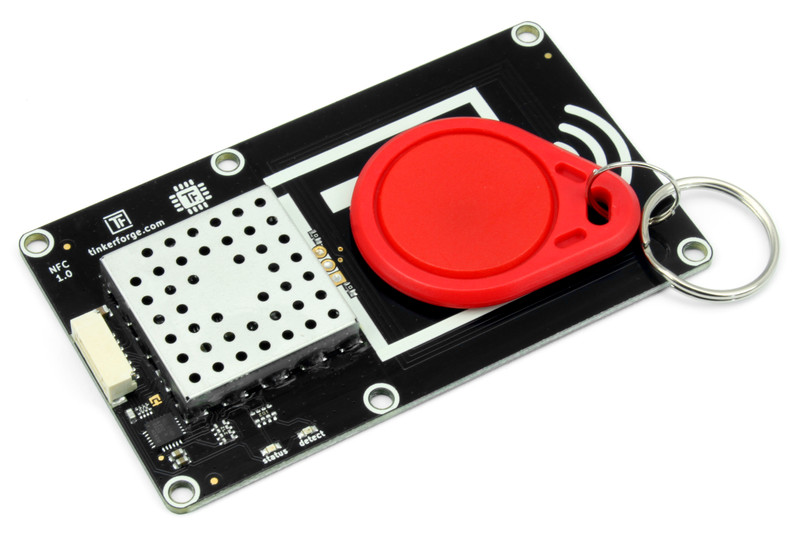
The NFC Bricklet can be used to extend Bricks by the possibility to read and write NFC tags. To do this you only have to place a NFC tag in the proximity (up to 10cm) of the Bricklet.
NFC Forum Type 1, 2, 3, 4 (ISO 14443), NFC Forum Type 5 (ISO 15693) and Mifare Classic tags are supported. Direct page access is available and it is possible to directly read/write NDEF messages through the API.
The Bricklet also supports Card Emulation as well as NFC P2P communication.
Technical Specifications
Property |
Value |
|---|---|
NFC IC |
PN7150 |
Current Consumption (idle) |
24mW (~5mA at 5V) |
Supported tags |
Mifare Classic, NFC Forum Type 1, 2, 3, 4, 5 |
Supported modes |
Read/Write tag, P2P, Card Emulation |
Operating Frequency |
13.56 MHz |
Dimensions (W x D x H) |
80 x 50 x 7mm (3.15 x 1.97 x 0.28") |
Weight |
18g |
Resources
Compatibility
The Bricklet should work with every tag that is either compatible to Mifare Classic, NFC Forum Type 1, 2, 3, 4 or 5. We explicitly tested the Bricklet with the following tags:
Mifare Classic:
FM11RF08
MF1S50
NFC Forum Type 1:
Jewel
Topaz 512 (TPZ-505-016)
NFC Forum Type 2:
NTAG203(F)
NTAG210
NTAG213
NTAG215
NTAG216
Mifare Ultralight (MF01CU1)
NFC Forum Type 3:
Sony FeliCa Lite-S RC-S966
NFC Forum Type 4:
Mifare DESFire
Mifare DESFire EV1
NFC Forum Typ 5:
NXP ICODE SLIX
Every smart phone that is capable of NFC can read NFC Forum Type 1 and 2 tags. Most support Type 3 and 4.
Page Sizes and other things to know
Mifare Classic and NFC Forum Type x tags have different page sizes and a different memory structure. If you use the low level page write functions you have to keep track of this structure to not accidentally lock a tag.
Mifare Classic:
Page size 16 byte.
4 pages build one sector.
Sector 0 (pages 0-3) should not be overwritten.
The last page in every sector controls the authentication keys for this sector (page 7, 11, 15, ..). Do not overwrite these pages if you don't know what you are doing.
Adafruit has a quite good description of the structure: Link
NFC Forum Type 1:
Page size 8 byte.
pages 0-2 are reserved for lock control. Do not overwrite these pages if you don't know what you are doing.
page 15 is reserved and can not be written.
NFC Forum Type 2:
Page size 4 byte.
Page 0-1 are read only and contains the tag ID.
Page 3-4 and the last two pages (page number depends on the size of the tag) contain lock bits. Do not overwrite these pages if you don't know what you are doing.
NFC Forum Type 3:
Page 0 contains attribute information.
The other pages may be read-only. You can look up if it can be written in the attribute information.
NFC Forum Type 4:
Does not have pages, uses a file system instead.
Currently we support access to the capability container and NDEF record.
Select page 3 to access the capability container.
Select page 4 to access the NDEF record.
NFC Forum Typ 5:
Page size 4 byte.
It has a longer range since it is is based on ISO 15693 instead of ISO 14443.
Available since firmware version 2.1.0
Identifying, Reading and Writing tags
To read or write a tag you first have to change the mode to MODE_READER.
To identify and select a tag you have to call ReaderRequestTagID with a tag type (Mifare Classic or NFC Forum Type 1/2). The state of the Bricklet will change to READER_STATE_REQUEST_TAG_ID and then change to READER_STATE_REQUEST_TAG_ID_READY if a tag was found. You can then get the tag ID by calling GetTagID. Now the tag with this tag ID is selected and it can be read or written. If the state changes to READER_STATE_REQUEST_TAG_ID_ERROR no tag with the given tag type was found. In this case you can try again by calling ReaderRequestTagID again.
If you know the tag ID of your tag and ReaderGetTagID returns another tag ID it means that another tag is also in the proximity of the reader. In this case you can call ReaderRequestTagID again, the NFC Bricklet will cycle through up to two tags if ReaderRequestTagID is called repeatedly. Therefore ReaderRequestTagID select Tags.
If a tag is selected (i.e. the state is READER_STATE_REQUEST_TAG_ID_READY) you can read or write the tag page by page:
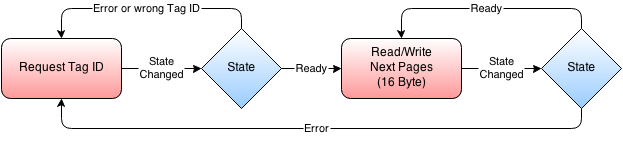
To read a page you have to first call ReaderRequestPage. The state will change to READER_STATE_REQUEST_PAGE_READY after which you can get the page by calling GetPage. Writing can be done by calling ReaderWritePage, the writing is finished after the state changes to READER_STATE_WRITE_PAGE_READY.
If a tag is selected you can read and write without calling ReaderRequestTagID again as long as the tag isn't removed from the proximity of the NFC Bricklet.
Instead of ReaderRequestPage or ReaderWritePage you can also use ReaderRequestNDEF or ReaderWriteNDEF to directly write NDEF messages to an appropriate space instead of low-level pages.
Special Case for Mifare Classic
In case of Mifare Classic you have to authenticate a page before you can read or write it:

This means that every time before you call ReaderRequestPage or ReaderWritePage, you have to call ReaderAuthenticatingMifareClassicPage and wait for the state to change to READER_STATE_AUTHENTICATING_MIFARE_CLASSIC_PAGE_READY. Otherwise Mifare Classic tags can be handled exactly as described above.
The default key (key number A) of a Mifare Classic tag is [0xFF, 0xFF, 0xFF, 0xFF, 0xFF, 0xFF].
Card Emulation
To use card emulation you first have to change the mode to MODE_CARDEMU.
Starting from CARDEMU_STATE_IDLE you can set the NDEF with CardemuWriteNDEF. After that call CardemuStartDiscovery. If a phone is now brought near to the NFC Bricklet the state will change to CARDEMU_STATE_DISCOVER_READY.
Call CardemuStartTransfer to transfer to previously set NDEF message to the phone.
Peer-To-Peer Mode
Warning
P2P support was removed in firmware version 2.1.0
To use P2P you first have to change the mode to MODE_P2P.
Starting from P2P_STATE_IDLE you can set the NDEF with P2PWriteNDEF. After that call P2PStartDiscovery. If a phone is now brought near to the NFC Bricklet the state will change to P2P_STATE_DISCOVER_READY.
Call P2PStartTransfer with parameter 1 to transfer to previously set NDEF message to the phone or with parameter 2 to read an NDEF message from the phone.
In the second case you can read the NDEF message with P2PReadNDEF.
NFC NDEF Messages
The NFC Forum has specified the NFC Data Exchange Format (NDEF) to transfer messages from NFC tags to smart phones. NDEF Messages consist of one or more NDEF Records. Many of the predefined NDEF Records can be understood by any smart phone that is capable of NFC communication.
Test your NFC Bricklet
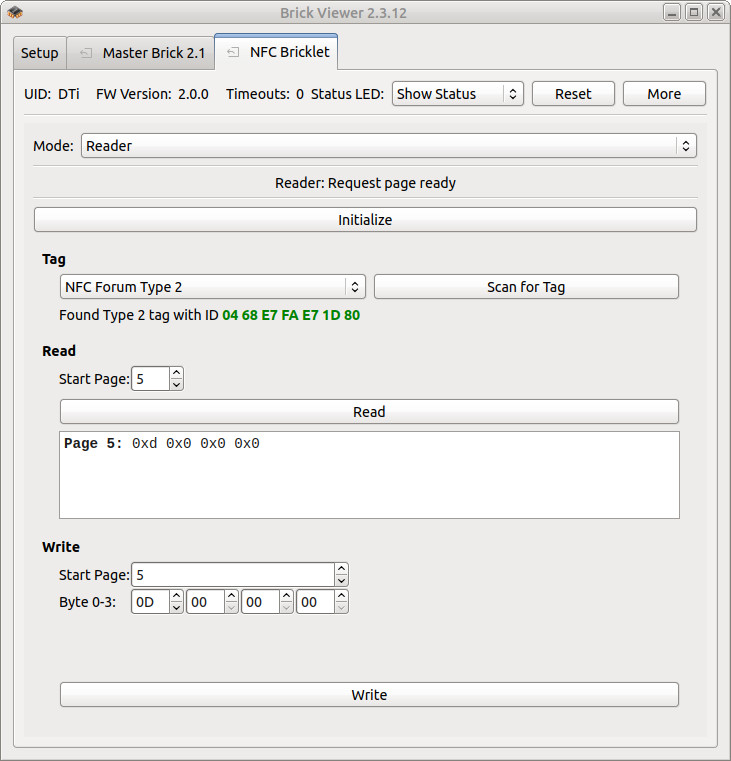
To test a NFC Bricklet you need to have Brick Daemon and Brick Viewer installed. Brick Daemon acts as a proxy between the USB interface of the Bricks and the API bindings. Brick Viewer connects to Brick Daemon. It helps to figure out basic information about the connected Bricks and Bricklets and allows to test them.
Connect the NFC Bricklet to a Brick with a Bricklet Cable.
If you connect the Brick to the PC over USB, you should see a new tab named "NFC Bricklet" in the Brick Viewer after a moment. Select this tab.
If everything went as expected you can now scan for tags and read/write pages etc.
After this test you can go on with writing your own application. See the Programming Interface section for the API of the NFC Bricklet and examples in different programming languages.
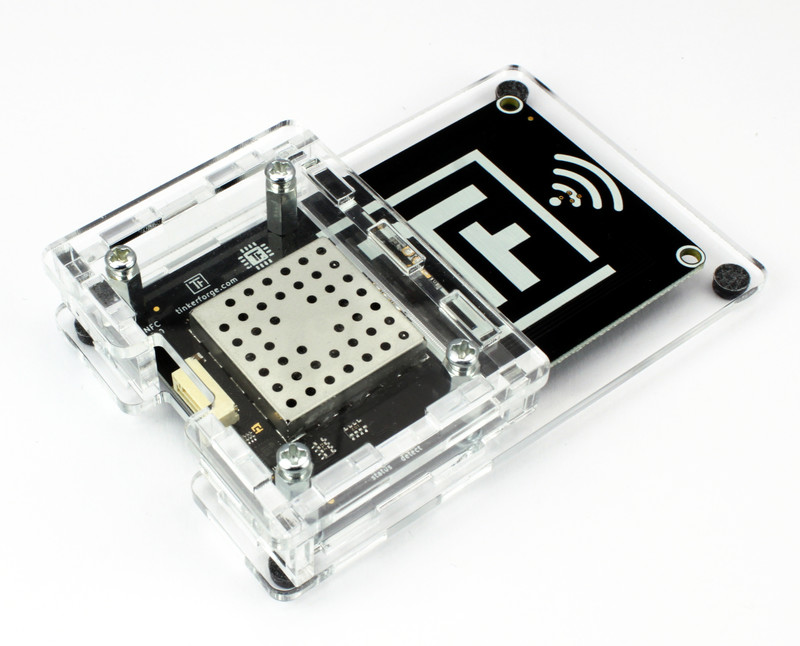
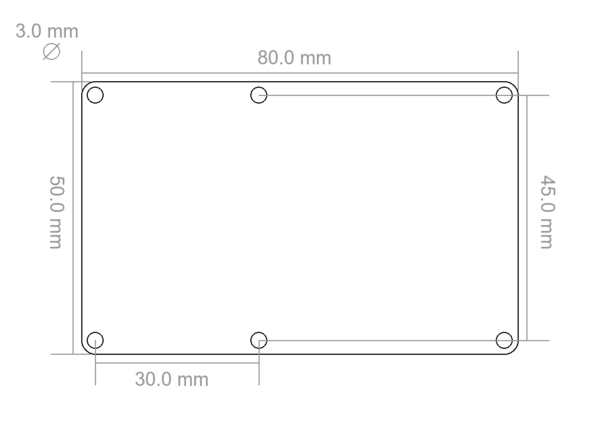
Case
A laser-cut case for the NFC Bricklet is available.
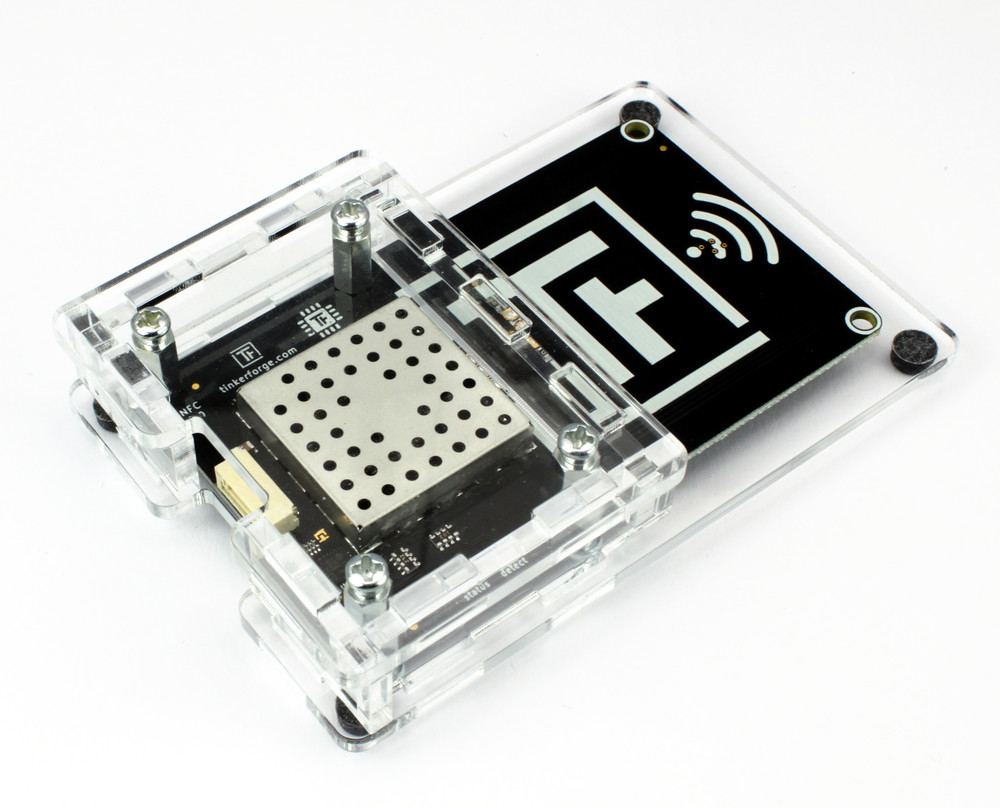
The assembly is easiest if you follow the following steps:
Put long screws through bottom plate,
put Bricklet on plate and fasten screws with spacers,
build up side plates,
plug side plates in bottom plate,
add top plate onto side plates and
add screws to top plate.
Below you can see an exploded assembly drawing of the NFC Bricklet case:

Hint: There is a protective film on both sides of the plates, you have to remove it before assembly.
Programming Interface
See Programming Interface for a detailed description.
Language |
API |
Examples |
Installation |
|---|---|---|---|
C/C++ |
|||
C/C++ for Microcontrollers |
|||
C# |
|||
Delphi/Lazarus |
|||
Go |
|||
Java |
|||
JavaScript |
|||
LabVIEW |
|||
Mathematica |
|||
MATLAB/Octave |
|||
MQTT |
|||
openHAB |
|||
Perl |
|||
PHP |
|||
Python |
|||
Ruby |
|||
Rust |
|||
Shell |
|||
Visual Basic .NET |
|||
TCP/IP |
|||
Modbus |