- Getting Started
- Hardware
- Bricks
- Bricklets
- Accelerometer Bricklet 2.0
- Air Quality Bricklet
- Ambient Light Bricklet 3.0
- Analog In Bricklet 3.0
- Analog Out Bricklet 3.0
- Barometer Bricklet
- Barometer Bricklet 2.0
- Breakout Bricklet
- CAN Bricklet
- CAN Bricklet 2.0
- CO2 Bricklet 2.0
- Color Bricklet
- Color Bricklet 2.0
- Compass Bricklet
- DC Bricklet 2.0
- Distance IR Bricklet
- Distance IR Bricklet 2.0
- Distance US Bricklet 2.0
- DMX Bricklet
- Dual Button Bricklet 2.0
- Dust Detector Bricklet
- E-Paper 296x128 Bricklet
- Energy Monitor Bricklet
- GPS Bricklet 2.0
- GPS Bricklet 3.0
- Hall Effect Bricklet
- Hall Effect Bricklet 2.0
- Humidity Bricklet 2.0
- IMU Bricklet 3.0
- Industrial Analog Out Bricklet 2.0
- Industrial Counter Bricklet
- Industrial Digital In 4 Bricklet 2.0
- Industrial Digital Out 4 Bricklet
- Industrial Digital Out 4 Bricklet 2.0
- Industrial Dual 0-20mA Bricklet
- Industrial Dual 0-20mA Bricklet 2.0
- Industrial Dual AC In Bricklet
- Industrial Dual AC Relay Bricklet
- Industrial Dual Analog In Bricklet 2.0
- Industrial Dual Relay Bricklet
- Industrial PTC Bricklet
- Industrial Quad Relay Bricklet 2.0
- IO-16 Bricklet
- IO-16 Bricklet 2.0
- IO-4 Bricklet 2.0
- Isolator Bricklet
- Joystick Bricklet
- Joystick Bricklet 2.0
- Laser Range Finder Bricklet 2.0
- LCD 128x64 Bricklet
- LCD 20x4 Bricklet
- LED Strip Bricklet 2.0
- Line Bricklet
- Linear Poti Bricklet
- Linear Poti Bricklet 2.0
- Load Cell Bricklet 2.0
- Motion Detector Bricklet 2.0
- Motorized Linear Poti Bricklet
- Multi Touch Bricklet
- Multi Touch Bricklet 2.0
- NFC Bricklet
- OLED 128x64 Bricklet 2.0
- OLED 64x48 Bricklet
- One Wire Bricklet
- Outdoor Weather Bricklet
- Particulate Matter Bricklet
- Performance DC Bricklet
- Piezo Speaker Bricklet
- Piezo Speaker Bricklet 2.0
- Real-Time Clock Bricklet
- Real-Time Clock Bricklet 2.0
- Remote Switch Bricklet 2.0
- RGB LED Bricklet 2.0
- RGB LED Button Bricklet
- Rotary Encoder Bricklet 2.0
- Rotary Poti Bricklet
- Rotary Poti Bricklet 2.0
- RS232 Bricklet
- RS232 Bricklet 2.0
- RS485 Bricklet
- Segment Display 4x7 Bricklet
- Segment Display 4x7 Bricklet 2.0
- Servo Bricklet 2.0
- Silent Stepper Bricklet 2.0
- Solid State Relay Bricklet 2.0
- Sound Intensity Bricklet
- Sound Pressure Level Bricklet
- Temperature Bricklet
- Temperature Bricklet 2.0
- Temperature IR Bricklet 2.0
- Thermal Imaging Bricklet
- Thermocouple Bricklet 2.0
- Tilt Bricklet
- UV Light Bricklet 2.0
- Voltage/Current Bricklet 2.0
- XMC1400 Breakout Bricklet
- Master Extensions
- Power Supplies
- Discontinued Products
- Timeline
- Software
- Kits
- Embedded Boards
- Specifications
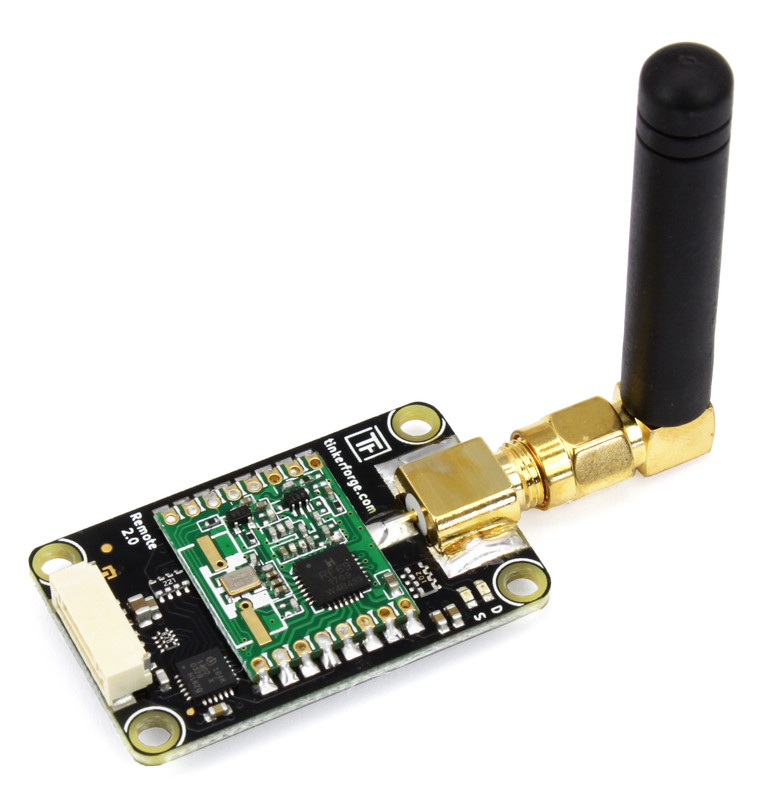
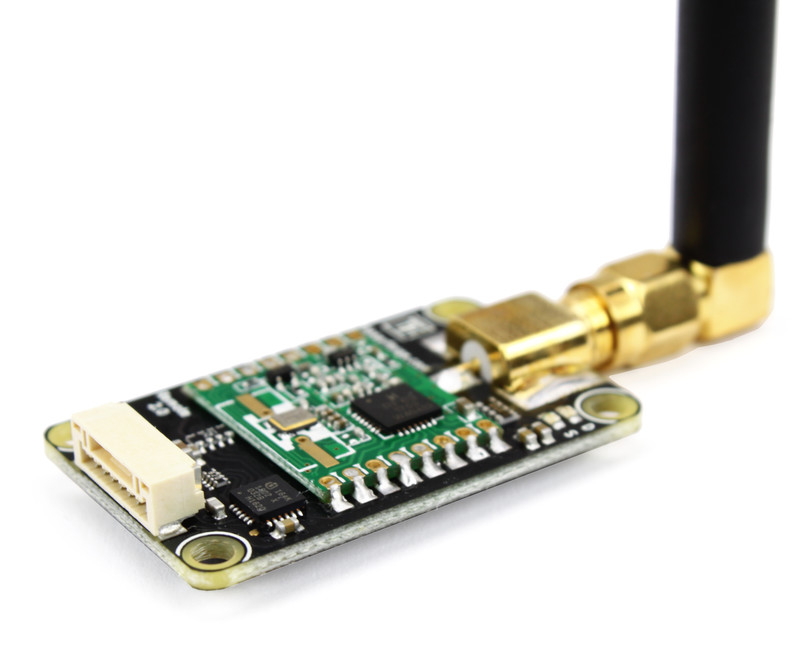
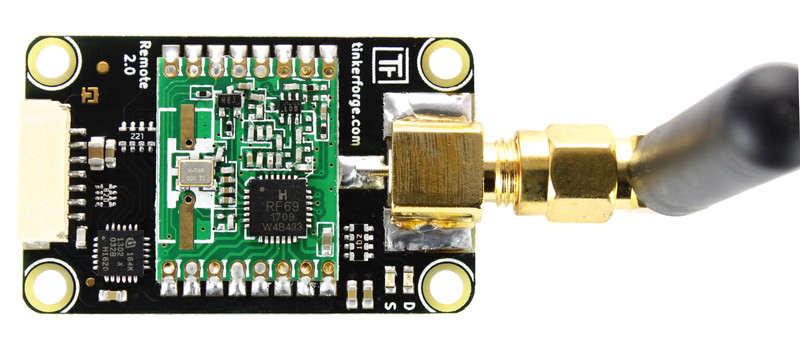
Remote Switch Bricklet 2.0
Features
Wireless house automation
Controls remote mains switches (supported devices)
Can control remote mains switches with dimming function
Can read out the remotes of remote mains switches
Description
The Remote Switch Bricklet is equipped with a 433MHz radio module (433MHz SMA antenna is included). It can be used to extend Bricks by the possibility to control remote mains switches that are based on the PT2262 and HX2262 ICs.
House code as well as receiver code can be configured with the API.
The Bricklet can also be used as a receiver for the remotes.
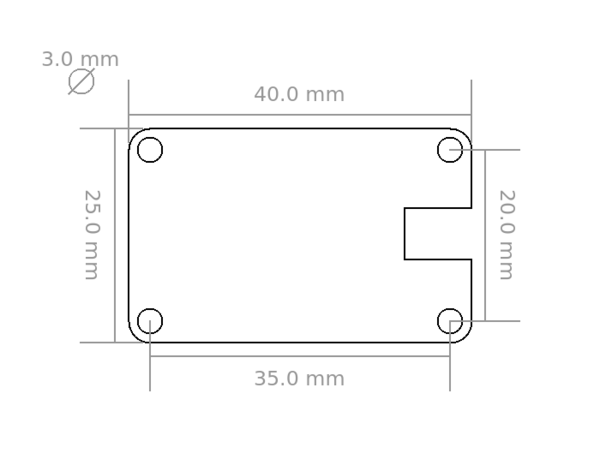
Technical Specifications
Property |
Value |
|---|---|
Radio Module |
RFM69HW |
Current Consumption |
113mW (idle), 231mW (sending) |
Radio Frequency |
433MHz |
Supported Remote Mains Switches |
All based on PT2262 and HX2262, (complete list) |
Dimensions (W x D x H) |
25 x 40 x 5mm (0.98 x 1.58 x 0.2")* |
Weight |
8g* |
* without antenna
Resources
Test your Remote Switch Bricklet 2.0
To test a Remote Switch Bricklet 2.0 you need to have Brick Daemon and Brick Viewer installed. Brick Daemon acts as a proxy between the USB interface of the Bricks and the API bindings. Brick Viewer connects to Brick Daemon. It helps to figure out basic information about the connected Bricks and Bricklets and allows to test them.
Connect the Remote Switch Bricklet 2.0 to a Brick with a Bricklet Cable.
If you connect the Brick to the PC over USB, you should see a new tab named "Remote Switch Bricklet 2.0" in the Brick Viewer after a moment. Select this tab. After that configure the house and receiver code. If everything went as expected you can now control remote mains switches.
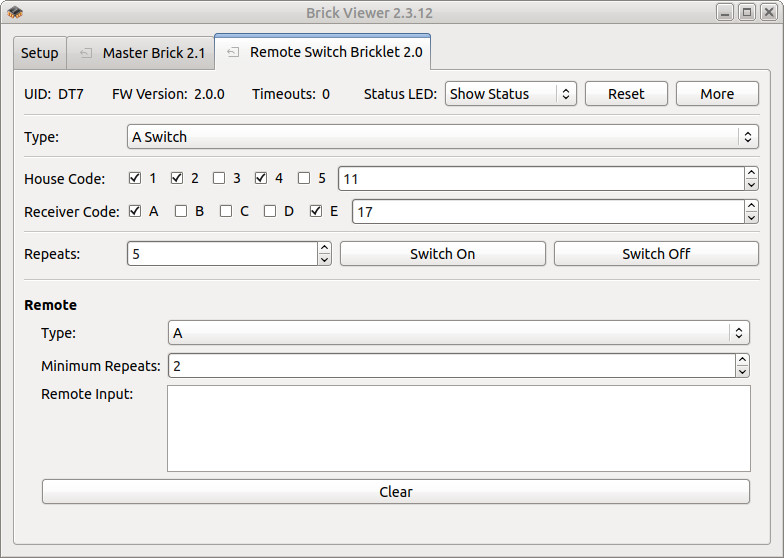
After this test you can go on with writing your own application. See the Programming Interface section for the API of the Remote Switch Bricklet 2.0 and examples in different programming languages.
List of Supported Devices
The following devices are known to be controllable with the Remote Switch Bricklet 2.0. If you found another remote mains switch that is compatible please write us an email, we would like to add it.
The Remote Switch Bricklet 2.0 currently supports three different addressing types: A, B and C.
Manufacturer |
Models |
Function |
Type |
|---|---|---|---|
BAT |
RC 3500-A |
Switch |
A |
|
RC AAA1000-A |
Switch |
A |
|
RC AAA3680-A |
Switch |
A |
Brennenstuhl |
RCS 1000 N Comfort |
Switch Set |
A |
|
RCS 1044 N Comfort |
Outdoor Switch Set |
A |
|
RCS 2044 N Comfort Indoor |
Switch Set |
A |
|
RCS 2044 N Comfort Outdoor |
Outdoor Switch Set |
A |
DÜWI |
FS1 |
Switch Set |
C |
ELRO |
AB440D |
Dimmer |
A |
|
AB440ID |
Dimmer (flush-mounted) |
A |
|
AB440IS |
Switch (flush-mounted) |
A |
|
AB440L |
Bulb Holder Dimmer |
A |
|
AB440R |
Remote |
A |
|
AB440S |
Switch |
A |
|
AB440W |
Outdoor Switch |
A |
ELRO Home Easy |
HE801S |
Switch Set |
B |
|
HE801SA |
Switch Set |
C |
|
HE801SF |
Switch Set |
B |
|
HE802SA |
Dimmer Set |
B |
|
HE802SF |
Dimmer Set |
B |
|
HE803S |
Dimmer Set |
B |
|
HE805S |
Switch Set (flush-mounted) |
B |
|
HE808S |
Switch Set |
B |
|
HE815S |
Dimmer/Switch Set |
B |
|
HE820 |
Gong |
B |
|
HE821S |
Gong with light |
B |
|
HE831S |
Outdoor Switch Set |
B |
|
HE834S |
Outdoor Switch Set |
B |
|
HE844A |
Remote |
B |
|
HE866 |
Outdoor build-in Switch |
B |
|
HE867 |
Outdoor Switch |
B |
|
HE871 |
Bulb Holder Switch |
B |
|
HE872 |
Bulb Holder Switch Dimmer |
B |
|
HE874 |
Switch |
C |
|
HE875 |
Mini-Switch |
B |
|
HE877 |
Switch |
B |
|
HE877A |
Switch with On/Off at Receiver |
B |
|
HE878 |
Switch |
B |
|
HE878A |
Dimmer |
B |
|
HE881 |
Build-in Switch |
B |
|
HE886 |
Switch (flush-mounted) |
B |
|
HE888 |
Dimmer (flush-mounted) |
B |
|
HE889 |
Blind Switch (flush-mounted) |
B |
|
HE876 |
Mini-Dimmer |
B |
|
HE892S |
Outlet Strip |
B |
Intertechno |
CMR-300 |
Dimmer (flush-mounted) |
C |
|
CMR-500 |
Blind Switch (flush-mounted) |
C |
|
CMR-1000 |
Switch (flush-mounted) |
C |
|
CMR-1001 |
Impulse Switch (flush-mounted) |
C |
|
CMR-1224 |
12/24V Switch (flush-mounted) |
C |
|
HDR-105 |
12V Dimmer |
C |
|
GR-300 |
Outdoor Dimmer |
C |
|
GRR-300 |
Outdoor Dimmer |
B |
|
GRR-3500 |
Outdoor Switch |
B |
|
IT-1500 |
Switch Set |
B |
|
IT-2300 |
4x Switch |
B |
|
IT-3500L |
Switch |
B |
|
ITDL-1000 |
Switch (flush-mounted) |
B |
|
ITDM-250 |
LED Dimmer (flush-mounted) |
B |
|
ITE-300 |
Dimmer (flush-mounted) |
C |
|
ITE-1000 |
Switch (flush-mounted) |
C |
|
ITK-200 |
Remote |
C |
|
ITL-150 |
Dimmer (flush-mounted) |
B |
|
ITL-210 |
Dimmer (flush-mounted) |
B |
|
ITL-230 |
Switch (flush-mounted) |
B |
|
ITL-250 |
LED Dimmer (flush-mounted) |
B |
|
ITL-300 |
Dimmer (flush-mounted) |
B |
|
ITL-500 |
Blind Switch (flush-mounted) |
B |
|
ITL-1000 |
Timer Switch (flush-mounted) |
B |
|
ITL-3500 |
Switch (flush-mounted) |
B |
|
ITLR-300 |
Dimmer |
B |
|
ITLR-3500 |
Switch |
B |
|
ITR-300 |
Dimmer |
C |
|
ITR-1500 |
Switch Set |
B |
|
ITR-3500 |
Switch |
C |
|
ITR-7000 |
Gong |
B |
|
ITT-1500 |
Remote |
B |
|
LBUR-100 |
Bulb Holder Switch |
B |
|
PA3-1000 |
Switch Set |
C |
Mumbi |
m-FS300 (year 2013 model) |
Switch Set |
A |
ONE FOR ALL |
HC-8000 |
Switch Set |
C |
Vivanco |
FSS 31000W |
Switch Set |
A |
|
FSS 33600W |
Switch Set |
A |
Switch 230V devices
Switching 230V devices is a typical application. Devices for this come in several forms. For example, as intermediate adapter that goes into your standard socket (e.g. Intertechno ITR-1500 and ELRO HE874) or designed for flush-mounting (e.g. Intertechno ITL-1000). Additional features such as timers to turn off the connected device after a given amount of time are also available.
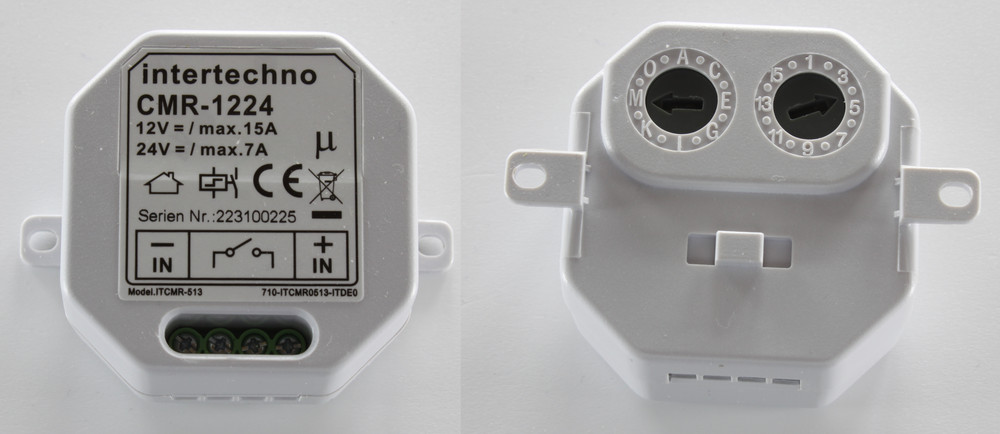
Switch 12/24V devices
Low-voltage or battery powered systems are common in cars, trucks and boats. There are specialized remote switches that operate on 12/24V (e.g. Intertechno CMR-1224).
Dim (energy-saving) light bulbs and LEDs
In addition to simple on/off switches there are also dimmers for normal lamps (e.g. Intertechno ITLR-300), for energy-saving lamps (e.g. Intertechno ITL-150) and for LED lamps (e.g. Intertechno ITL-250).
Control Garage Doors and Blinds
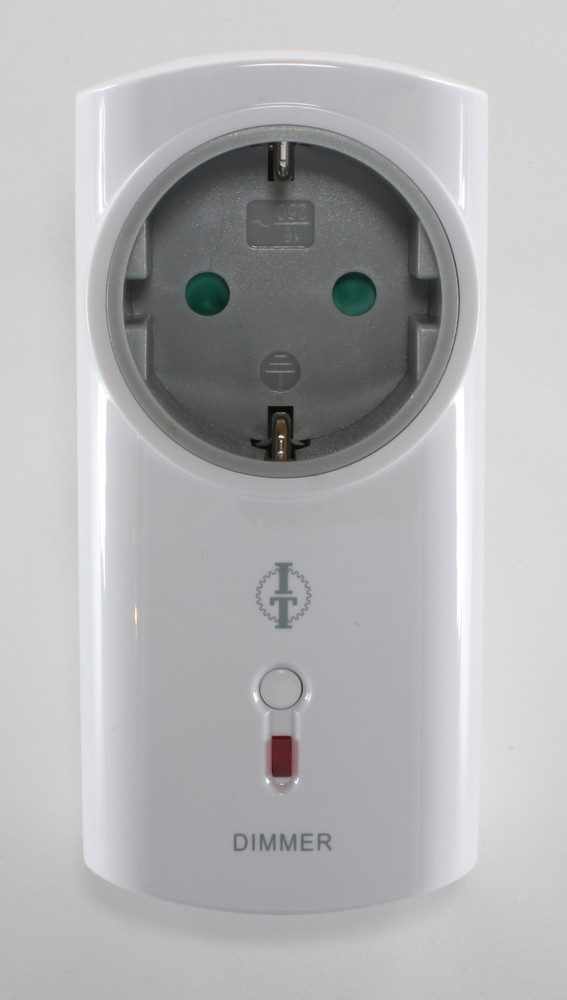
For garage doors and blinds simple on/off switches are not enough. For this applications there are specialized remote switches that can handle three state up, down and off (e.g. Intertechno CMR-500).
Trigger Gongs
Beside switches in different variations there are also gongs (e.g. Intertechno ITR-7000) that can draw attention with sound and/or light signals and are trigger remotely.
Addressing Types
To control remote switches or dimmers their address must be known. The Remote Switch Bricklet 2.0 supports different addressing types. How to figure out or set the address of your device is described below. See the list of supported devices for the specific addressing type of your device.
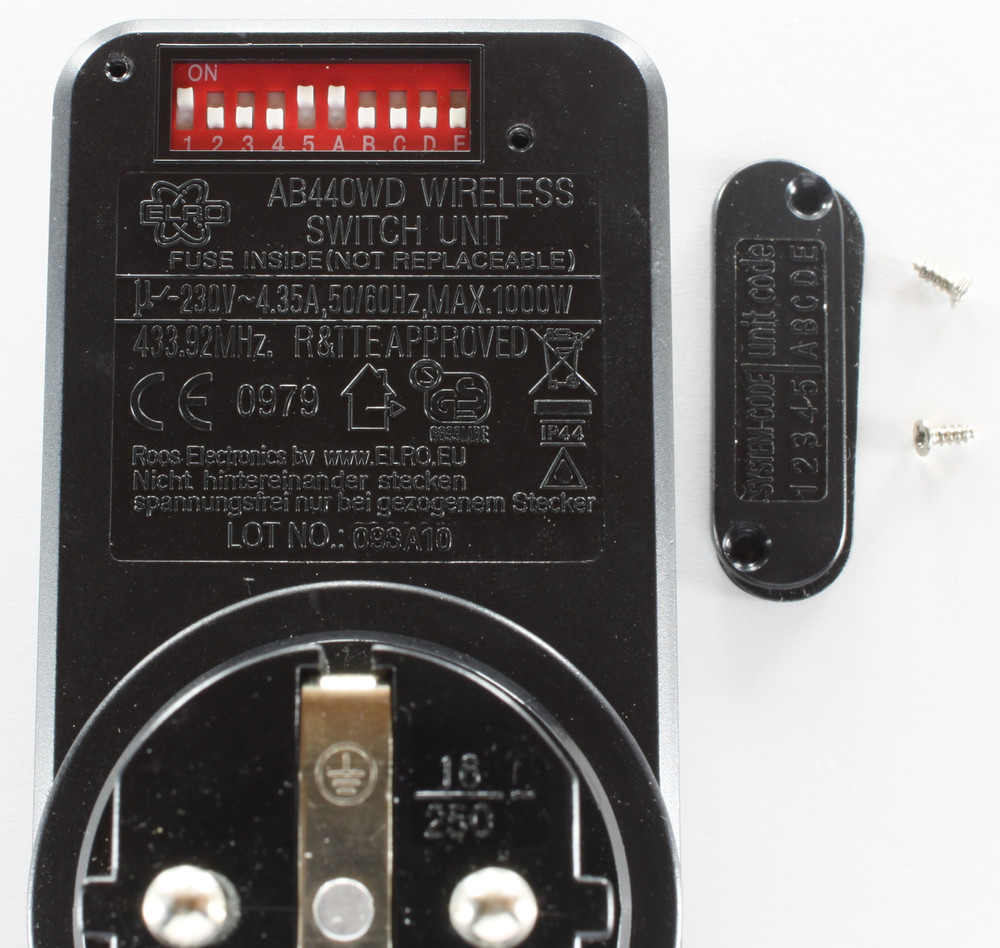
Type A: House Code and Receiver Code
The house and receiver codes are typically configurable with small DIP-switches inside the remote switch or dimmer. Please note that house and receiver code is sometimes labeled differently. In the following example image the removed cover of the DIP switch is labeled with "System Code" and "Unit Code". "System Code" means house code and with "Unit Code" the receiver code is meant.
In the image below DIP-switches 1 and 5 are on for the house code, this equals 10001 in binary (least-significant bit first) or 17 in decimal. For the receiver code only DIP-switch A is on, this equals 10000 in binary (least-significant bit first) or 1 in decimal.
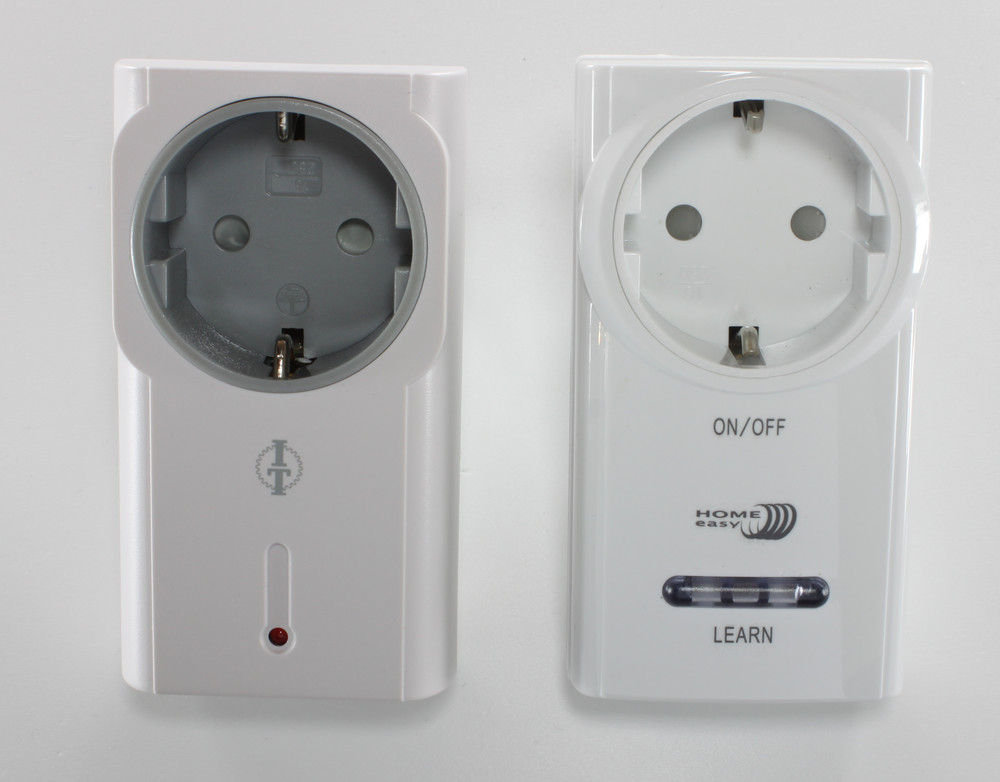
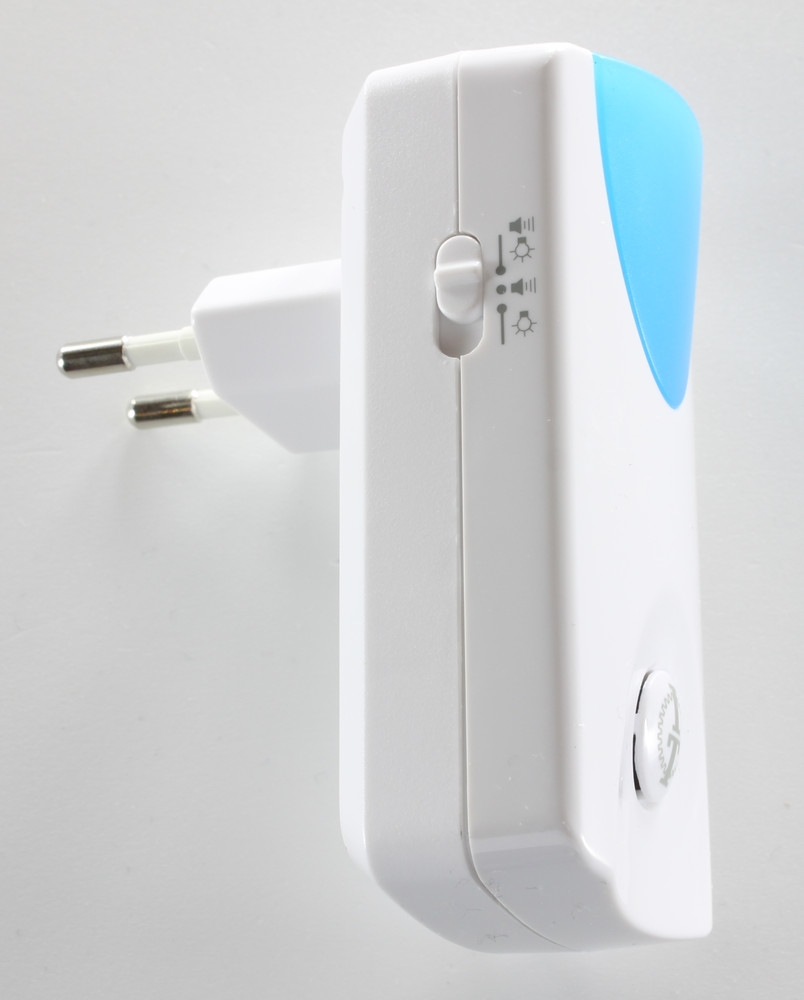
Type B: Address and Unit
Devices of type B do not have switches to configure their address and unit. Instead the remote switch or dimmer has to learn its address and unit. Depending on the specific device at hand it is in learning mode for some seconds after it has been plugged in (left one from Intertechno in the image below) or it has a button that has to be pushed to enter learning mode (right one from ELRO in the image below). While in learning mode you have to send a switch-on command to the device with the address and unit that should be assigned to the device. Maybe it is necessary to send this command several times until the device leaves the learning mode.
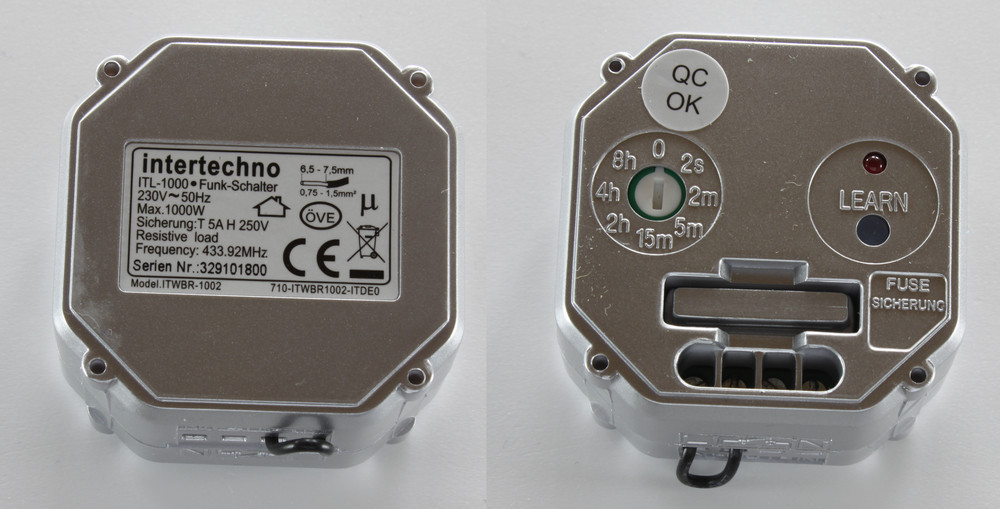
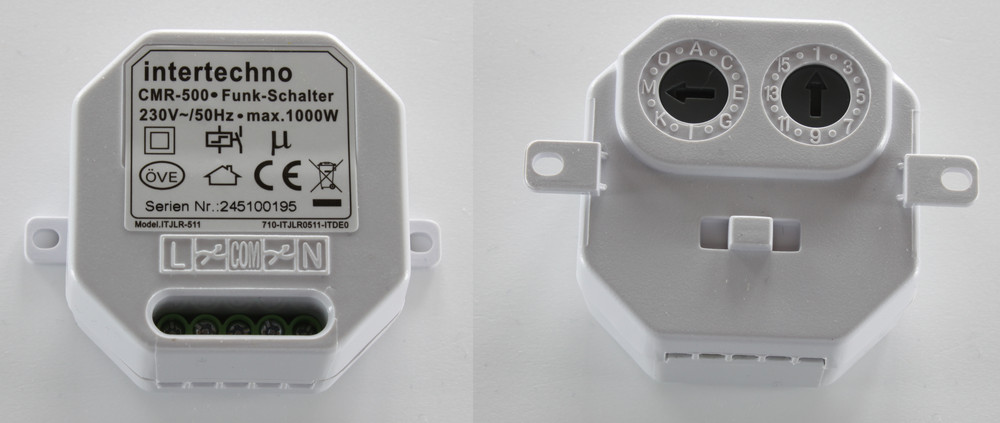
Type C: System Code and Device Code
The system and device code are typically configurable with code wheels on the back of the remote switch or dimmer. Please note that the system code is sometimes called differently. For example, "House Code", "System Character" or "Family Code".
In the image below the left code wheel (A-P) is set to M for the system code and the right code wheel (1-16) is set to 1 for the device code.
Usage as Receiver
Typically remote mains switches come with a remote. The signals of these remotes can be read out with the Remote Switch Bricklet 2.0.
For that the Bricklet has to be configured to receive the signals of the corresponding addressing type. After that the received data can be read out.
Case
A laser-cut case for the Remote Switch Bricklet 2.0 is available.
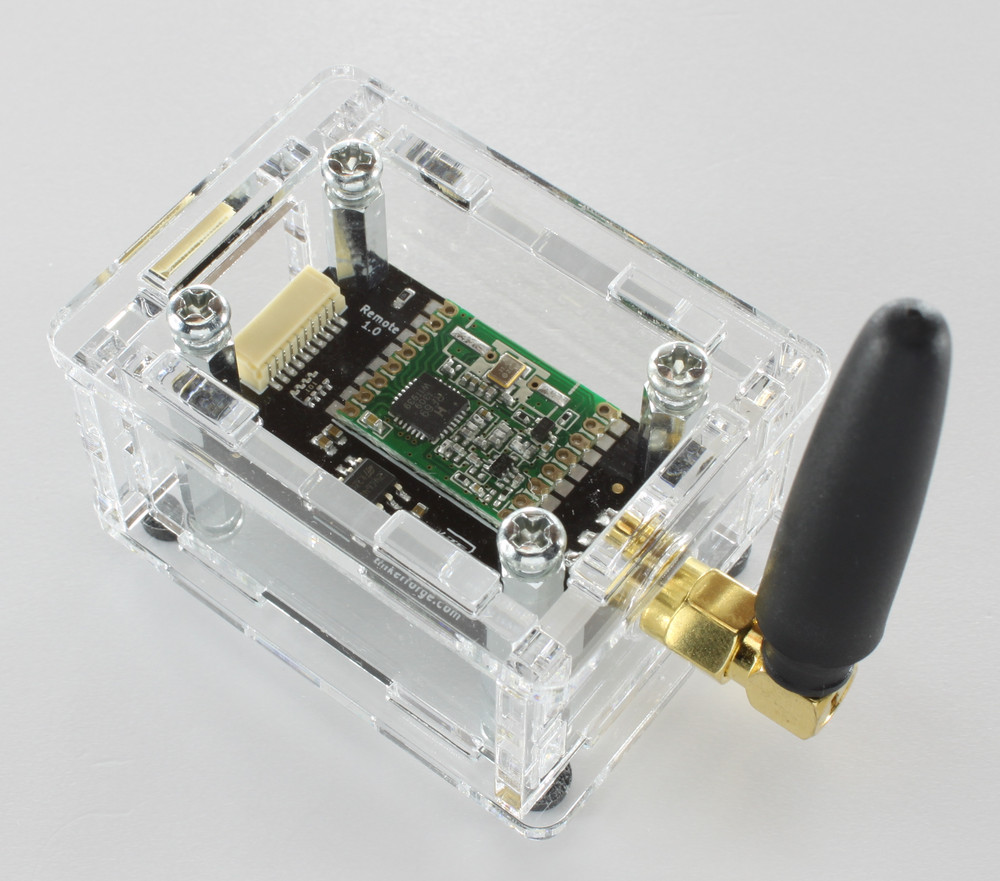
The assembly is easiest if you follow the following steps:
Screw spacers to the Bricklet,
build up side plates and put them around Bricklet (the antenna plate is slightly asymmetric, the wider margin goes to the bottom side, when viewed from the outside),
screw bottom plate to bottom spacers,
screw top plate to top spacers.
Below you can see an exploded assembly drawing of the Temperature IR Bricklet case:
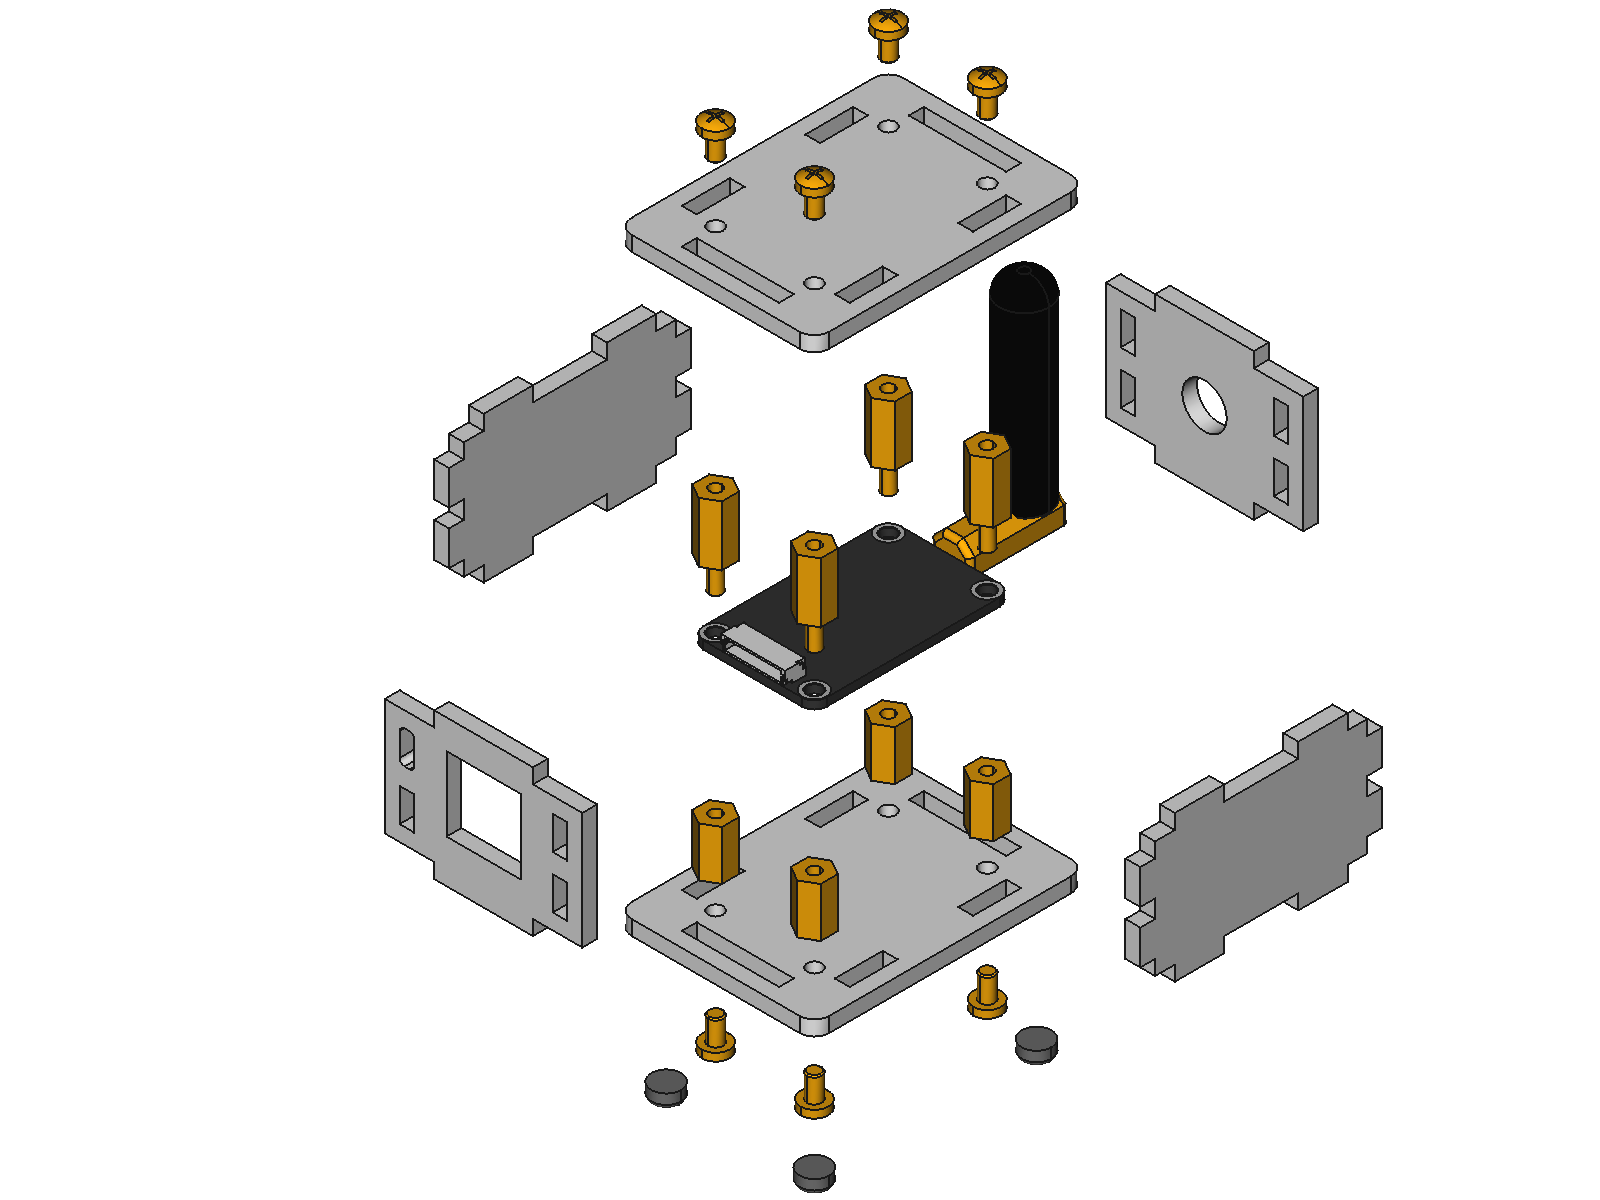
Hint: There is a protective film on both sides of the plates, you have to remove it before assembly.
Programming Interface
See Programming Interface for a detailed description.
Language |
API |
Examples |
Installation |
|---|---|---|---|
C/C++ |
|||
C/C++ for Microcontrollers |
|||
C# |
|||
Delphi/Lazarus |
|||
Go |
|||
Java |
|||
JavaScript |
|||
LabVIEW |
|||
Mathematica |
|||
MATLAB/Octave |
|||
MQTT |
|||
openHAB |
|||
Perl |
|||
PHP |
|||
Python |
|||
Ruby |
|||
Rust |
|||
Shell |
|||
Visual Basic .NET |
|||
TCP/IP |
|||
Modbus |